
DIY Tilda Dog Pattern
Tilda is a rag doll with a smooth silhouette that makes a stylish addition to any home. Whether it's a dog, an angel, or a bunny, Tilda has a rather conventional face with distinctive, close-set, knotted eyes, a small nose, and rosy cheeks. Making one is not only a fun way to pass the time, but also a unique gift for a loved one for any occasion.
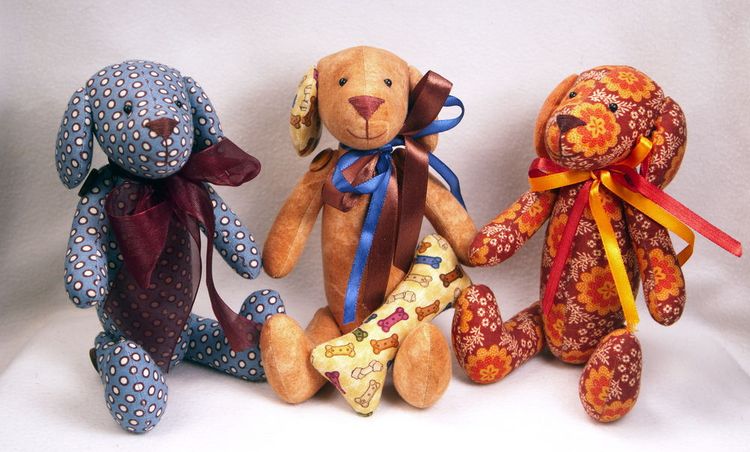
Since the Dog is the symbol of the upcoming 2018, a gift of a cute Tilda-style dog will be especially appropriate for the upcoming New Year. And the best part is that you can make a Tilda dog yourself using the suggested master classes with minimal effort and common materials. You can be sure that this dog will be equally appealing to both children and adults.
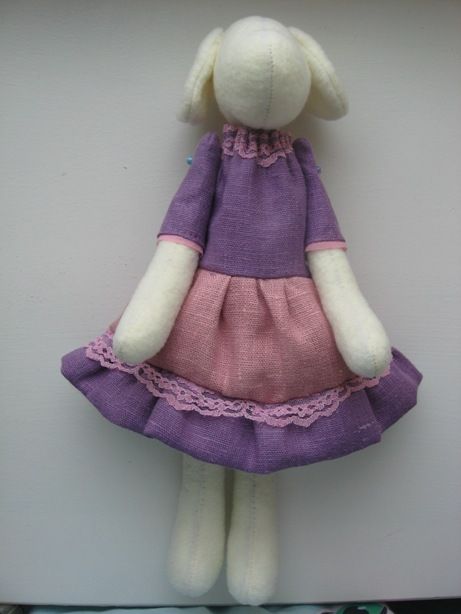
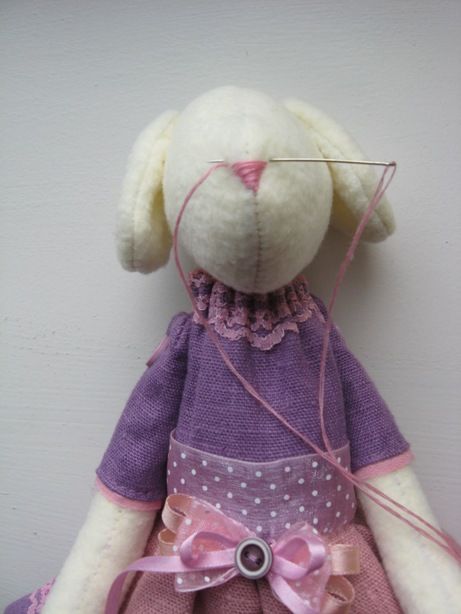
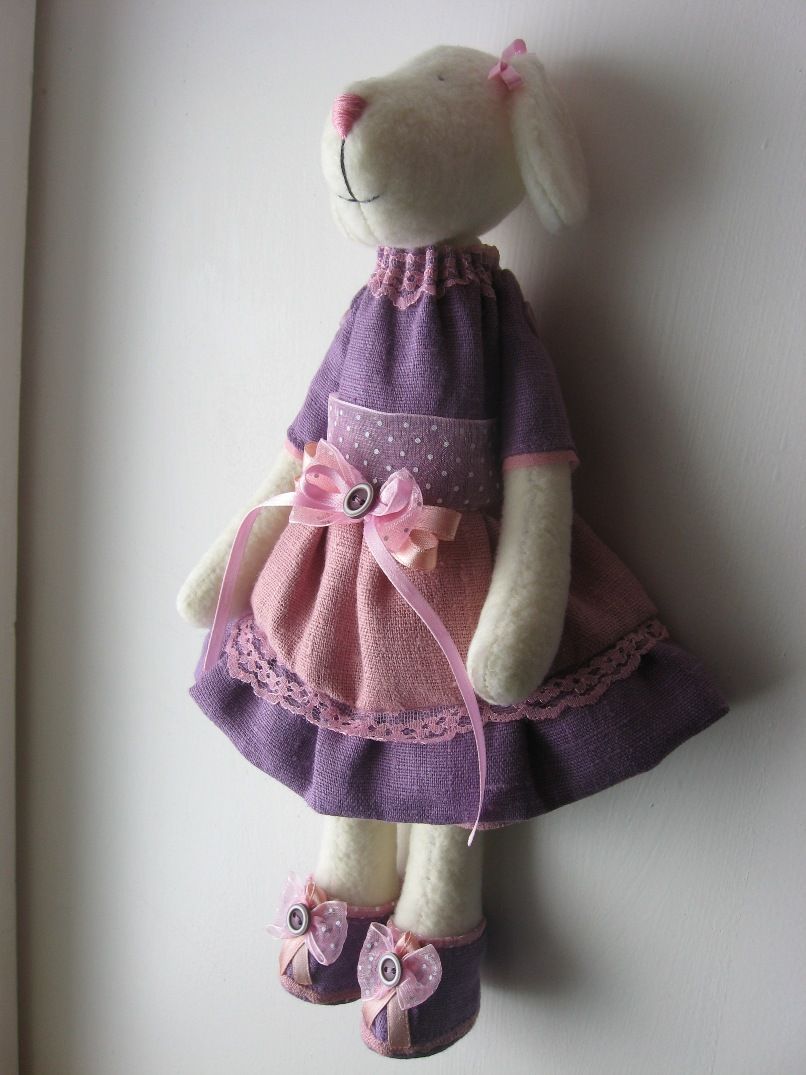
Tilda the dog in a dress
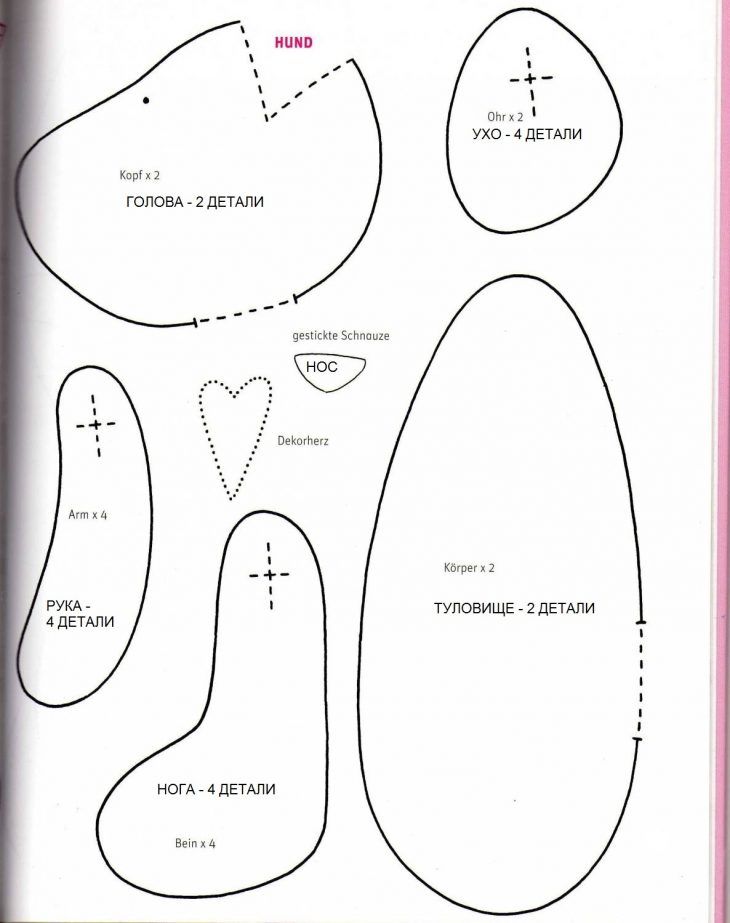
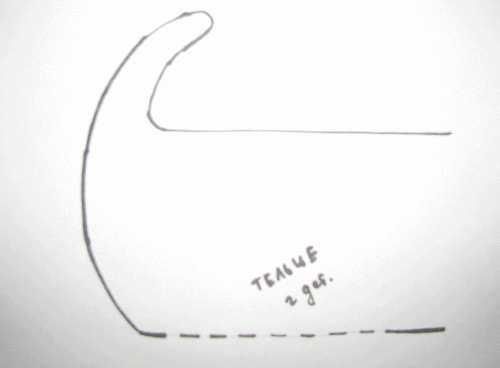
First, you need to make a pattern for Tilda's dog. You can trace it from a photo, draw it by hand, or print the design below on an A4 sheet of paper and then cut out each element with scissors.
Next, to make a Tilda dog with your own hands, you need to prepare:
- 3 pieces of fabric: plain (you can use fleece) – for the body and 2 types of colored (for the dress);
- pencil or chalk;
- scissors;
- tailor's pins;
- embroidery floss for decorating the face;
- needle and thread;
- lace, satin ribbon, buttons (for decoration);
- filler.
Note! It is recommended to use synthetic padding as a filler, as it is considered the most practical and easy-to-work-with material.
Manufacturing process
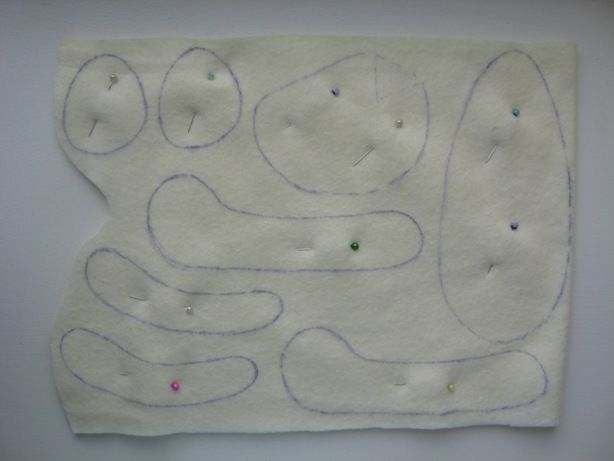
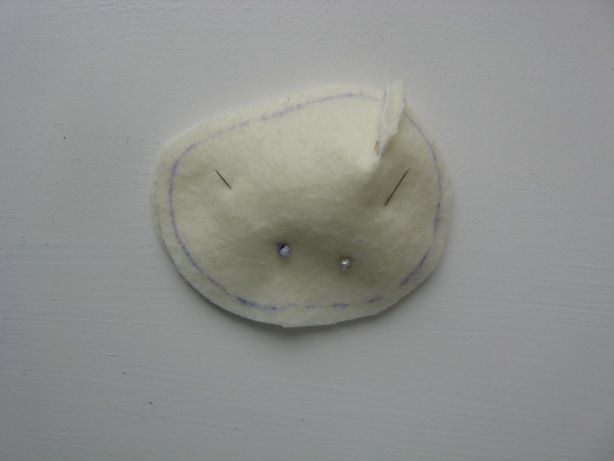
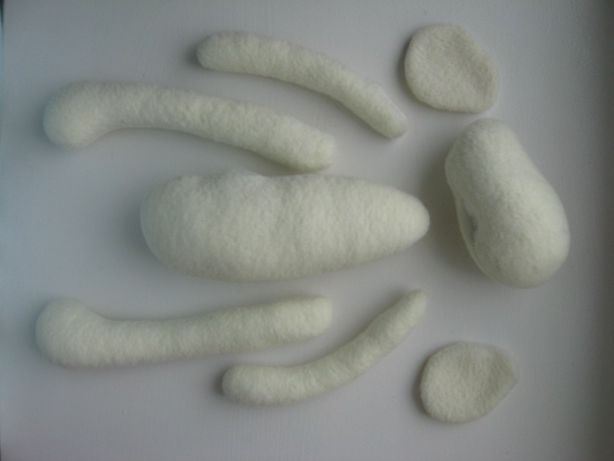
Fold a light-colored, plain fabric in half, pin the paper pattern pieces to it, and trace them. Note: if you need to make two copies of some pieces, trace them twice on the folded fabric. Now set the paper patterns aside and, without unfolding the fabric, pin each traced piece as shown in the photo below.
We cut out a piece for the future head and first stitch the darts, then pin both parts together with the right sides facing each other and stitch around the perimeter.
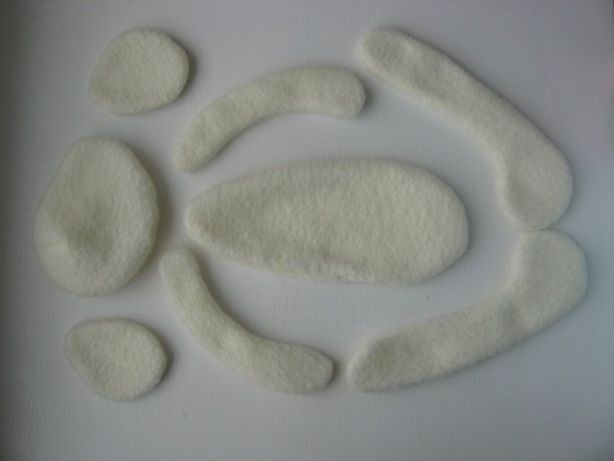
First, stitch the remaining fabric pieces along the marked lines and then cut them out, remembering to leave 5 mm allowances.
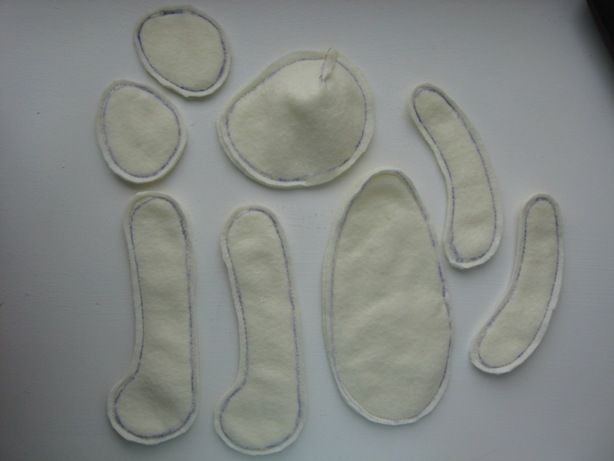
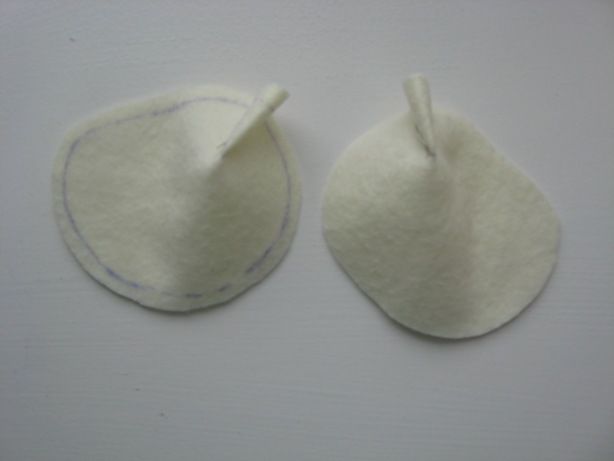
On the parts of the ears and limbs, on the side that will touch the body, we make small cuts and turn the parts inside out through them.
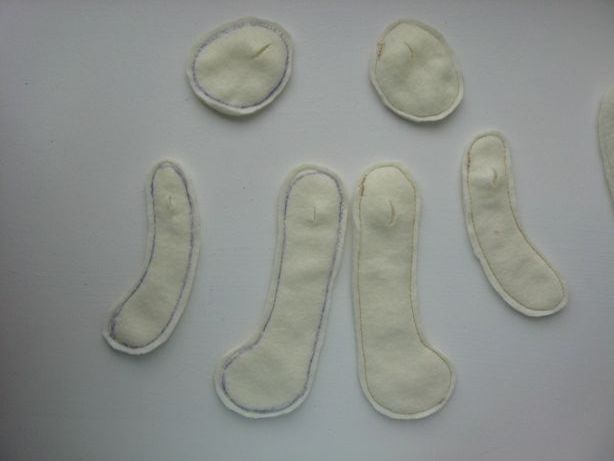
We fill each piece with synthetic padding or other filling, distributing it evenly inside with a pencil, and sew up the holes made by hand.
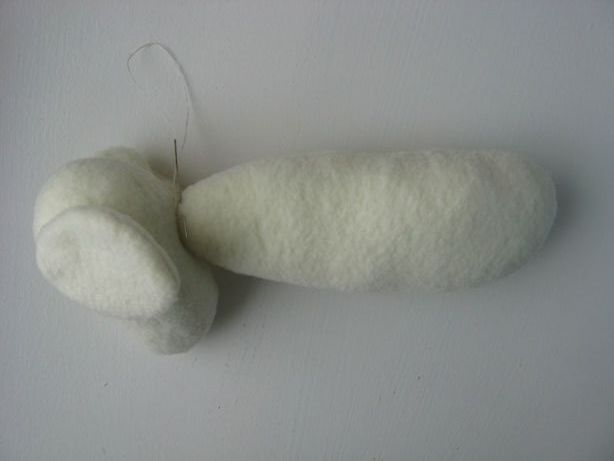
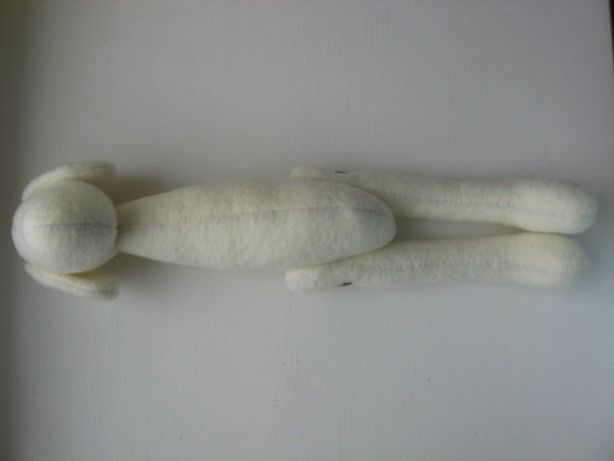
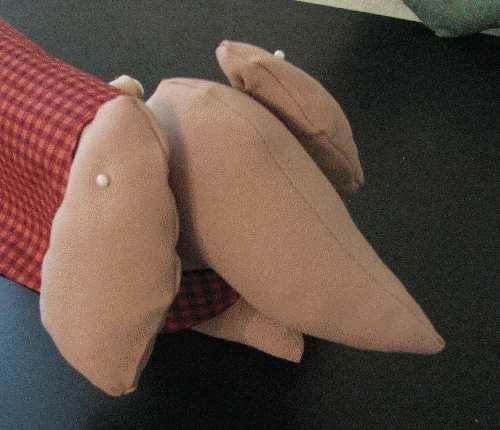
Now we begin to connect all the parts together. First, sew the ears to the head, and then use a blind stitch to sew the head to the body, as shown in the photo.
In the same way, first pin them in place and then sew on the legs. If you don't pull the stitches too tightly, the legs will be easy to raise and lower, or for the future dog to sit on.
You can also sew the limbs on using the button-fastening method. To do this, insert a threaded needle from the wrong side of the leg, leaving a 15 cm (6 in) tail of thread. Sew the leg, pull the thread through the button, and bring the needle out through the other side of the body. Repeat this process several times, keeping the thread taut and wrapping the remaining thread around the seam where the leg is attached (similar to how you form the shank when sewing on buttons). Next, insert the needle into the base of the leg and bring it out at the center seam of the body. Tighten it again, and trim, leaving the tail inside the body.
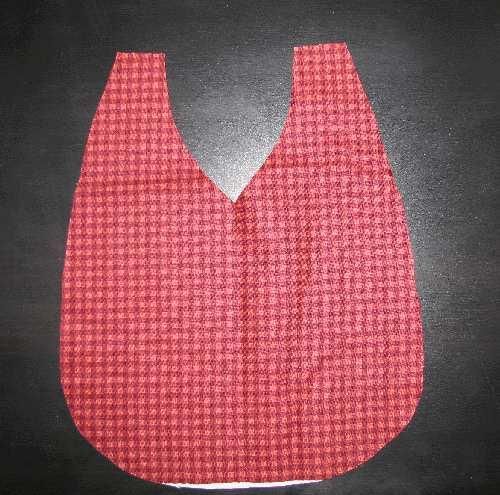
The next step is to begin making the outfit. To do this, take the colored fabric and cut two rectangles: one color to fit the torso, and the other 2-3 times longer (depending on the desired fullness of the skirt). Sew a strip of lace to the top of the fabric on the right side, and gather the bottom portion.
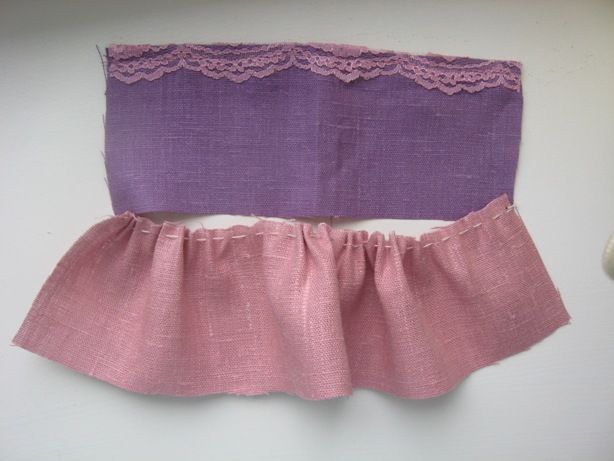
We sew both parts of the future dress together using machine stitching.
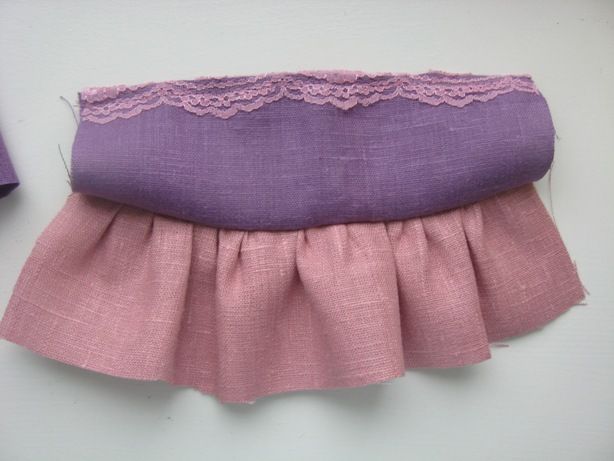
We measure out another piece 2-3 times longer than the bottom edge of the skirt, fold it in half and gather it as well.
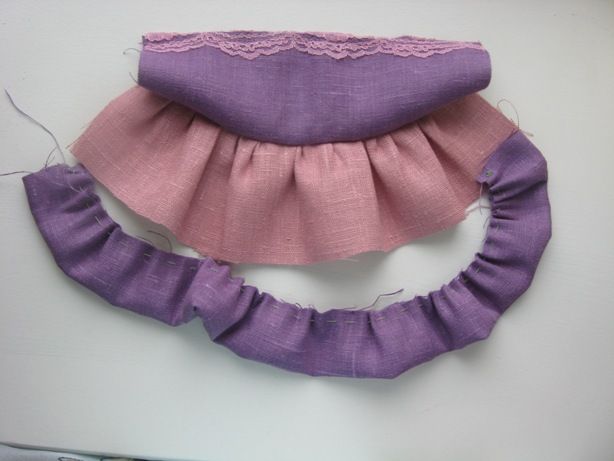
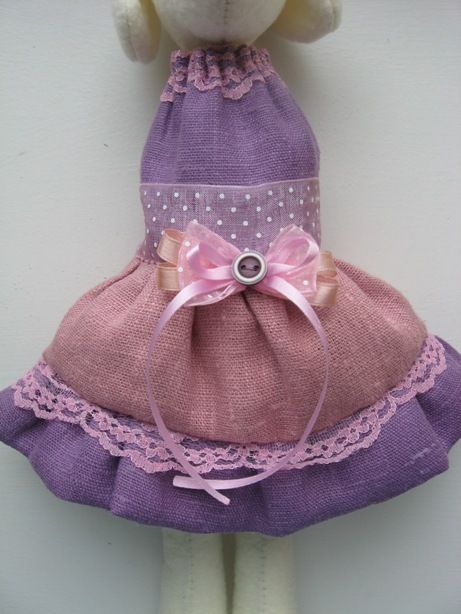
We sew the gathering along the bottom of the skirt, sew the outfit along the back seam and put the finished outfit on the body, gathering it at the top with a thread.

If desired, we can make decorations in the form of an organza belt and a bow from satin ribbon.
Next, we cut and sew the sleeves from the fabric, put them on the handles and, having secured them to the body with pins, sew them on.
All that remains is to embroider the nose and mouth on the face and outline the eyes.
You can also sew cute shoes for the toy or leave it as is. That's it! Your DIY Tilda dog is ready!
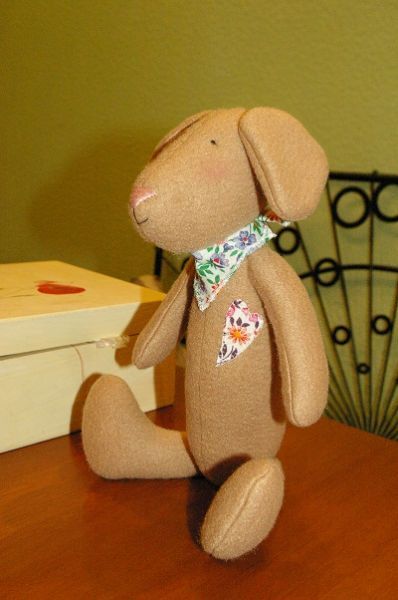
Using this pattern, you can create a variety of Tilda dog designs. Just make some changes to the design, and you'll get a completely different, yet equally adorable, dog. For example, you could use light brown fleece for the body, and decorate it with a heart and a scarf made from floral fabric.
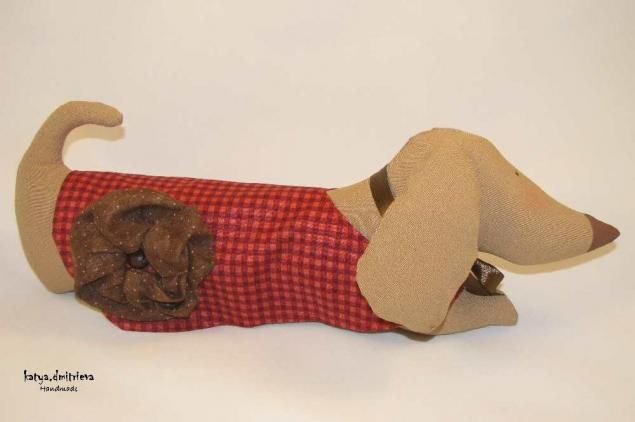
Dachshund in tilde style
To sew such a dachshund you will need:
- A4 sheet of paper (for the pattern);
- 3 types of fabric: a solid color for the body (you can use cotton, calico, gabardine) and 2 pieces of other colors for the cape and for the decorative flower;
- bead, ribbon (for decoration);
- needle and thread;
- filler;
- brush;
- acrylic paints;
- blush and a cotton swab.
So, let's get to work.
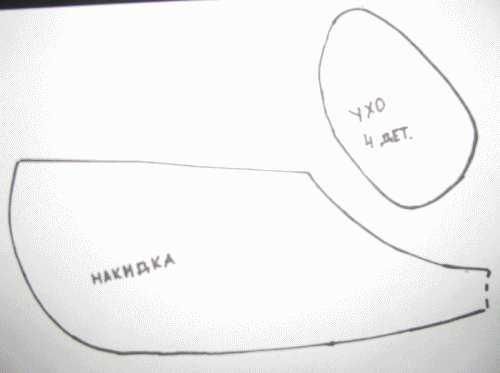
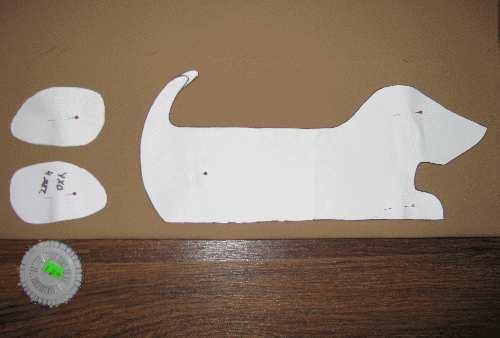
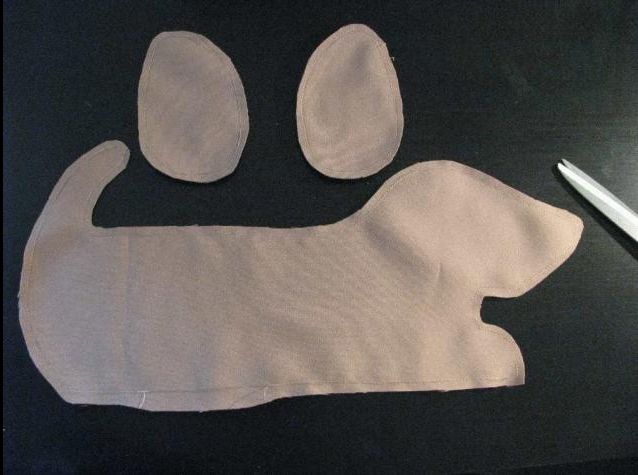
Print out the Tilda dog pattern details below in full size on A4 sheets.
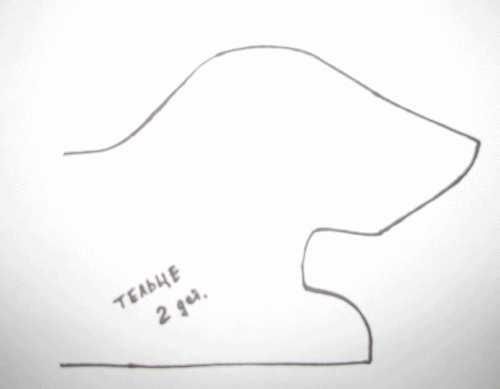
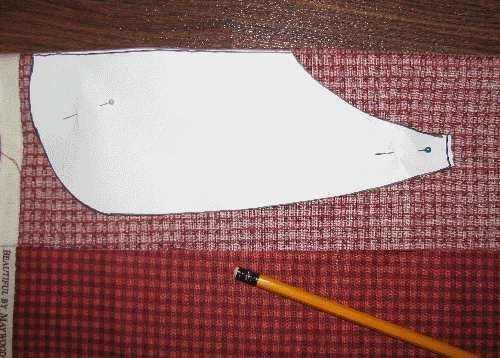
We fold a piece of plain fabric in half and mark out the details of the body and two ears.
We take the material for the future cape, fold it in half and apply the pattern along the fold of the top edge so that in the end we get a single piece, as shown in the photo.
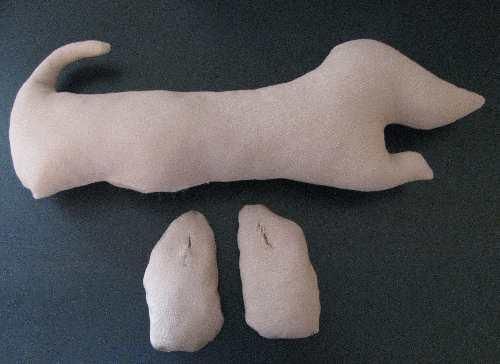
We sew the body and ear parts together, leaving a small area unsewn for subsequent stuffing of the toy.
We begin stuffing the dog's body tightly with synthetic padding. To stuff the ears, make small slits on the inside and insert a small amount of padding. After stuffing, sew up any remaining openings with a blind stitch.
We hem the edges of the cape along the entire perimeter (for convenience, you can iron them first), join the upper parts with a seam and put it on the still earless dog.
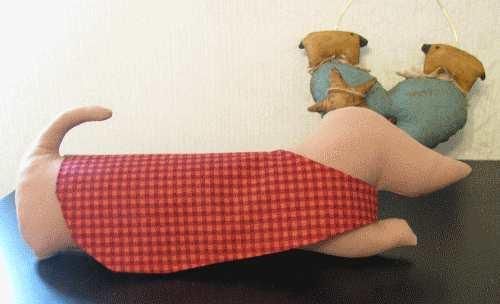
We pin the ears to the sides of the head and then stitch them with a blind stitch on the inside. Be sure to check their symmetry.
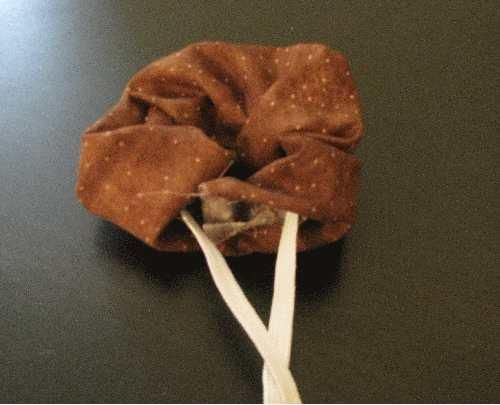
For the floral embellishment, cut out a 10x20cm rectangle, fold it in half with the right sides facing in, and sew. Turn the resulting piece inside out, insert the ribbon or cord, and tighten to form a flower, then sew the edges together. If desired, decorate the center with a large bead and sew the flower to the cape.
Now let's draw the dog's face: using acrylic paint, outline the nose and eyes. To make the nose smooth, you can apply a strip of paper to each side as a stencil. Use powder or blush to create a light flush. The end result is a beautiful Tilda dog, like the one in this photo:
Helpful tips
To enjoy not only the work but also the final result, we recommend using the following tips when making your own Tilda dog:
- Choose natural-colored fabrics for the body (milky, terracotta, sand, beige). If you don't have a suitable color, you can tint white fabric to the desired hue using coffee or tea. If desired, you can add cinnamon or vanilla for a pleasant aroma.
- Use high-quality stuffing (hollow fiber or synthetic padding) and don't skimp on the amount. If you don't use enough stuffing, Tilda will quickly lose her striking appearance.
- To stuff long limbs and distribute the filling evenly, it is convenient to use a plastic tube or sushi stick.
- When making clothes and accessories, use your imagination: use any materials, embroidery, applicationsAs accessories, you can put a bone, a bouquet of flowers, or any other object in the paws.
Read also:
- DIY Dog Head Mask
- Modular origami dog: diagram, step-by-step instructions
- DIY Dog Panties for Dogs in Heat


Add a comment