
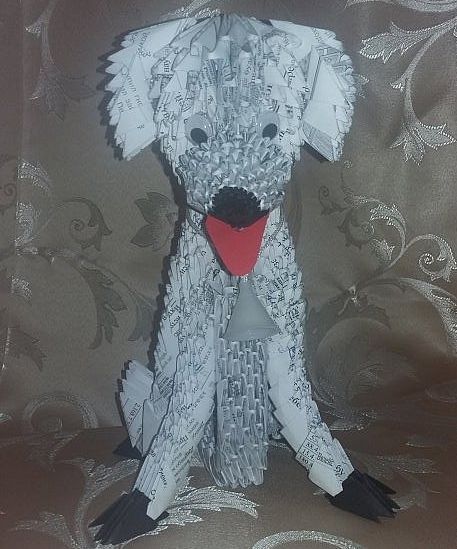
Modular origami dog: diagram, step-by-step instructions
The best way to win the trust of the symbol of the coming year is to decorate your home with one of the decorative elements featuring their image. Dog figurines and unique candy bowls with their image can be made out of paper using modular origami. It's not difficult to master. To make things easier, we present three step-by-step modular origami master classes featuring dogs.
Content
Option 1: Artemon on high paws
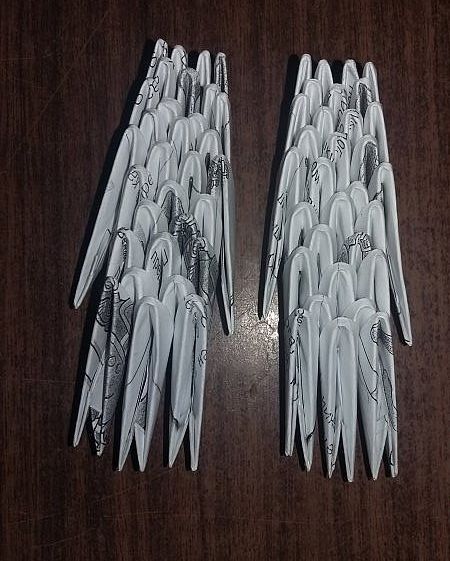
We'll be using printer paper with pre-printed symbols. This will make the figurine more expressive. You'll need 1,075 printer paper and 25 black 1/16-size modules to complete the craft.
You will also need the following materials:
- ribbon collar;
- double-sided red and black paper for eyes and tongue;
- PVA and hot glue to secure vulnerable areas of the craft.
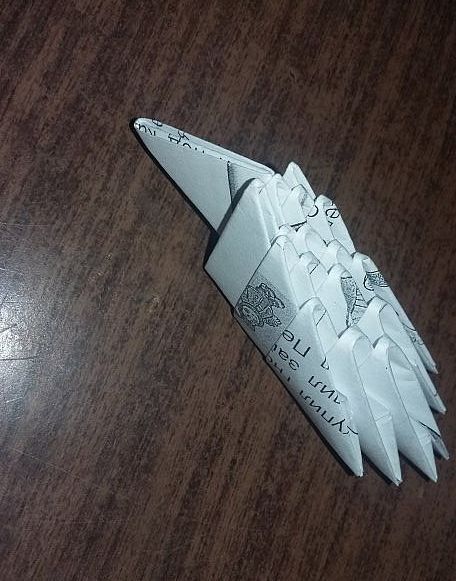
When assembling the figure, we'll place the modules with the long side facing out and the short side facing out. For ease of understanding, these points are denoted by the abbreviations DSN and KSN.
We begin making the toy by assembling the body:
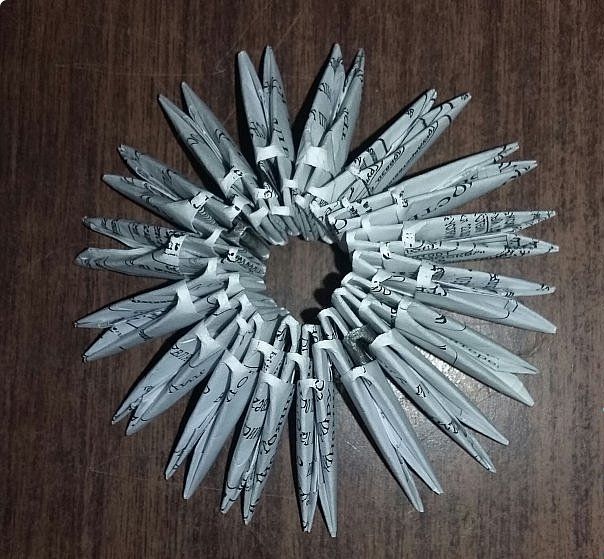
- We assemble three rows, each containing 17 DSN modules. We close the circle by inserting the last element into the pocket of the first.
- Add 3 DSN elements in random order. As a result, the 3rd row should increase to 20 elements.
- We assemble 4-5 rows, using 20 DSN modules for each.
- We increase by 6 rows up to 21 elements.
- In 7-8 rows we maintain the specified quantity.
- We increase the 9th row to 24 elements.
- In 10-11 p. we maintain the quantity.
- Starting from row 12, to define the chest area, we distribute the number of DSN blanks: 4 for the chest, 14 for the back, and 3 for each leg. To widen the back area, add one more element to the row.
- We collect 13-14 rows in the back area, maintaining the number.
- To expand it, we increase the 15 row part to 16 DSN elements.

- In the 16th-17th row we maintain the specified quantity.
- We expand the back areas, increasing the part of row 18 to 17 DSN elements.
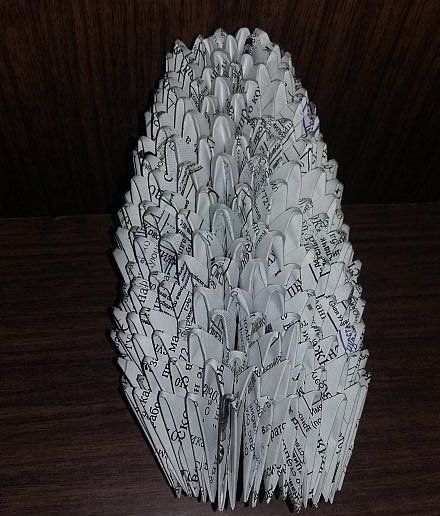
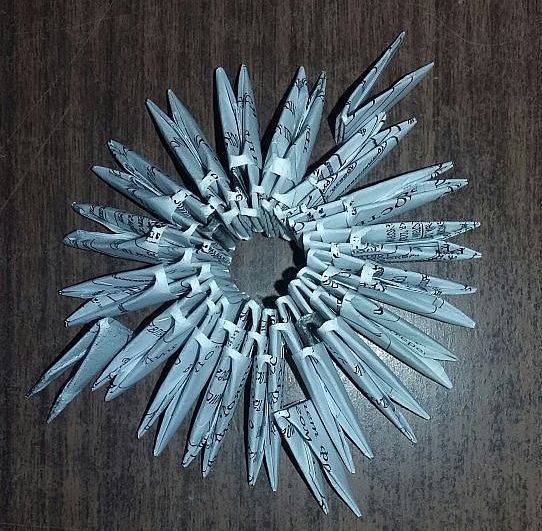
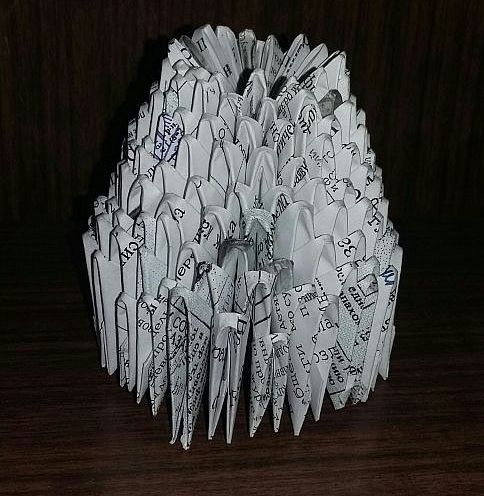
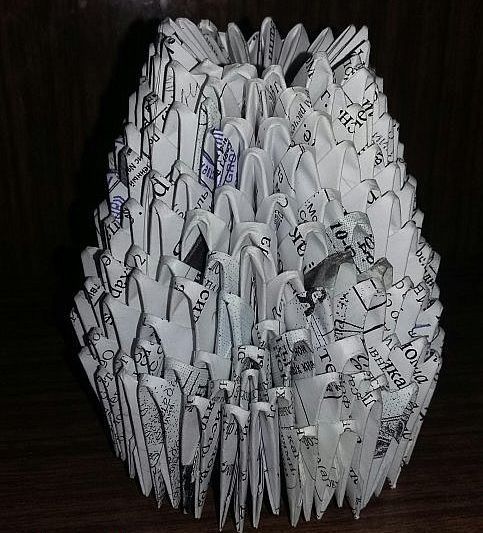
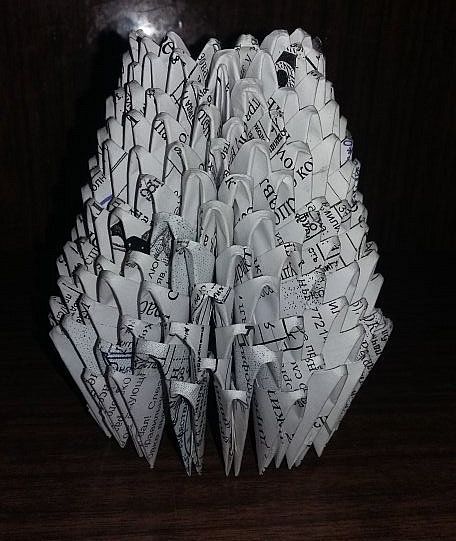
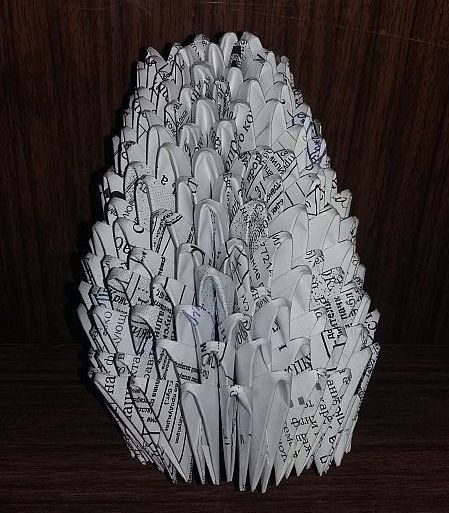
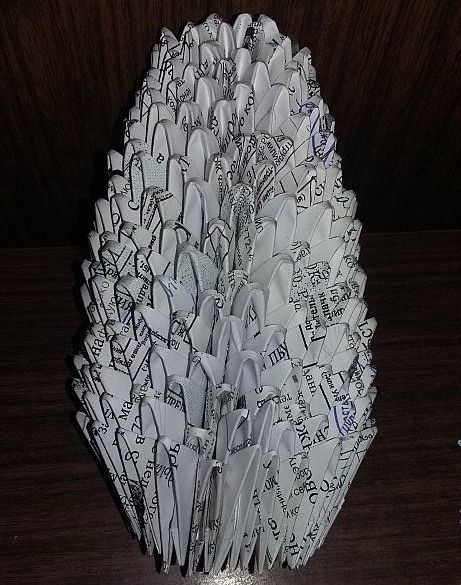
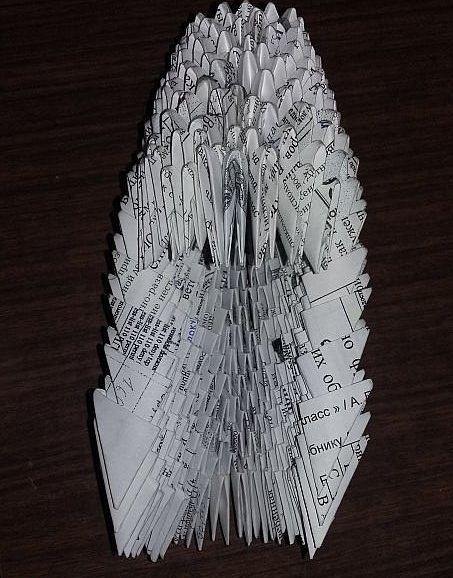
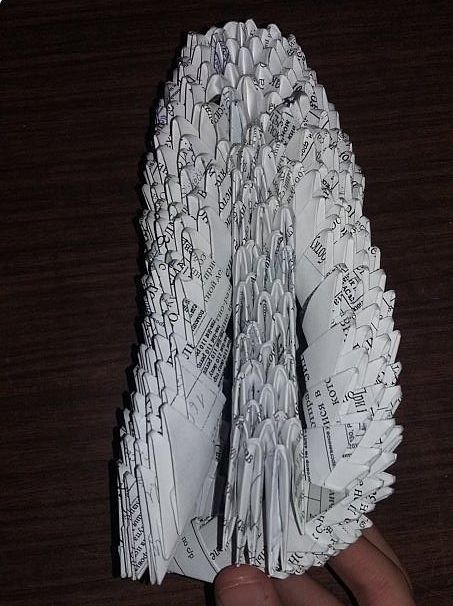
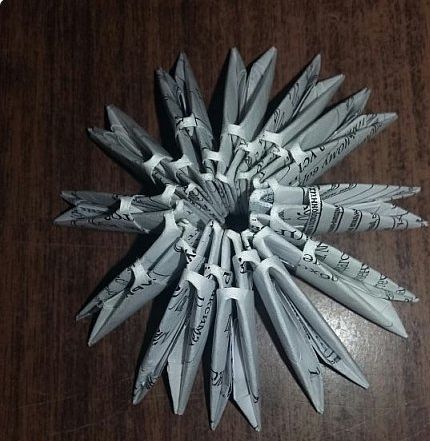
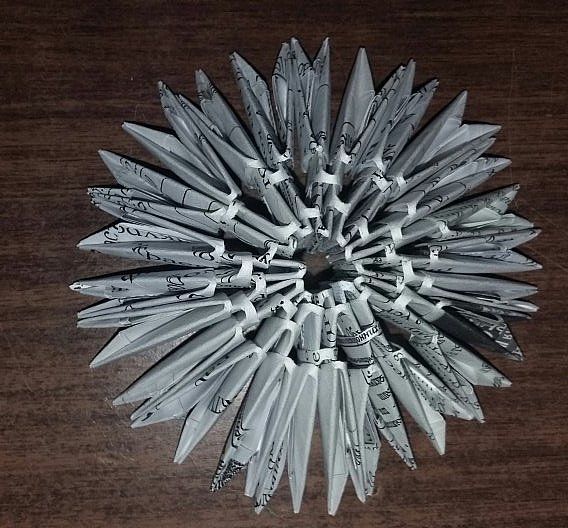
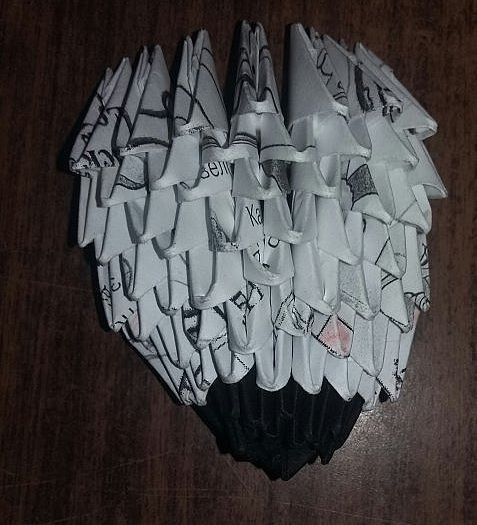
- In rows 19-21, we maintain the same quantity. During assembly, the figurine should look like this:
Separately assemble the chest area from the DSN pieces. When assembling 23 rows, alternate the number of pieces 4/3/4/3/4…
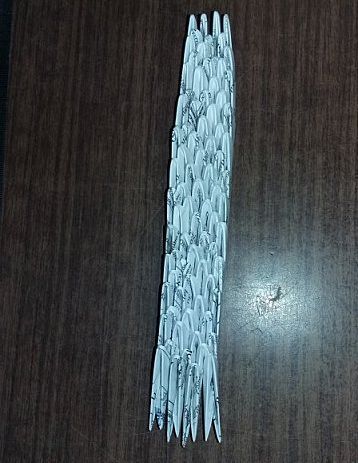
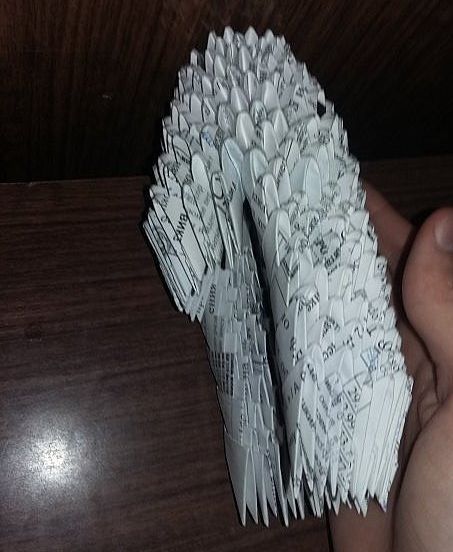
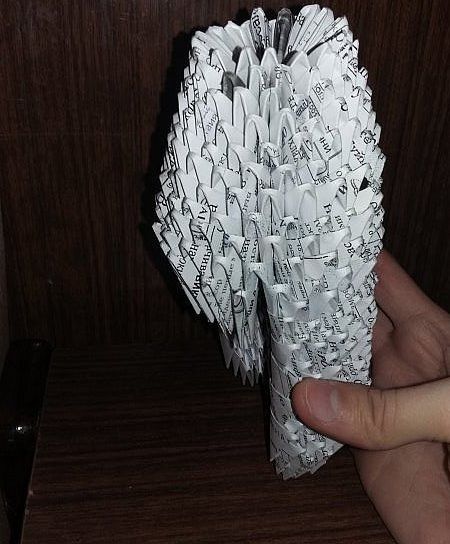
We attach the chest piece to the torso. To achieve the desired angle and create the effect of a protruding tummy, we slightly shift the pieces.
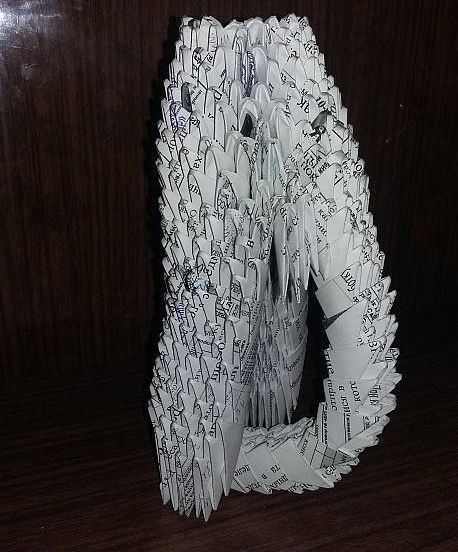
Assembling Artemon's paws:
- We put 3 DSN elements on the outer row.
- We collect the next 15 rows, alternating the number of DSN fragments 3/2/3/2/3…
- We assemble the second paw using the same principle.
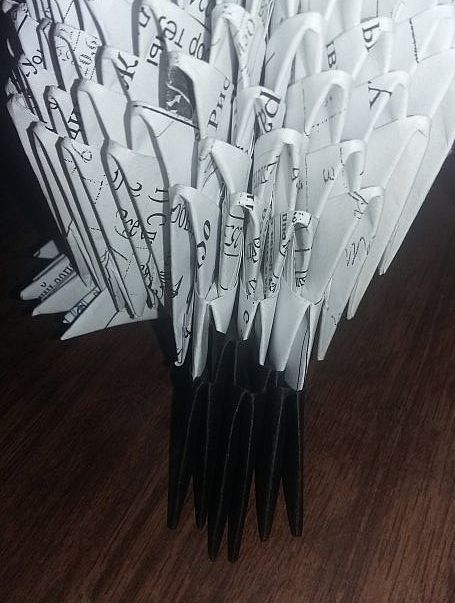
- To highlight the feet and toes of the front paws, we finish them with 2 rows of KCH fragments.
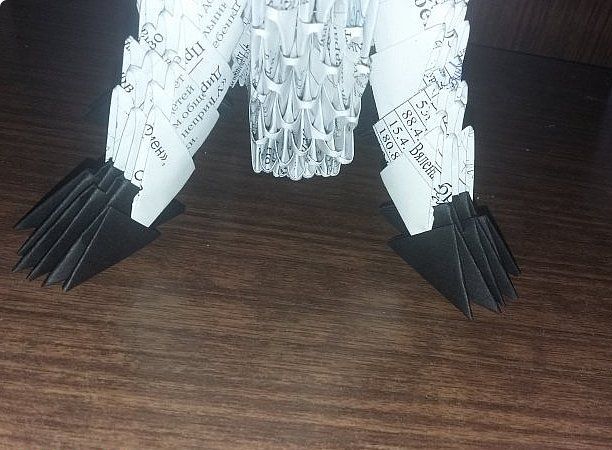
- To highlight the back leg, we collect 3 rows of KCH, using the 3/2/3 alternation.
We make the second hind leg using the same technology.
We begin assembling the back thigh with 2 DSN modules. From rows 2 to 5, we increase the area by alternating 3/4/5/4.
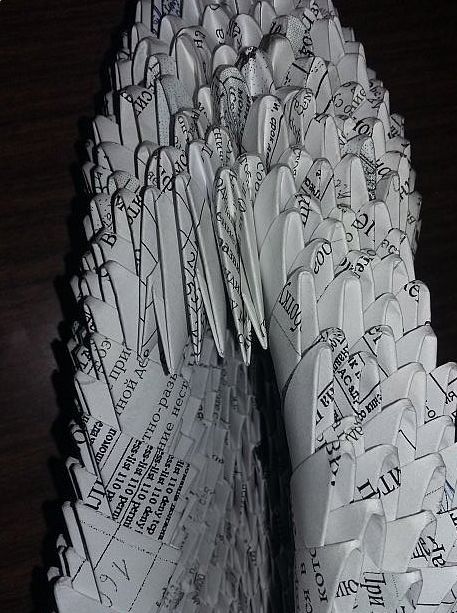
Making the head:
- We assemble 3 rows, each containing 10 DSN modules. We close the circle by inserting the last element into the pocket of the first.
- We double the number of pieces in row 4. To do this, we place pockets from individual modules on each corner of the element from the previous row.
- In rows 5-6 we use 24 fragments of DSN.
 Starting from row 7, we form the dog's head. To do this, we highlight the eye area by attaching two DSN fragments. We attach two more EL KSN to them. The remaining fragments are in the DSN row.
- Row 8 consists of DSN. However, we define the placement areas of the KSN by one such element.
- In rows 9-10, we place 2 KSN elements above the DSN fragments.
- In rows 11-12 we round the head, reducing the number of fragments to 16 units.
- To close the hole, bring the ends of the triangles closer to the center.
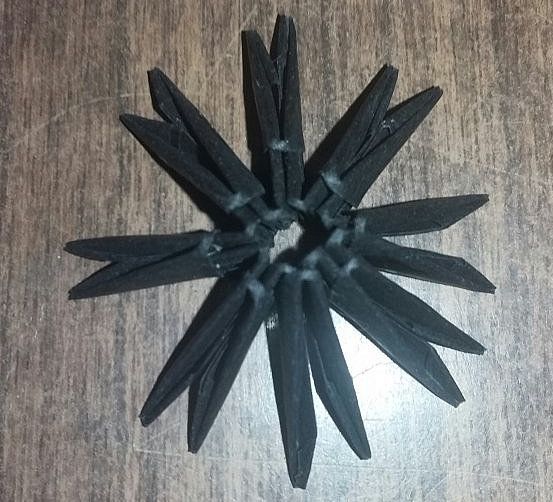
To form the spout, assemble rows 1-2 of 8 black DSN elements each. Rows 3-10 use printer blanks, 7 pieces each.
From row 11, we expand the area, increasing the number of fragments to 14. We additionally place 2 fragments on the corners of row 10.
The muzzle is ready.
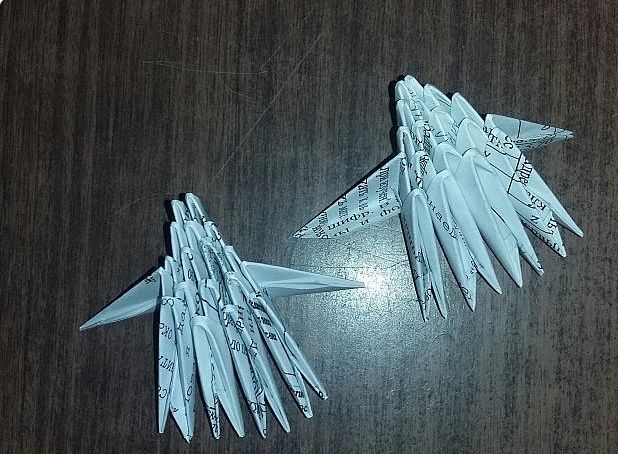
We assemble the ears by alternating 4/3/4/3/4 stitches from rows 1 to 6. From row 7, we narrow the piece to 2 strands, and by row 9, we close it completely. We make the second ear using the same principle.
The tail is made by alternating from rows 1 to 7 of the DSN fragments 3/2/3/2... The workpiece is completed with 1 KSN fragment.
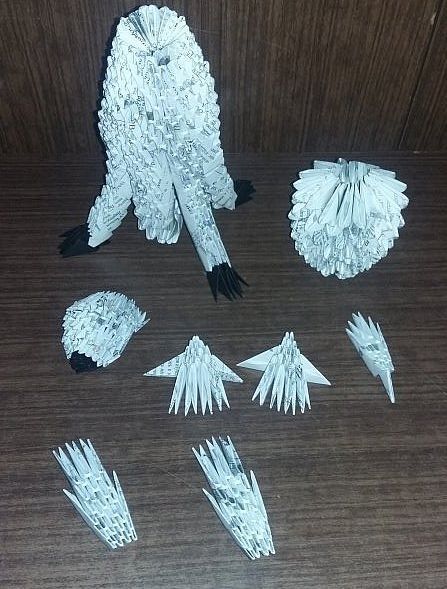
All that remains is to assemble the finished parts, securing any weak or vulnerable areas with hot glue and PVA. Finally, cut out and glue the eyes and tongue. Frame the neck with satin ribbon.
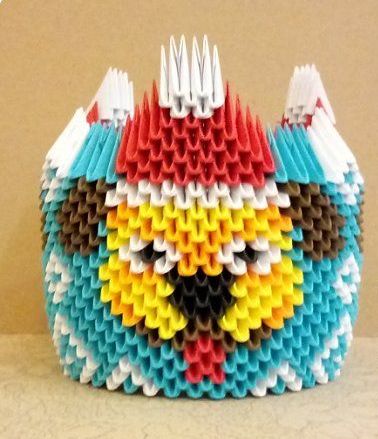
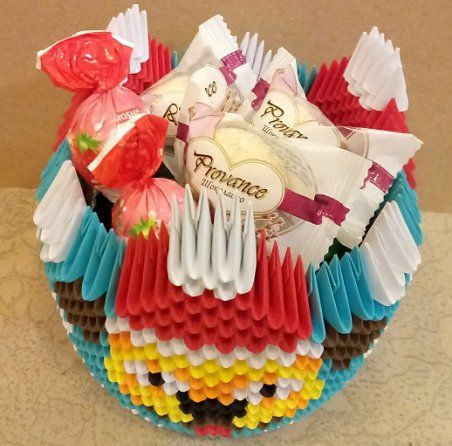
Option 2: New Year's vase with a dog
Want to make something simpler but no less original? Create a candy bowl decorated with three animal faces. The height of the piece is 14 cm, and the diameter is 11.5 cm.
To assemble it you will need 1/32 colored modules:
- white (B) – 267 pcs.;
- blue (G) – 363 pcs.;
- brown (K) – 129 pcs.;
- yellow (Y) – 126 pcs.;
- red (Red) – 111 pcs.;
- orange (O) – 63 pcs.;
- black (B) – 36 pcs.
The candy bowl assembly process is quite simple. Just follow the instructions carefully, which are clearly illustrated with step-by-step photos.
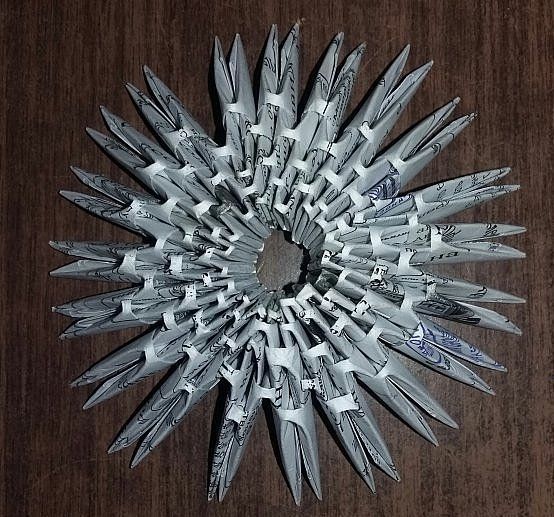
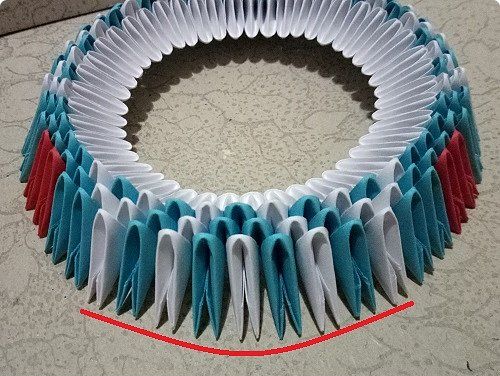
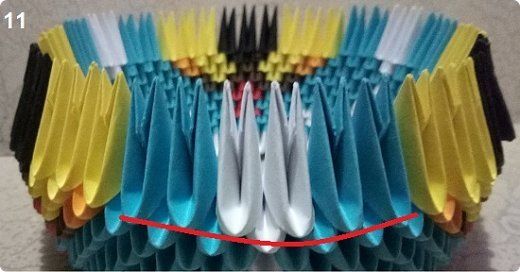
Assembling the first rows is the most crucial step. In row 1, we place the KSN fragments, starting with row 2, we place the DSN fragments. To simplify the task, we assemble the pieces in sectors. The first row of each sector consists of 15 KSN fragments, the second of 14, and the third of 13 DSN fragments.
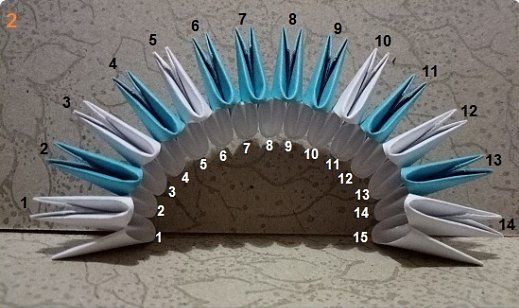
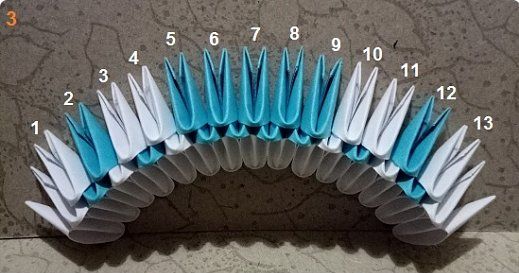
We connect the sectors by securing the ends of each row with blue fragments. The resulting closed ring should contain 45 elements.
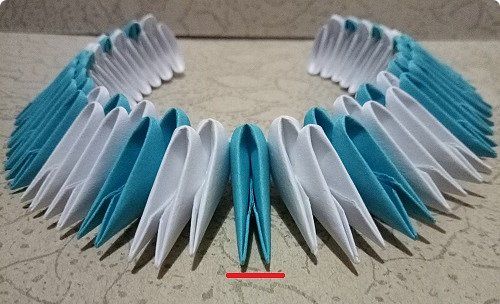
Let's start forming three identical images:
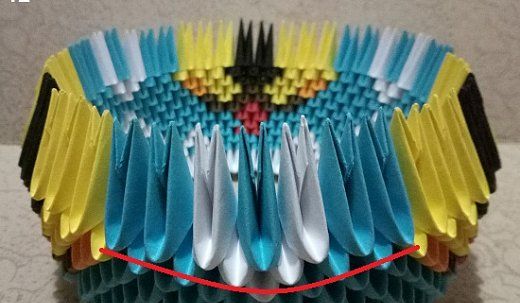
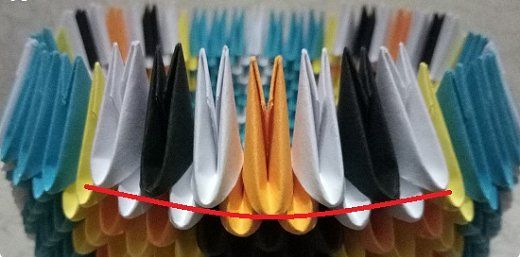
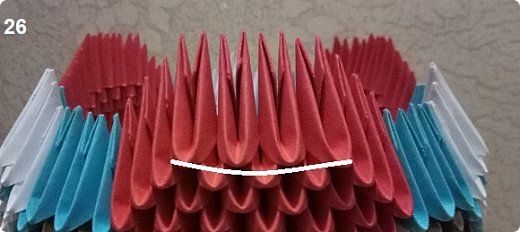
- We collect 4 rows, inserting 2 red modules between the blue ones.
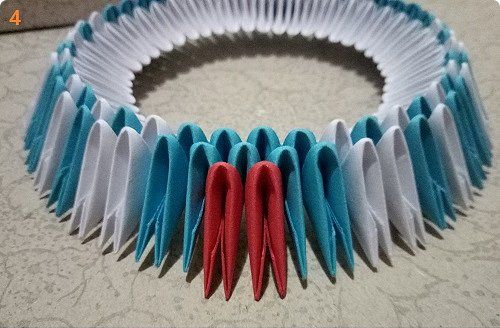
- We form 5 rows according to the pattern: 5 C/1 K/5 C/1 B/2 C/1 B… The row should be closed at the end of the 3rd repeat of the pattern.
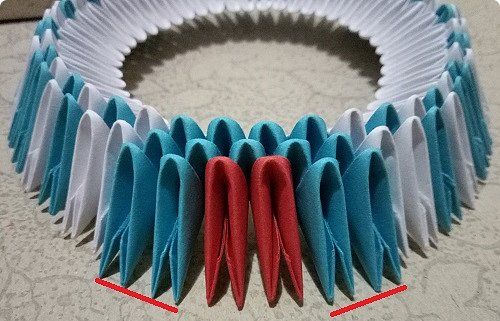
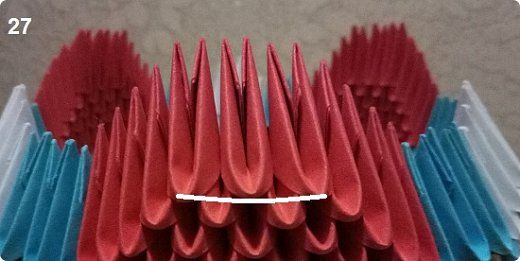
- In the 6th row, the number of reds increases to two. From each of them, 5 C/1 B/1 C moves out to the sides.
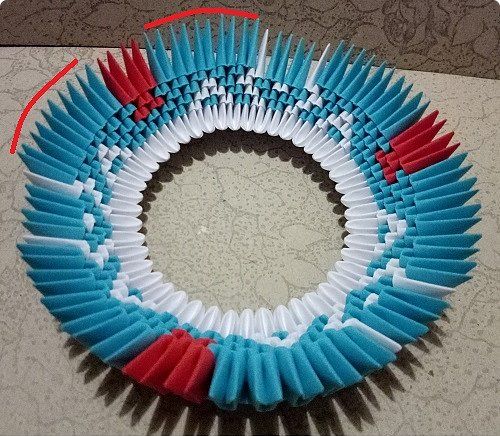
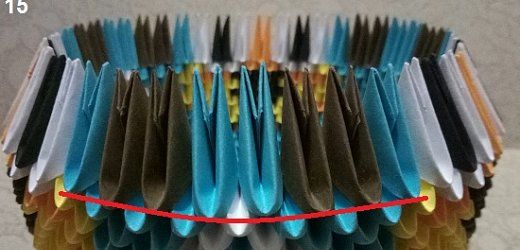
- In the 7th row, the number of reds decreases again. Each of them moves 2 K/4 S/2 B to the sides.
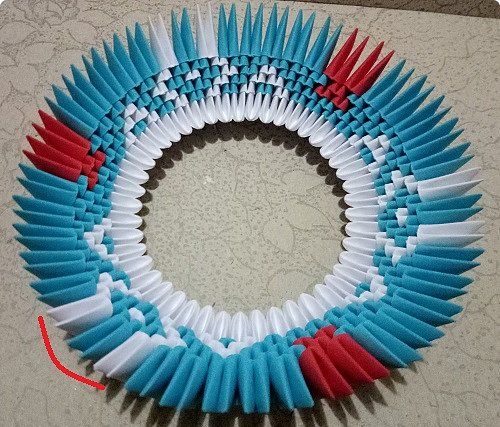
- In row 8, 2 brown fragments are placed on the corners of the red ones, and then according to the pattern in both directions: 1 F/1 K/4 S/1 B.
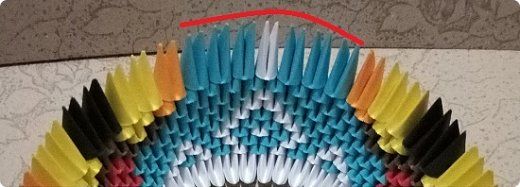
- In row 9, the pattern goes from brown to both sides: 2 F/1 O/8 S.

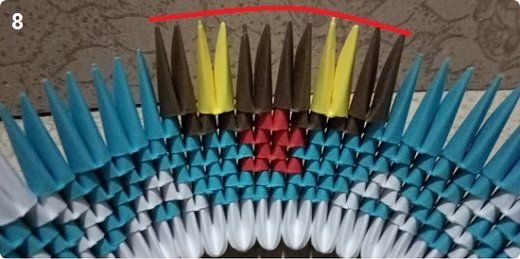
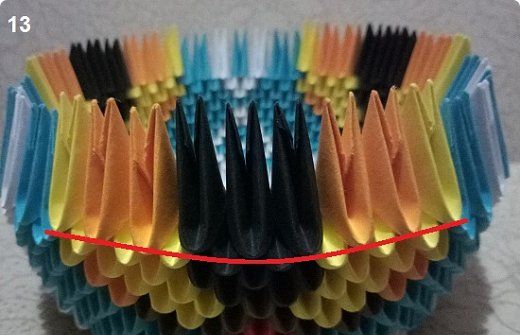
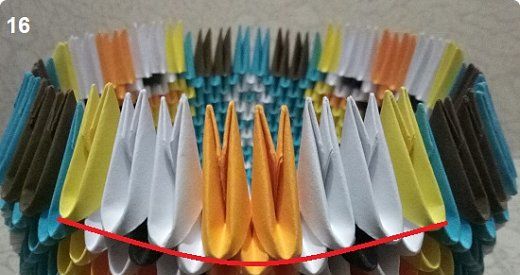
- Row 10. Starting point of the pattern – 2 black fragments. In both directions 2 Y / 1 O / 2 S / 1 B.
- Row 11. Starting point: 3 black fragments. 3 Y/2 S/2 B on each side.
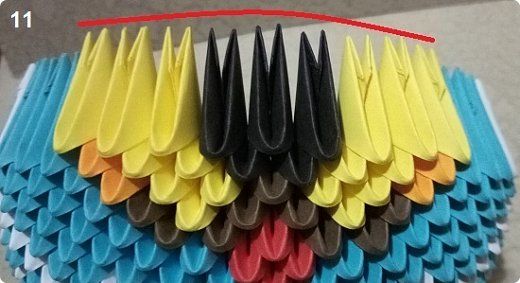
- 12 p. From 2 black elements in both directions 4 F/2 S/1 B/1 S.
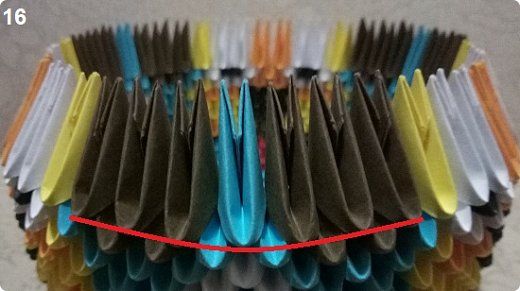
- 13 p. From 3 black elements in both directions 2 O/1 F/2 S/2 B.
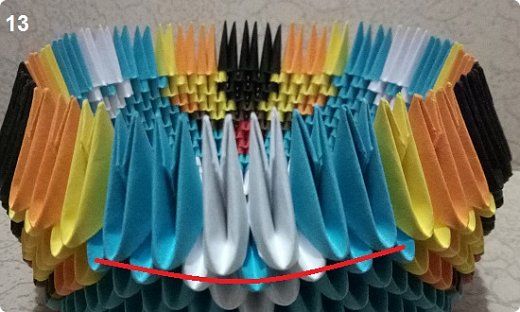
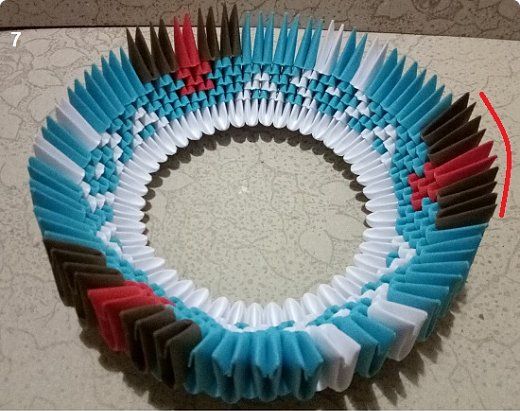
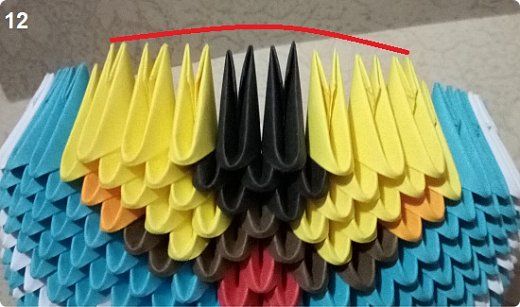
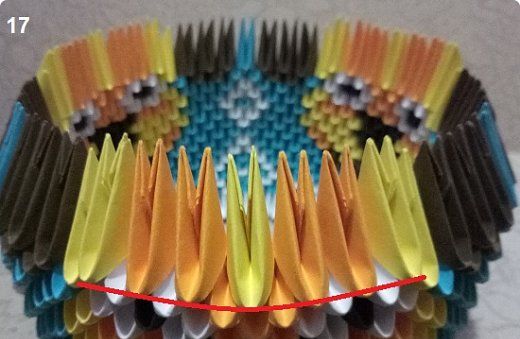
- Row 14. Place 2 orange stitches on top of the black ones. Continue according to the pattern in both directions: 2 B/2 F/3 S/1 B.
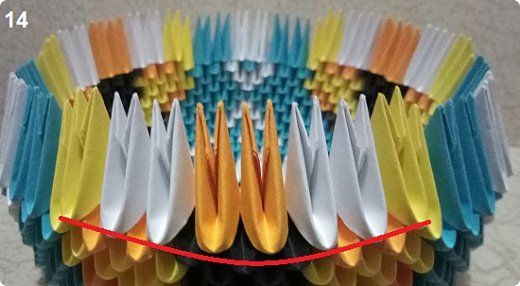

- 15 rows. Starting point: 1 orange fragment. In both directions: 1 B/1 Ch/1 B/1 S/2 K/2 S.
- 16 p. From 2 orange elements in both directions 2 B/1 F/3 K/1 S.
- Row 17. Place 1 yellow stitch on top of the orange stitches. Continue according to the pattern in both directions: 2 O/1 Y/1 S/2 K/2 S.

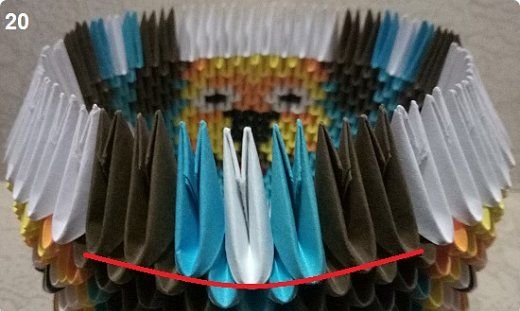
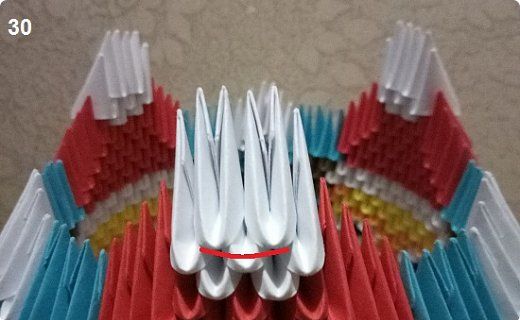
- Row 18: Expand yellow to 6 stitches. In both directions: 1 O/3 K/1 S.
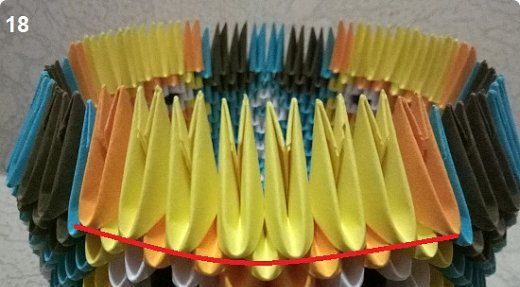
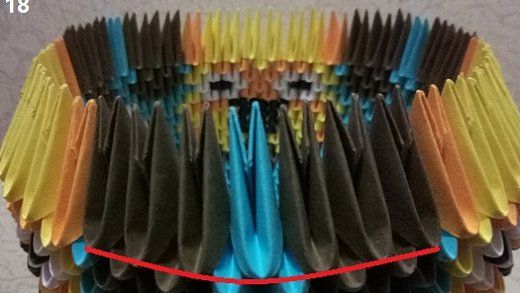
- Row 19: Narrow the yellow to 5 elements. In both directions: 1O/3 K/2 S.
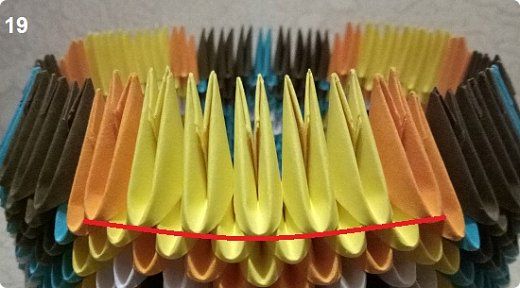

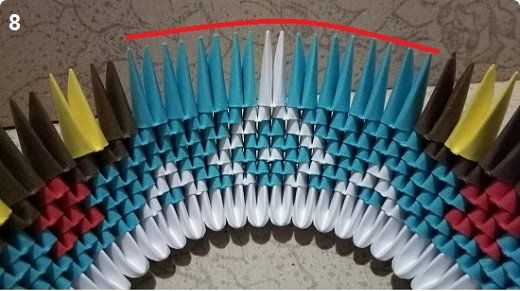
- Row 20. Instead of yellow, use 8 white pieces. Continue as follows: 2 K/1 S/1 B.
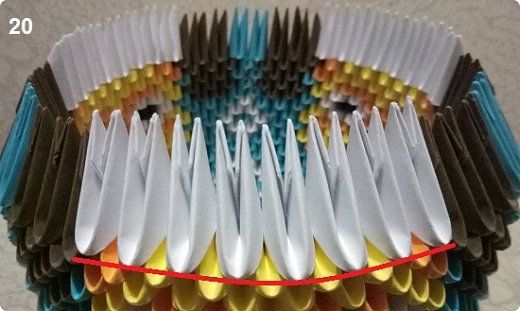
- 21 row. Narrow the number of yellow ones to 7. Move in both directions according to the pattern: 2 K/1 S/2 B.

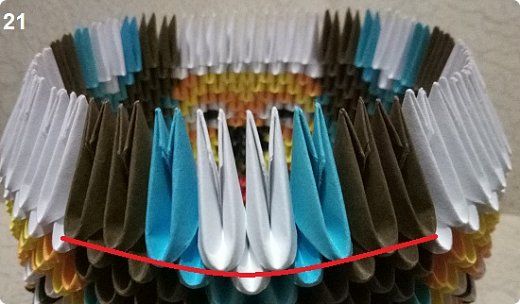
- 22 rows. Instead of white elements, 6 red ones. Then according to the pattern: 3 C/1 B/1 C.
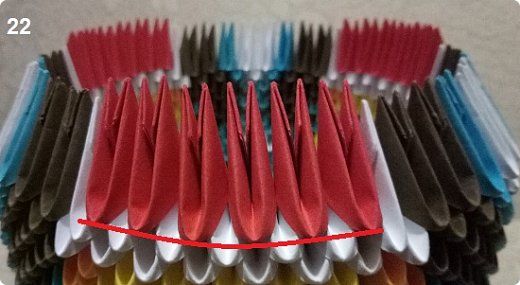

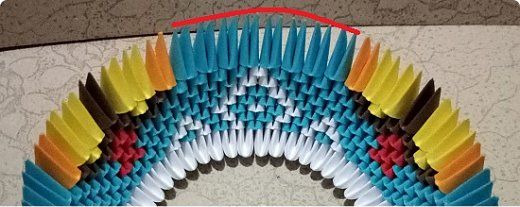
To give the candy bowl a raised edge, we add parts of the design with red elements in 4 rows, each time reducing the number of fragments 6/5/4/3
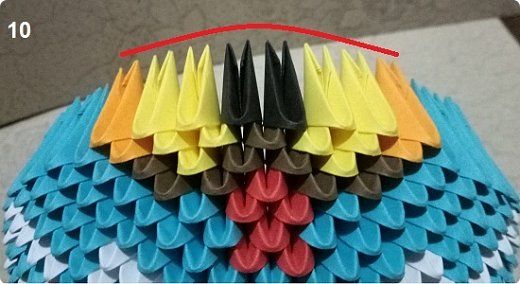
To decorate the dogs' hats with pompoms, the elevations are completed with 3 rows of white modules, assembling them according to the 2/4/2 pattern.
The candy bowl is ready. All that's left to do is fill it with treats and use it to set the table.
Option 3: Adorable Puppy
And finally, we offer another easy-to-make version of the symbol of the coming year – a cute puppy.
The process of its production is described in detail in the video:
Read also:


Add a comment