
Master class on making a scratching post
When your pet starts to damage furniture and wallpaper by scratching, a scratching post made according to this tutorial will be your best friend. If you get the hang of it, the task will be quite simple, especially considering how much benefit you'll get out of it.
Since this habit is ingrained in the animal's nature, it's best not to scold your pet for its misbehavior. With a homemade scratching post, your cat can sharpen its claws in peace, and your owner will forget about the hassle of a scratched sofa.
Content
- 1 What types of cat scratching posts are there?
- 2 Step-by-step instructions for making a cardboard scratching post
- 3 A scratching post with a bed for your beloved pet
- 4 Twine Scratching Post: Step-by-Step Guide
- 5 Making a flat or corner scratching post for a cat
- 6 Tips for making a scratching post at home
What types of cat scratching posts are there?
You can find the perfect scratching post for any apartment, based on its size and design concept. Our master class suggests making one of the following cat scratching post options:
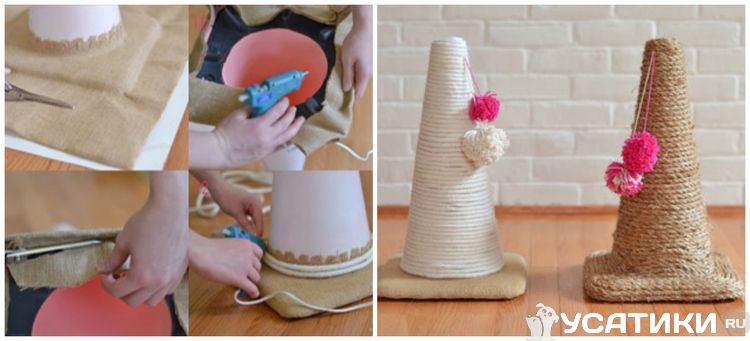
- a scratching post in the shape of a cone, wrapped with ordinary rope, which is glued to the base
- a rectangular item covered with natural fabric to make it comfortable for a cat to sharpen its claws on
- compact scratching posts with fleecy fabric, placed on the wall

- houses, which combine both a place for the cat to sleep and vertical columns for sharpening claws
- a scratching post that resembles an ordinary board that is tightly wrapped with rope
- a corner structure that is positioned at an angle for the pet's comfort

Any option can be adapted to your apartment and made comfortable for your cat, and if necessary, the structure can be installed precisely in those places where your pet likes to sharpen its claws.
Our scratching post tutorial is very simple. If you can't find the materials to make one, you can find suitable items around the house to construct one using the diagram. These could include:
- any remaining coverings (fabric, carpet, etc.) that will be comfortable for the cat;
- small but stable plastic pipes;
- remnants of furniture that has already outlived its usefulness.
It's important to consider the fact that the materials used for making the shawl should be chosen so as not to leave behind debris when sharpening the claws. You can use a ready-made form or cardboard as a base, but it's best to wrap it with fabric or rope.
Step-by-step instructions for making a cardboard scratching post
One of the simplest and most accessible materials for The scratching post is made of cardboard, as it can be found in almost every home. This product will serve your pet for quite a long time, so making it will be not only easy but also practical. To make it, you'll need:
- pencil;
- ruler;
- ordinary cardboard;
- a sharp stationery knife;
- fabric or rope for decoration.
You don't need any special skills to make this scratching post using our instructions. Follow the steps below and build it yourself, without any hassle or expense:
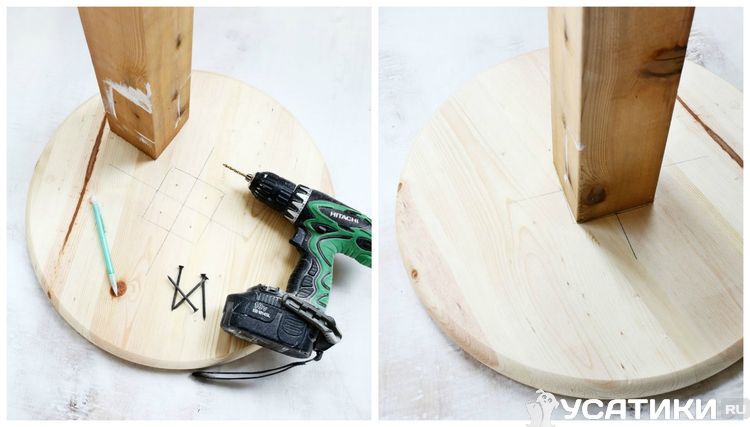
- Drill a hole in the center of the board.
- Attach the cardboard to a wooden dowel, which also has a hole drilled in it, right in the middle.
- Screw the screw into the base, holding it with a screwdriver, and screw the dowel onto it.
- Then, for several levels of the scratching post, you need to prepare templates and cut them out.
- Use these templates to cut out the required pieces from cardboard and cut them out with a sharp knife.
- Assemble all cut out pieces onto the dowel.
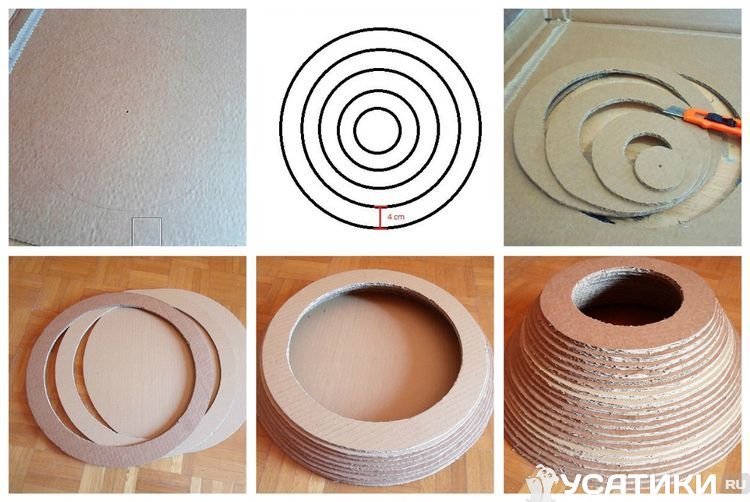
It only takes a little time, and a scratching post for a cat made from improvised materials is ready for use.
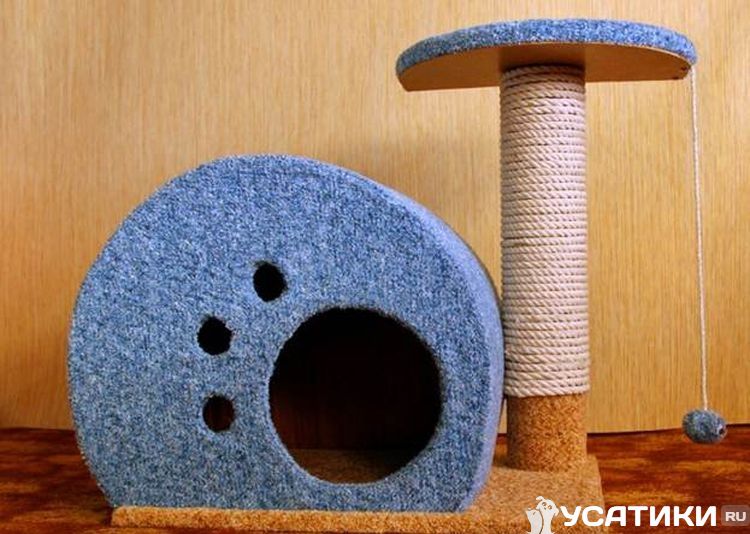
A scratching post with a bed for your beloved pet
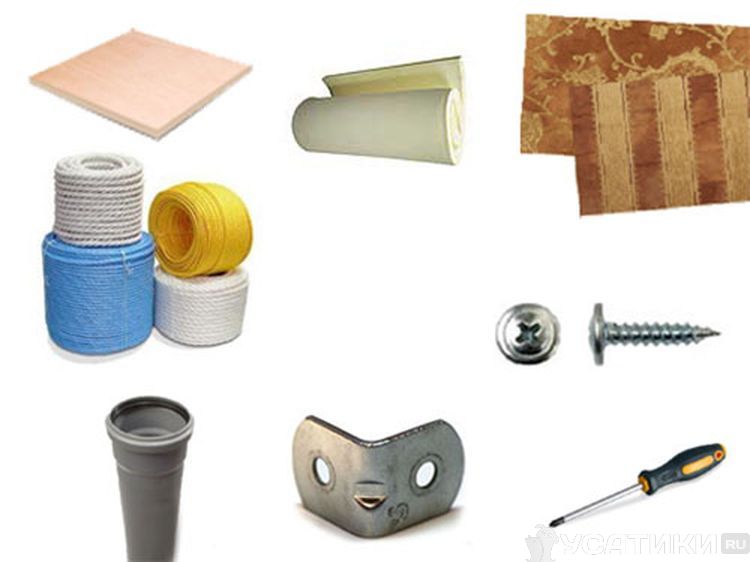
This design will require some sewing skills, and the scratching post requires more complex materials, namely:
- dry timber;
- plywood (thickness about 1 cm);
- rope;
- textile;
- self-tapping screws;
- plastic;
- foam rubber;
- a sharp knife or scissors;
- necessary construction tools.
Once you've gathered the necessary materials and decided on the size of your future scratching post, you can begin following the step-by-step tutorial below:
- Based on the results of measuring the required characteristics, a stable board is selected, which will serve as the base of the product.
- Cut out 2 rectangles according to the given dimensions.
- Find their center by drawing diagonal lines.
- Make an oval template out of paper before cutting it out of a wooden board or chipboard, place it on the base and trace around the shape.
- Once you have the base in the desired shape, sand down the edges.
- Cut out another such oval from plywood, only its thickness should be smaller.
- Make a side for the future bed using metal, and cut out another oval from foam rubber for the bed itself.
- For the scratching post, take a plastic pipe or a wooden beam of the required length and diameter and attach it with screws.
- Assemble all the resulting parts as follows: secure the pipe to the base of the scratching post with screws, decorate the pipe with fabric or rope using special glue so that it is convenient for the cat to sharpen its claws on it and no debris remains on the floor, and install the bed itself on top, in the same way that the pipe was secured to the base.

This scratching post option is more versatile, as it also provides a place for your cat to rest. It can be placed anywhere, thanks to its compact size.
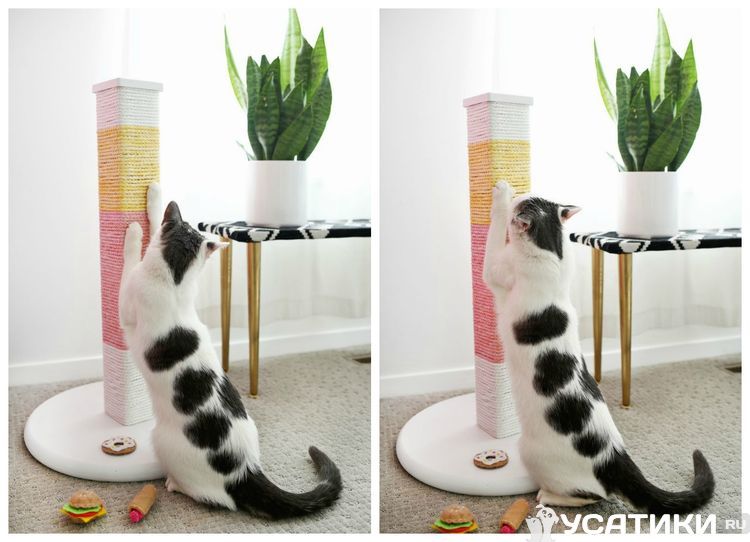
Twine Scratching Post: Step-by-Step Guide
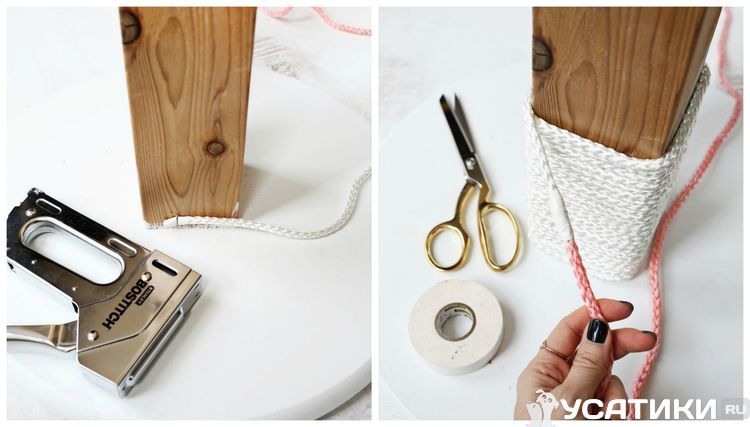
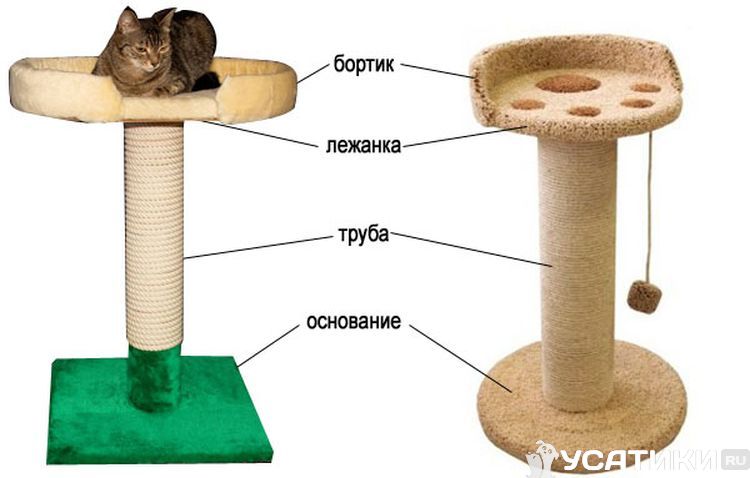
To ensure a high-quality scratching post made according to our tutorial, the pattern and dimensions must be chosen correctly. Natural twine is ideal for a standard scratching post shaped like a vertical tube wrapped in fabric or rope. You can make it as follows:
- Take a stable and strong foundation.
- Make a post of the required size, which can be a regular pipe or a wooden beam.
- Next, you need to connect and secure the post to the base of the scratching post.
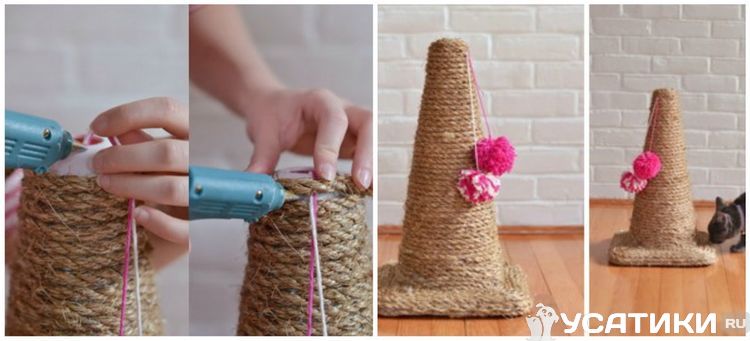
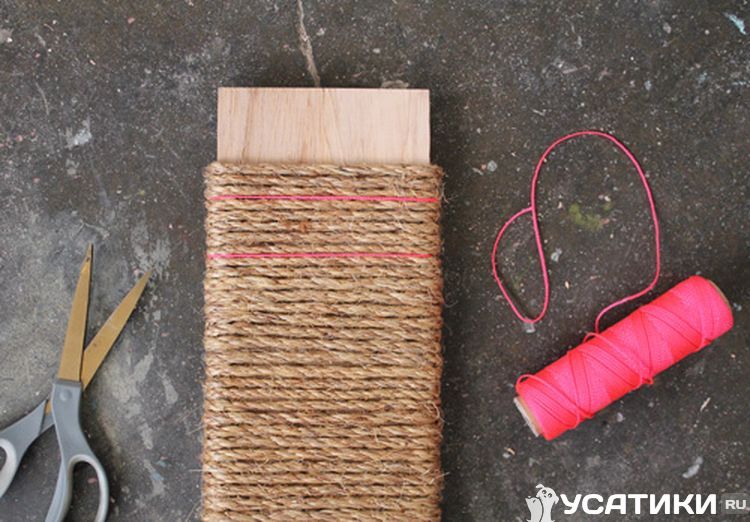
- Wrap the finished form tightly with rope, the skeins of which should fit tightly together, and secure them with permanent glue.
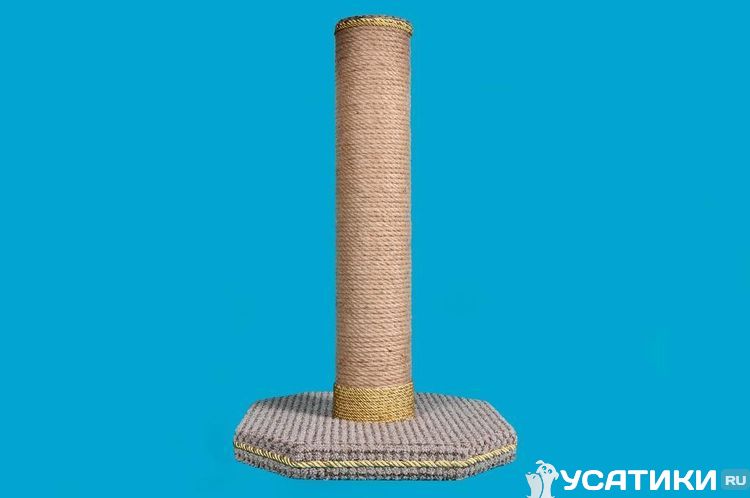
To make this scratching post look more interesting, you can place a bed on top or attach some toys to keep your cat interested.
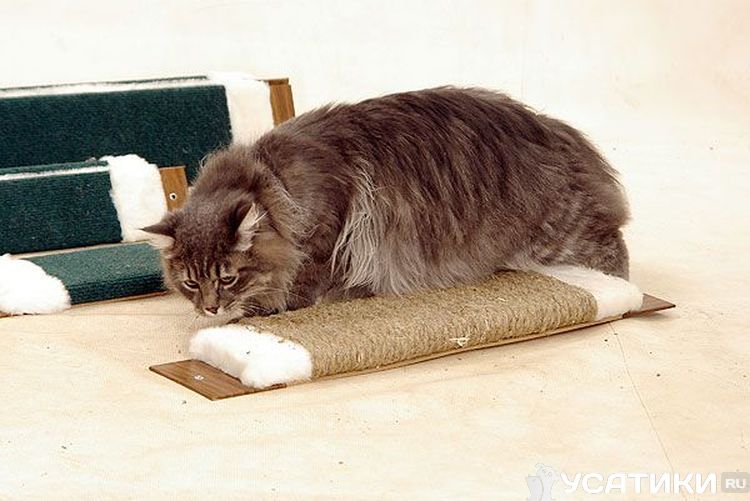
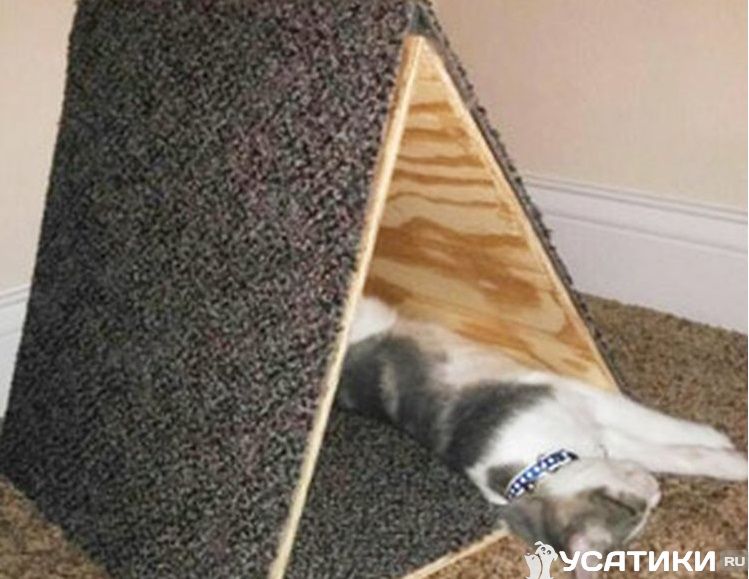
Making a flat or corner scratching post for a cat
The flat cat scratching post, pictured above, is made from the same materials as the previous ones, except that it does not need to be attached to a post.
- You can take any board or timber, the main thing is that it is flat.
- Next, you should wrap the base with material that you find around the house.
- Using a stapler, you need to fix the material to the base of the scratching post.
This design can be attached to a wall or floor. Its main advantage is that it can be installed precisely where the cat sharpened its claws before a scratching post was installed.
As for corner structures, the process of creating one involves the same steps as described above, with the exception that it must be constructed in two planes. Attach it to two surfaces—the floor and the wall—and secure it securely with screws, and this scratching post will serve your pet for a long time.
Tips for making a scratching post at home
If you've never seen a tutorial before, making a scratching post might seem complicated and time-consuming, but it's much easier and quicker than you think. Follow the step-by-step instructions, and you'll be successful, and a few tips will help you avoid mistakes:
- in designs with a house, place it on a pole, since the cat may consider this room as a toilet and relieve itself in the wrong place;
- If you have several cats in your house and you decide to build a scratching post with several couches, then think everything through so that the resting places are at the same level from the floor, otherwise disagreements may arise between the cats;

- the height of the scratching post or the entire structure should not be higher than 1 meter;
- If you want to engage your pet in the scratching post by adding toys to the structure, make sure your cat will be interested in it so you don't waste time.
By considering all the room parameters and factors that influence your cat's comfort with the scratching post, you can create an excellent design using our diagram and save time while saving money on the purchase.
Read also:


Add a comment