
DIY Cat Bed: How to Make It
It's crucial to ensure your pet's comfort, particularly by providing a soft place for them to sleep. This is especially important for cats, as they prefer to sleep most of the day and need a cozy, quiet spot to rest. To avoid unnecessary expenses and make your pet happy, a DIY cat bed made from a sweater is just the thing.
It's not as difficult as it might seem at first glance. Besides a sweater, various fabrics, faux fur, other old knits, worn clothes, and so on are all suitable for a cat bed. A cat bed can be made yourself from ordinary cardboard boxBelow are various DIY cat beds, patterns, and photos of finished products.
Content
Soft bed with sides
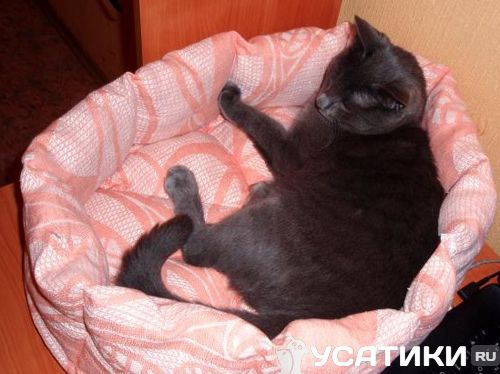
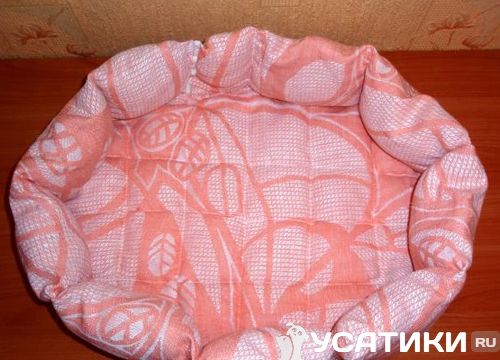
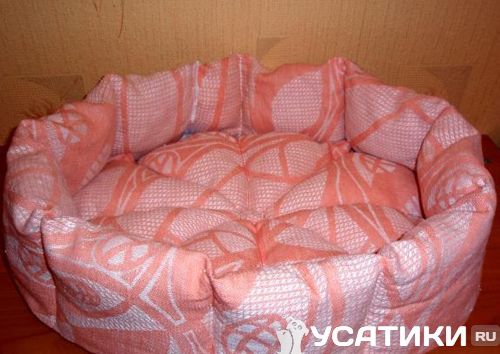
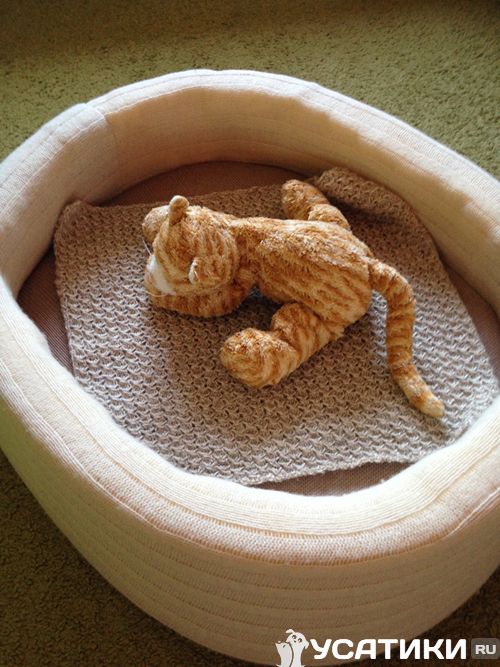
One of the master classes will demonstrate how to sew a cat bed yourself using household items. This bed features a simple oval shape, small soft-filled sides, and a removable cushion. If the cushion gets dirty, it can be easily removed and washed, making it a very practical item and sure to please your cat.
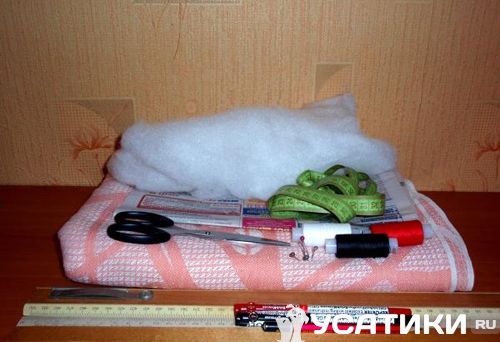
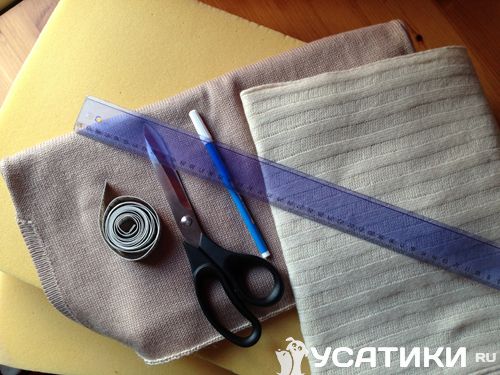
To sew a crib you will need:
- dense natural fabric;
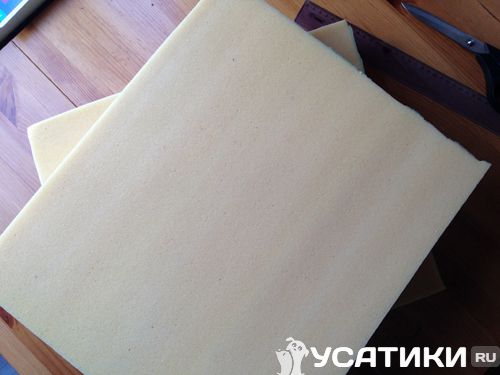
- synthetic padding as a filler;
- pattern paper;
- handy office supplies.
It is not recommended to use smooth, slippery fabric, as your pet's claws may get caught on it, causing discomfort, and the material will quickly fray over time, leaving the bed looking less than presentable.
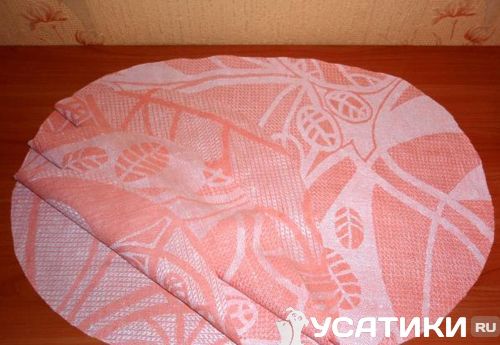
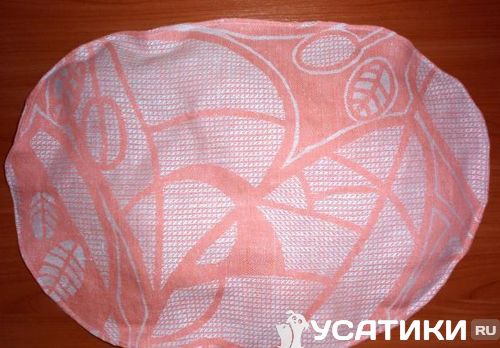
Any paper, newspaper, or cardboard will do for the pattern. You can sketch the outline of the desired item using a bar of soap, but it will be difficult to see on light-colored fabric. The size of the bed depends on the cat's size. In this case, the pattern was 40 x 55 cm.
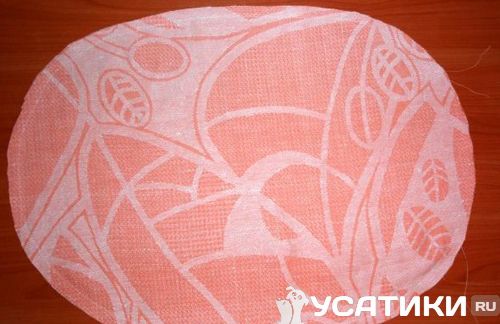
The resulting template is placed over the fabric and pinned to prevent it from slipping, then the base of the future garment is carefully cut out along the outline. You will need four of these templates.

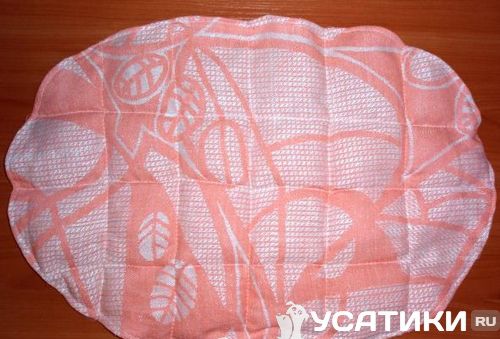
First, you need to sew the bottom of the bed. To do this, take two pieces, place them together with the right sides facing in, and sew them together. It's important to leave a 1 cm gap from the edge and a small opening for filling with synthetic padding. For convenience, you can pin the pieces together and sew them together with a sewing machine.
A thin layer of synthetic padding is inserted inside. The opening is then carefully pinned and machine stitched. To help the piece hold its shape better, you can additionally stitch around the entire circumference.
Next, stitch the bottom lengthwise and crosswise, dividing it into small squares. Now you can begin making the sides.
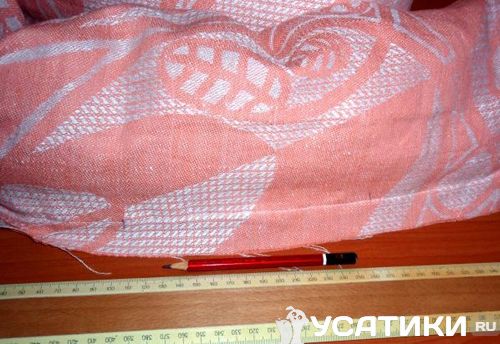
First, measure the bottom diameter of the future bed and add at least 10-15 cm to this value to calculate the side length. In this example, the prepared piece of material is 40 cm wide and 155 cm long.
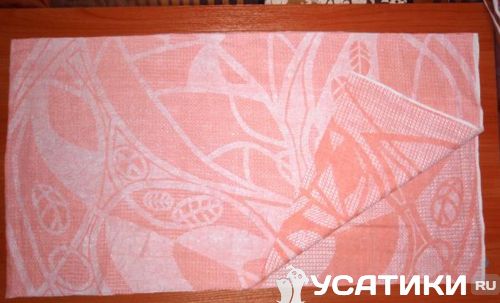
In the next step, fold one edge of the fabric over by 1 cm, pinning it for convenience. Then, place this edge against the opposite edge, 2 cm from its end, and pin again at the sides.

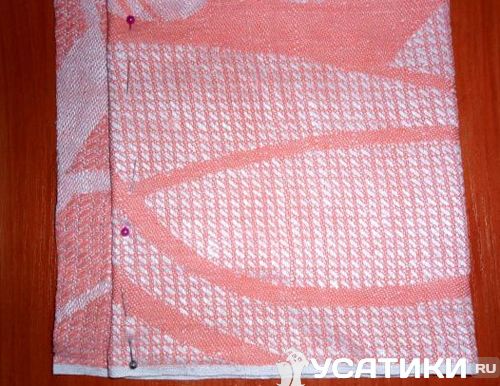
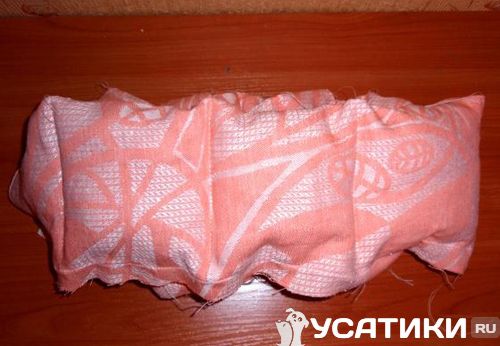
Next, stitch the fabric on a machine and stuff the resulting edges with synthetic padding. You can use other filling if you prefer. It's not recommended to stuff the product too tightly; it should have a slightly airy feel.
Then, using a ruler and pencil, measure out 16 cm squares.
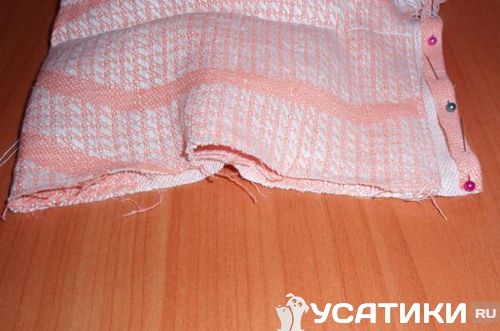
Sew the cross seams of the future crib along the pencil lines. This will shape the sides, but this isn't necessary. You can leave them straight and oval if you prefer.
The free edge at the side should be folded over and pinned to make stitching easier.
Finally, the edge is sewn to the bottom, with its loose folded edge positioned underneath. It's important to ensure the formed edge fits snugly against the bottom of the bed and doesn't bulge. All that's left to do is close it, carefully fold the edges over, tuck them in, and stitch. It's recommended to knead the piece slightly to evenly distribute the filling.

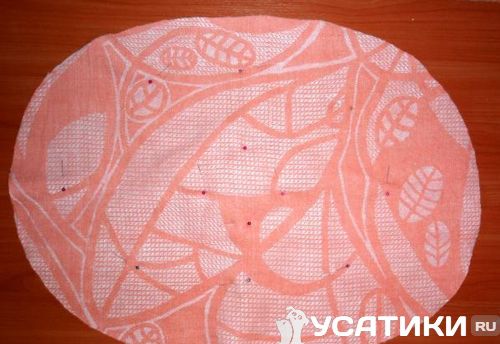
The bed is basically ready, but this model also has a removable cushion. To make it, you'll need two pre-cut oval pieces of fabric the same size as the bed base. Use pins to mark the seam lines. You can also use a pencil and ruler.
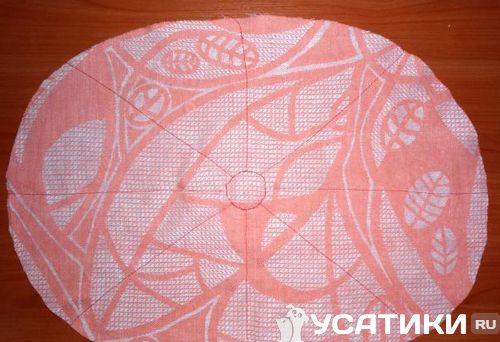
Next, using contrasting threads, carefully stitch a small circle in the center and from there, sectors diverge in different directions.
Each section is tightly stuffed with synthetic padding. Then the pillow is stitched around the entire circumference with a zigzag stitch.
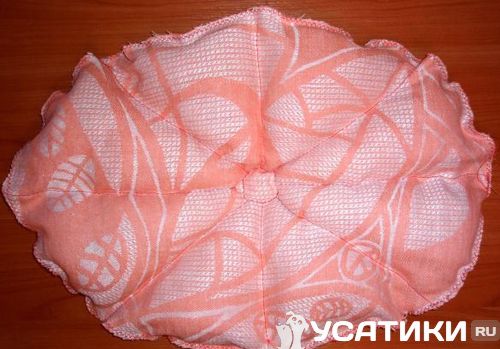
To give the product a more attractive appearance, fold the edges slightly and stitch them with the same stitch. The bed cushion is ready. Now you can invite your cat for the first test.

Read also: how to do origami cat And running wheel for cats on our website.
A bed made from old knitted clothes
The following step-by-step instructions will demonstrate how to make a cat bed from wool knitwear and a foam base. This sleeping area is very dense and warm, perfect for your pet during cold weather or on a rainy day.
To make this cat bed you will need:
- wool knitwear (any worn clothing will do, in this case a skirt was used);
- wool scarf approximately 30x200 cm;
- 2 foam pillows measuring 35x80 cm;
- handy office supplies.
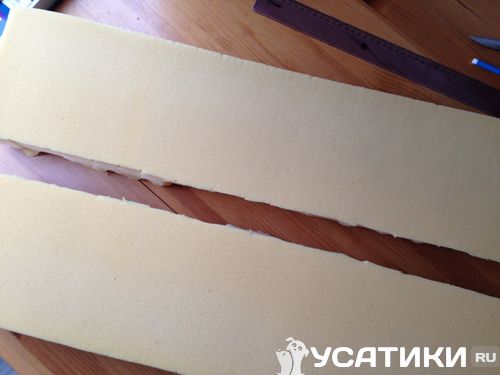
Below, we'll explain how to make a cat sleeping bag step by step. First, create the base for your pet's sleeping area using pillows. Using a marker and a ruler, divide the first foam element into two halves and carefully cut them with scissors.

As for the second pillow, it is also cut into two equal halves, but not crosswise, but lengthwise. Thus, the first pillow will serve as the basis for the bottom, and the second for the sides of the product.

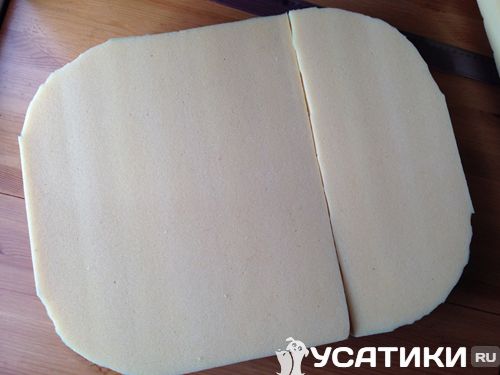
The size of the bed will depend on the cat's size. You can use the dimensions of the cat bed from the previous tutorial as a guide. Trim off any excess. To make the bed more attractive, it's recommended to round the edges. To maintain symmetry, you can use any rounded object, such as a plate. Place it on the foam and trace around it with a marker.
It's worth noting that the shape of the sleeping area is entirely up to you. It can be oval, rectangular with rounded edges, or even round. The main thing is that your pet is comfortable.
Cut two pieces from a former knit skirt to the size of the bottom. They can be easily sewn together by hand. It's important to leave an opening through which the piece can be turned inside out and a foam cushion inserted.
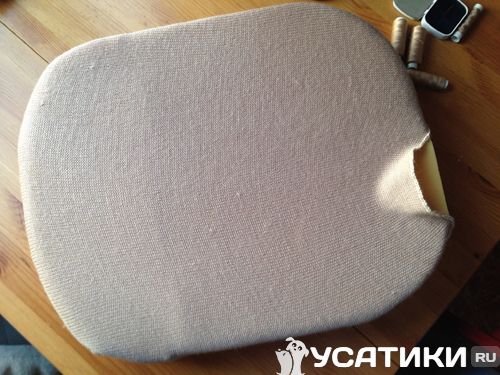
Once the foam is placed in the resulting cover, the opening can be sewn shut. The edge of the material is carefully folded over to the side and hand-stitched with a blind stitch. This completes the bottom of the bed. All that remains is to sew the side.
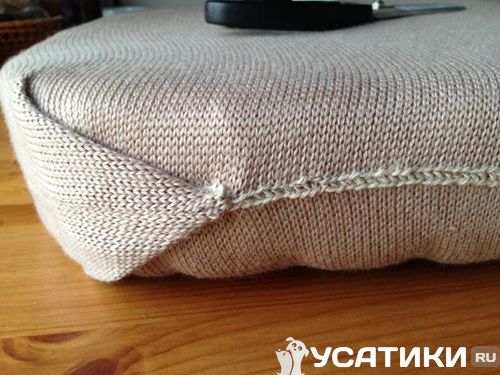
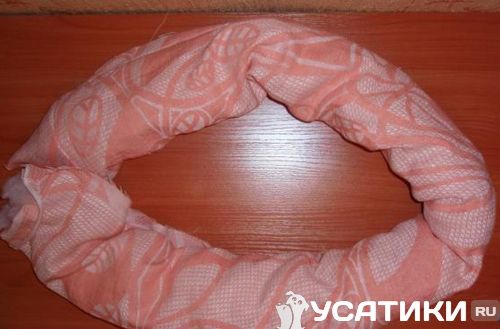
First, fold the scarf lengthwise and stitch it. Carefully fill the resulting tube with oblong pieces of foam rubber.
Next, based on the bottom dimensions, the outline of the side is formed. To join, overlap one edge of the side of the bed and sew together with a blind stitch. It's worth noting that 15-20 cm of space remains on one side, so there's no problem with closing the side in this manner, as this will prevent excess foam from sticking out and ruining the aesthetic appearance of the product.

All that's left to do is insert the bottom of the bed into the formed ring and sew them together. You can invite a mustachioed expert to assess the work.
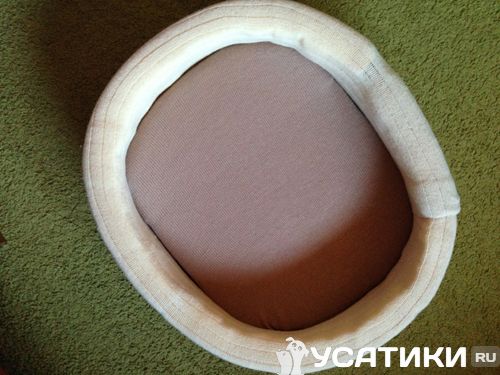
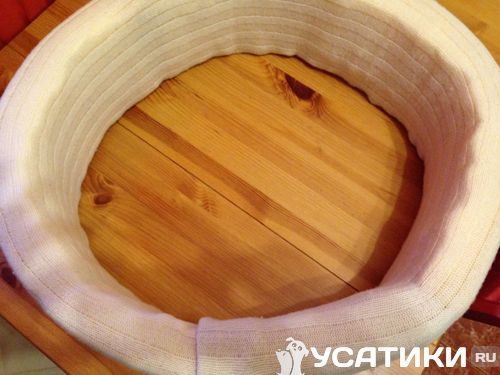
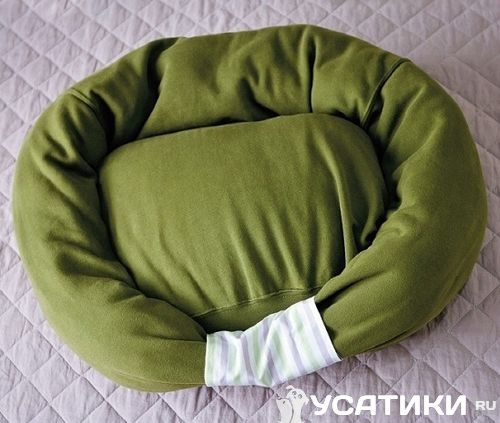
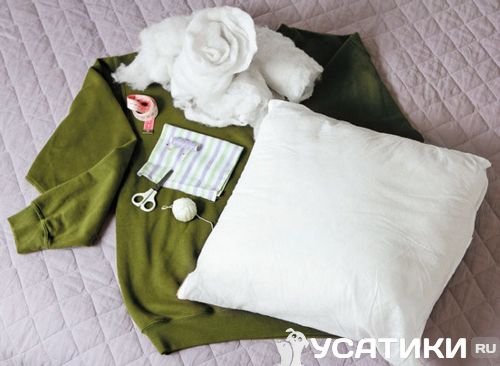
A bed made from a sweater
The next option for making a cat bed is quite simple and budget-friendly, but the end result is no worse than one made from expensive materials. You can sew a cat bed yourself from a sweater (the patterns for which are provided) and fill it with synthetic padding. It's a breeze to sew, even for someone inexperienced in sewing.
To sew a bed you will need:
- a sweater, preferably without a high collar;
- a small, thick piece of fabric, approximately 20×40 cm;
- pure synthetic padding (to simplify the task, you can put a pillow stuffed with synthetic padding on the bottom);
- sewing accessories.
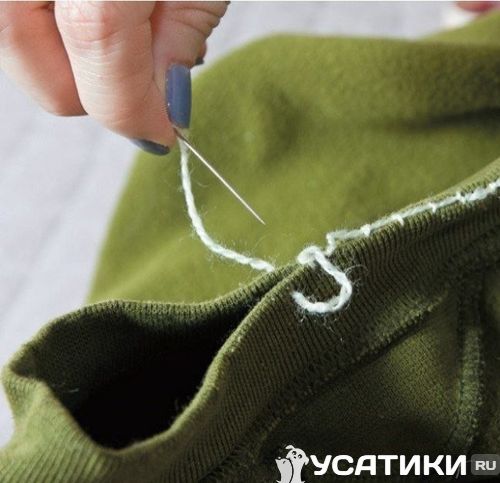
If your sweater or cardigan has a high collar, cut it off, fold it over slightly, and stitch the edges to prevent it from unraveling. It's recommended to use nylon or wool thread for sewing; they will ensure the strongest seams. It's best to choose a color that matches the sweater to avoid drawing attention to the seams.
Using the small diagram as a guide, sew up the neckline and a semicircle above the chest. This will mark the sides of the future cot. To prevent the stitches from slipping, it's recommended to pin the area you'll be working on.

Then place a pillow inside the sweater and sew up the opening to prevent it from falling out. The bottom of the bed is ready. If you don't have a pillow, you can stuff the sweater with regular padding, but that will require quite a bit of material.

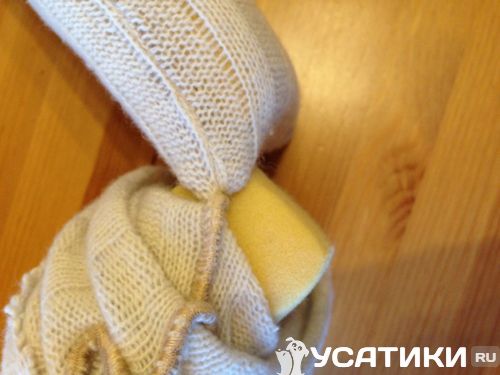
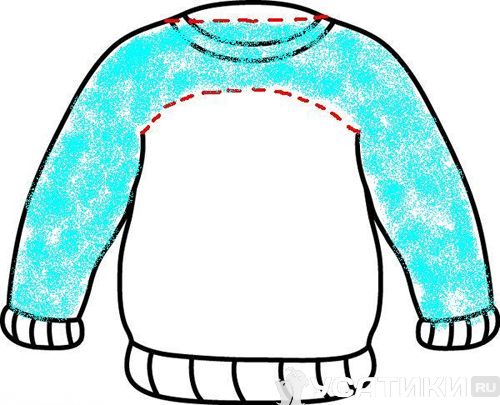
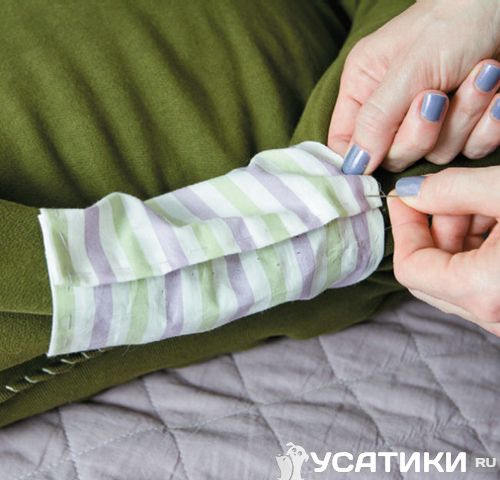
All that's left is to fill the sleeves so they're snug, hold their shape, and don't bulge. In photo 40, the area that needs to be well stuffed with synthetic padding is marked in blue.
As the sleeves are filled, they are sewn to the bottom in a circle. It is recommended to sew the sleeves one at a time. Where the neckline is, sew along its contour, preventing it from being visible in the finished product. This will ruin the aesthetic appeal of the lounger. The intersection of the sleeves should also be sewn, and the border should be lightly pressed to distribute the padding evenly.
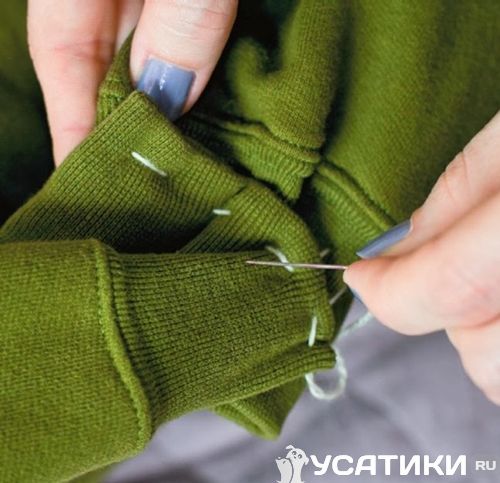
The previously purchased fabric is wrapped around the junction of the sleeves, covering the seams, and the material is sewn on with threads of a similar color.
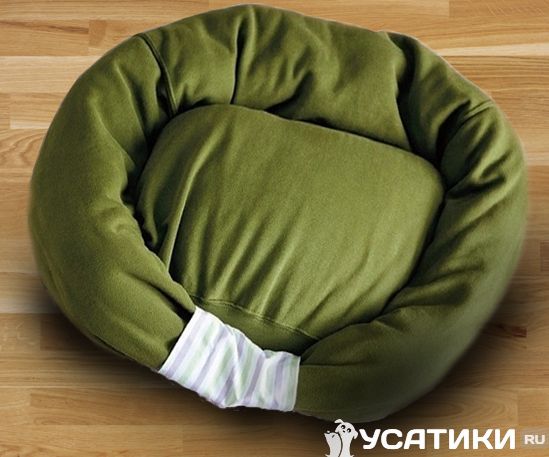
That's all. The lounger is ready for use.
The cost of the finished bed
Sofa for a cat
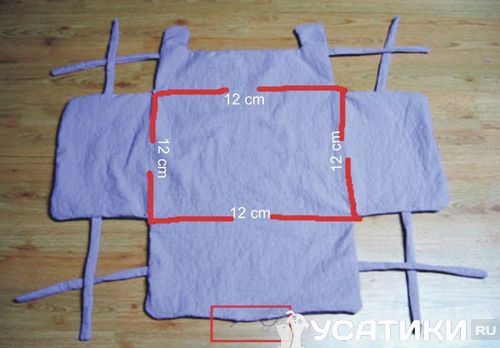
The next cat bed model features an original design. It mimics a small cat bed, sewn from simple fabric and assembled with fabric strips.

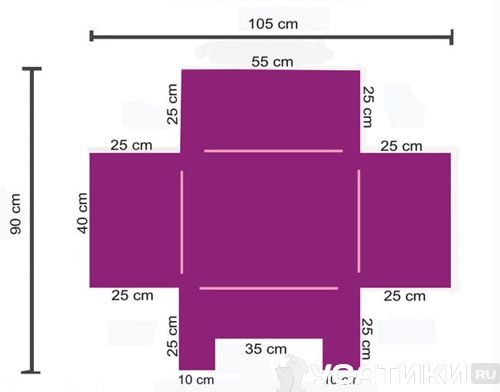
As mentioned earlier, the size of the garment directly depends on the size of your pet. When sewing, you can use the pattern and dimensions shown in photo 45 or experiment at your own discretion.
You can choose the fabric to your liking or cut up used clothing. In the example, we used fabric ribbons that match the pattern, but you could also purchase colorful satin ribbons, which would give the cat bed an even more appealing look.
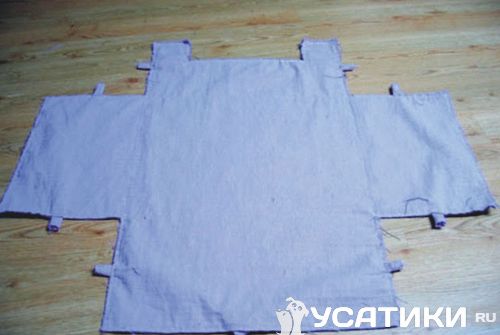
Two identical pieces of fabric are cut out, preferably in contrasting colors. They are then placed one on top of the other. As shown in photo 46, a ribbon is threaded between each of the paired rectangles. Its length isn't particularly significant, but it's better to have it as long as possible rather than end up too short.

The future bed is stitched along the entire perimeter, leaving 12 cm at each end to make it easier to fill it later.
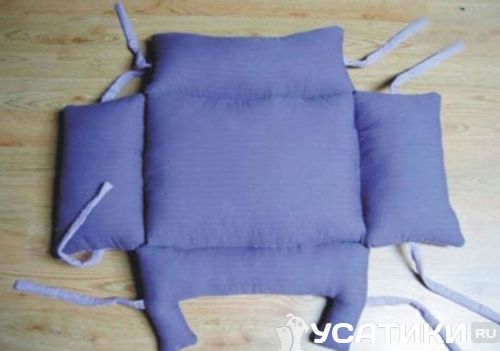
Next, turn the piece inside out and generously stuff it with synthetic padding. It's important to fill the sides tightly, as they need to stand up and hold their shape. Finally, stitch the bottom to form a rectangle, and sew up all the openings. For a textured bottom, you can topstitch it a couple of times lengthwise.
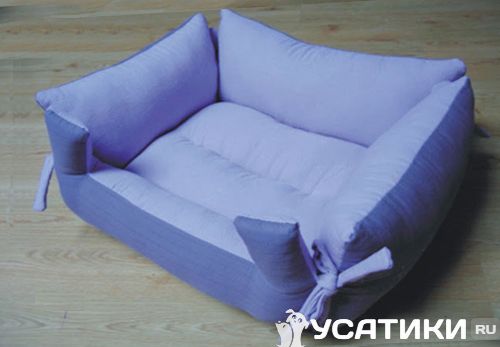
All that's left is to tie all the ribbons into bows, and the sofa-bed is ready. You can invite your cat to its new sleeping place. She'll be delighted with such a stunning gift, especially one made by her owner.
Read also:


Add a comment