
How to make a cat collar yourself
Unlike dogs, cats don't need a collar as much, but this accessory is crucial for returning a lost pet to its owner. Therefore, many cat owners wonder how to make a collar for their cat before spending time with their pet, for example, at the dacha.
Today, cat collars also serve as a fashionable accessory, complementing the unique look of this graceful animal. Consequently, special photo shoots for cats have become popular. But a unique, handmade cat collar makes the biggest impression.
Making such an accessory yourself is quite simple. It's important that your pet feels comfortable. The collar shouldn't be tight or have sharp edges. Furthermore, the accessory should be stylish, complementing the pet's fur, color, and personality.
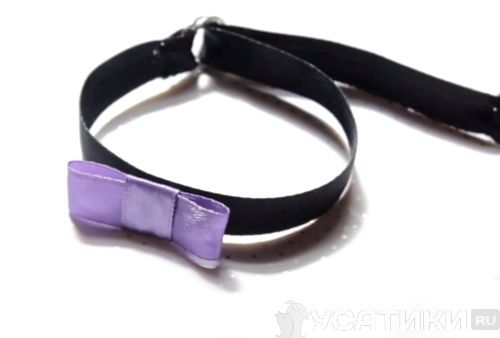
Satin collar
For elegant domestic cats, a beautiful handmade cat collar made from lightweight satin ribbons is the perfect choice. You can decorate it however you like, arranging the ribbons into various flowers and bows, as long as they don't get in your pet's way.
To make such a collar you will need:
- two pieces of ribbon of different colors and lengths (one as the base of the accessory, the second for its decoration);
- two small rings as a clasp;
- scissors;
- threads to match the product.
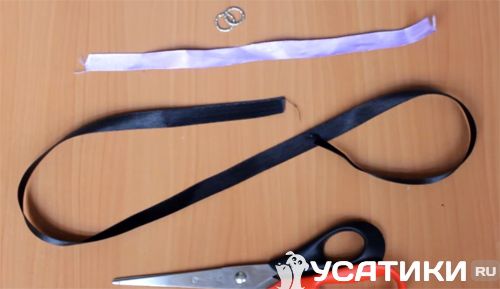
To determine the required ribbon length, measure the circumference of your cat's neck and add a few centimeters. The width can be adjusted to your taste. If the ribbon is too wide, you can fold it in half and sew it, or gather the edges together and seal them with a lighter. For further work with the ribbon, it's best to trim any frayed edges with scissors to give it a more aesthetically pleasing appearance.
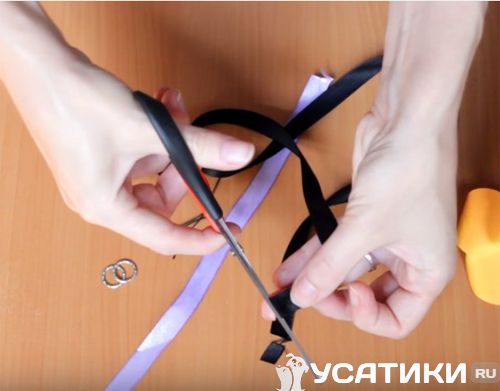
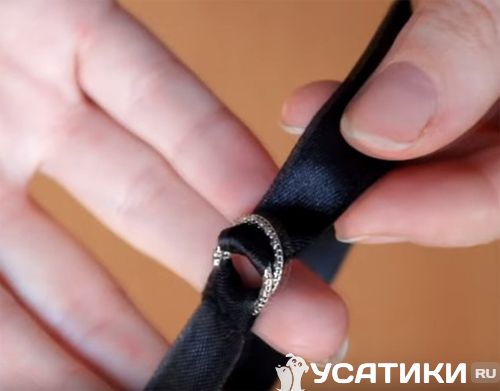
Then, place the two rings on. To secure them, fold one end of the ribbon over and stitch it with thread. You can use a lighter again, but be very careful when using it. This way, the rings remain in a small loop. It's recommended to fold the opposite end of the ribbon over slightly and stitch it.
Now you can begin creating the decoration. To do this, take two small pieces of ribbon. Fold the ends of one of them toward the center on both sides, forming the base for the bow. It's important that everything is symmetrical and neat.
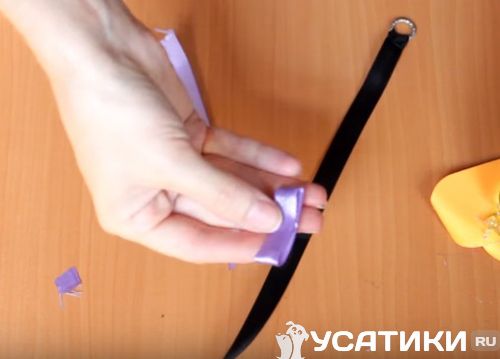
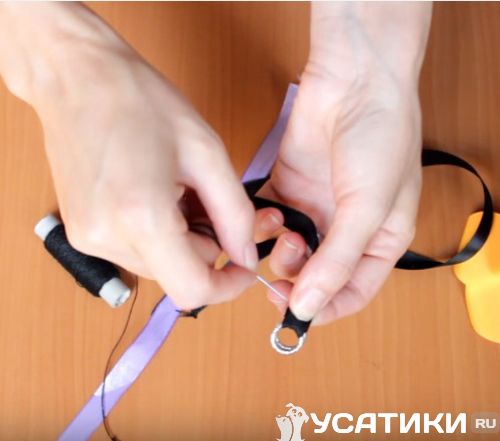
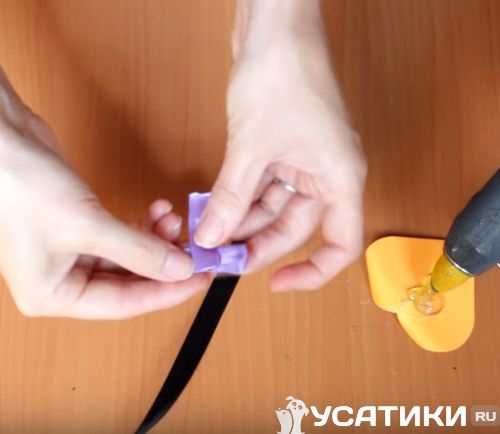
Then, glue a second piece of tape over the joint and wrap it around the base, securing it with glue after each wrap. Silicone glue is recommended, but superglue will also work.
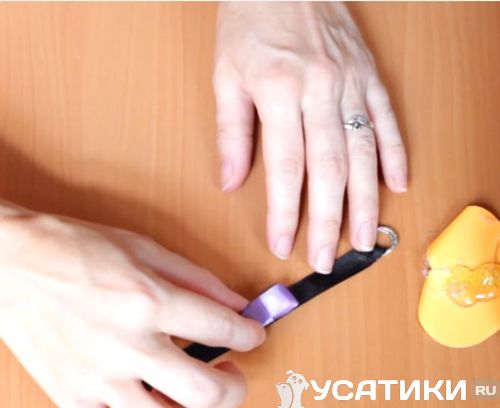
The resulting bow is now glued to the collar. It can be placed either in the center or closer to the edge. If desired, you can modernize the bow or replace it with a colorful flower made from the same material.
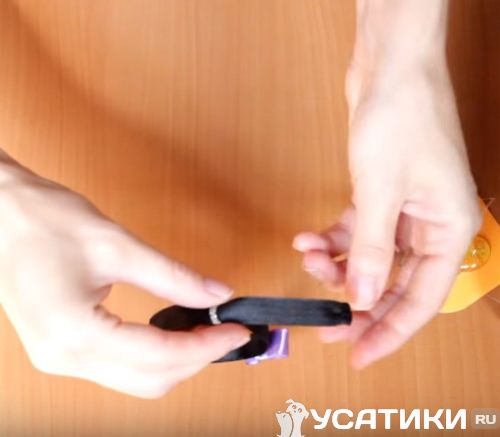
All that's left to do is fasten the accessory to the cat. To do this, thread the end of the ribbon through two loops and then out through the outer loop. The length can be easily adjusted.
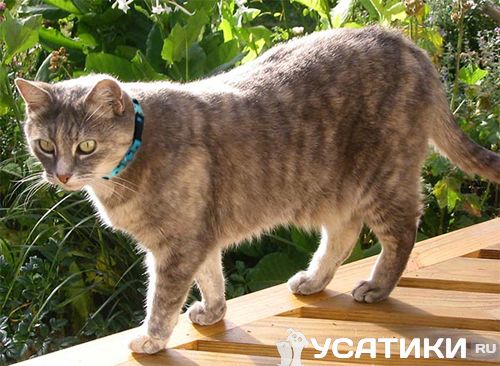
Practical collar
The next version of a homemade collar, the templates for which are presented here, is more practical and is perfect for stray cats.
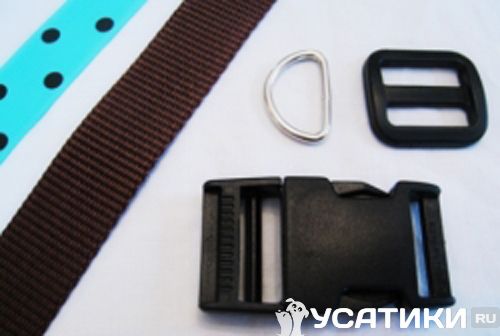
To make it you will need:
- nylon webbing;
- ribbon with ornament;
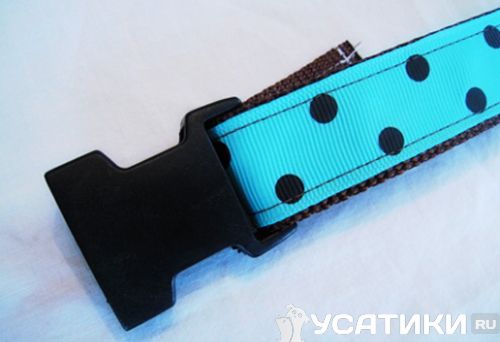
- plastic clasp;
- plastic buckle;
- half ring.
As for the width of the materials, 1.25 cm is optimal for a cat's neck.
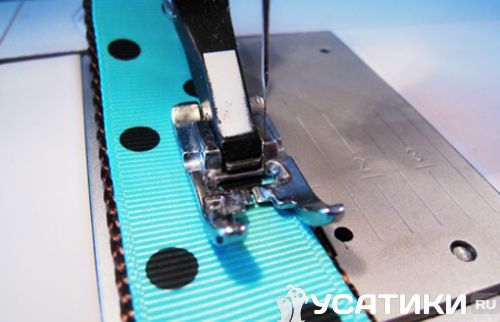
First, the colored ribbon is sewn to the webbing using a sewing machine. The stitch length is 2 mm. The ribbon is stitched along its entire length on both sides, as well as across the edges.
Now you can begin attaching the clasp. After unfastening it, thread the end of the strap through one of the elements, bend it, and sew it to the collar base at the fold. It's recommended to stitch several rows of stitches.
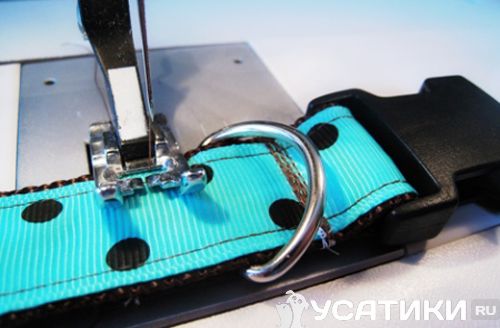
Next, the free end of the strap is threaded through the half-ring. It is moved as close to the beginning as possible and stitched across the strap again, using the remaining material threaded through the clasp to secure the half-ring.
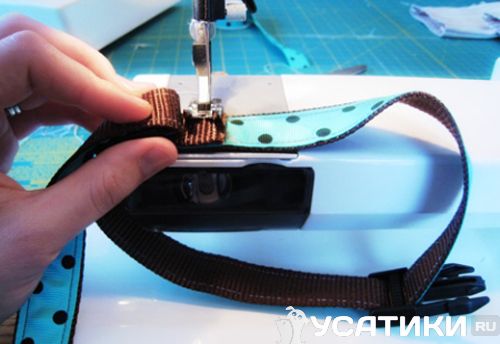
After this, the other side of the future product is threaded through the plastic buckle, and then the second part of the fastener is secured to the end, bending the strap with more reserve than the previous time.
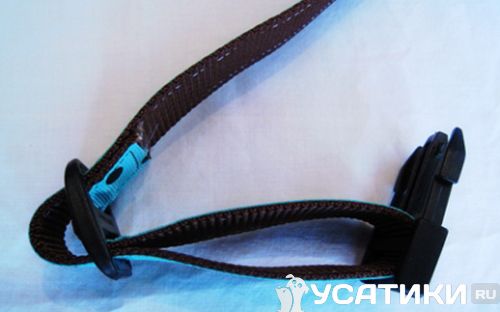
Next, bend the end of the strap back slightly and stitch it crosswise several times to secure the buckle. All that's left to do is try the collar on your pet.
Collar
This collar is incredibly simple and quick to make, and most importantly, it will make any cat look absolutely stunning. The tutorial below will show you how to make this accessory.
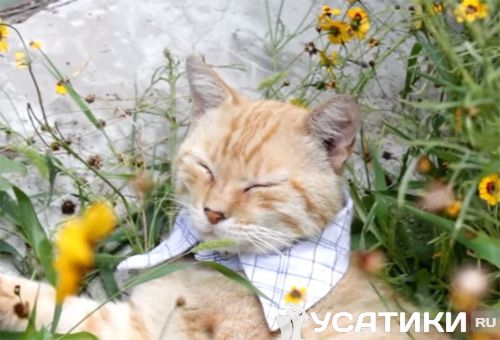
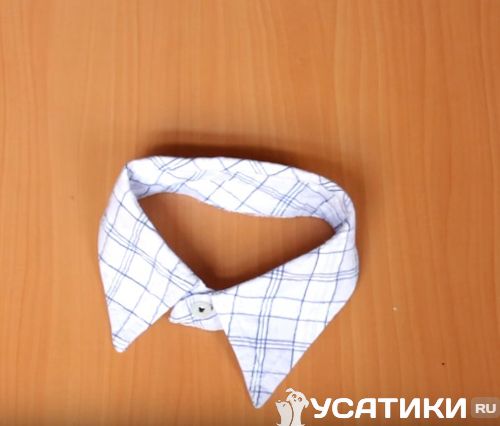
To make this stylish cat collar, you'll only need a shirt and scissors. The shirt can be absolutely any color—plaid or checked, worn or the wrong size to begin with. In other words, a shirt that no one will wear anymore. A great way to recycle old clothes.
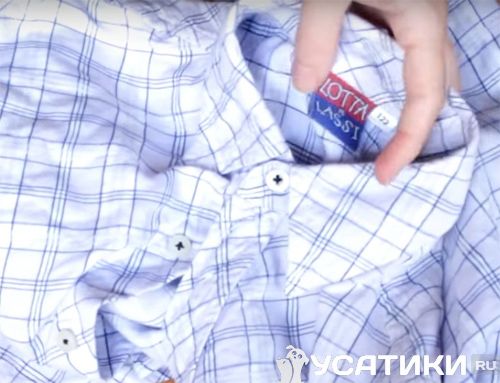
First of all, you should remove the tag so that it does not cause discomfort to your pet.
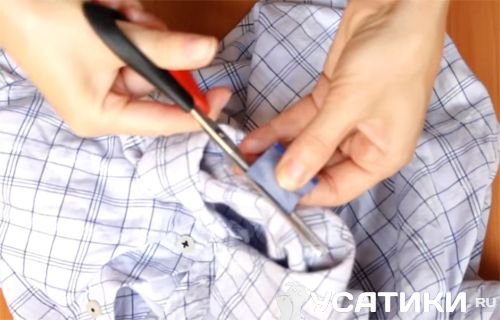
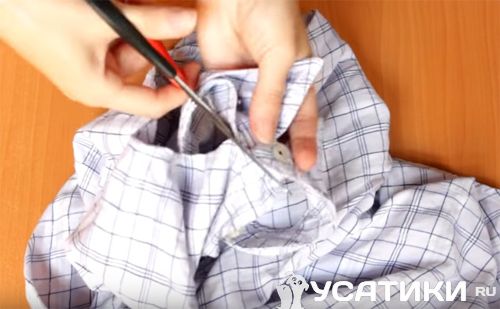
It's best to cut the buttoned collar in a circle, being careful not to cut any threads, otherwise the piece may fray over time. Optionally, you can machine-stitch or hand-sew the edges.

You can surprise your friends and neighbors with such an unusual design. It's important that the shirt you choose matches your pet's coat to create a flawless look.
Stylish butterfly collar
A bow tie collar would also look great on your cat. It's easy to sew yourself from any fabric or ribbon of various widths, and can be solid, striped, or polka-dotted. And most importantly, such a decoration will instantly transform your cat into a true gentleman.
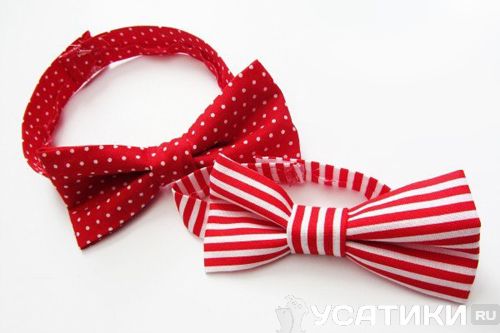
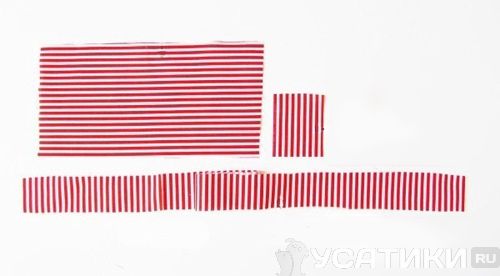
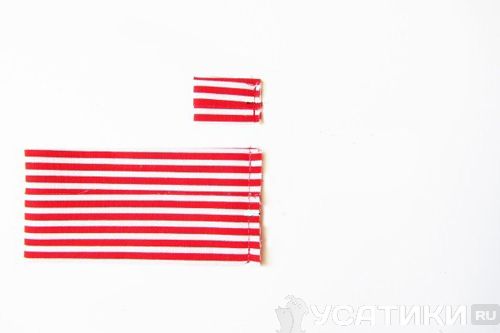
You'll need three different-sized pieces to sew this project. The collar is approximately 5 cm long, the bow tie base is 12 x 24 cm, and the center is 5 x 7 cm. You can make the bow tie larger than the example, if you prefer.
First, you need to sew the butterfly. To do this, fold the edges of the rectangle toward the center to ensure symmetry, and iron them well.
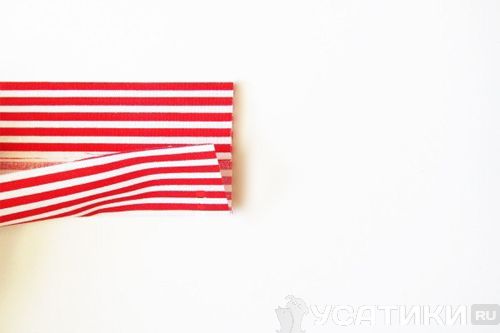
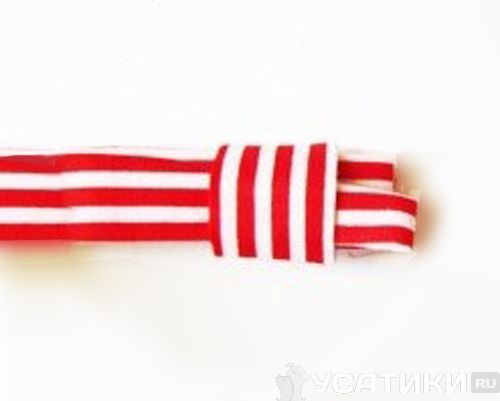
The small piece is folded using the same principle. Then, fold both pieces horizontally and stitch, leaving a slight gap from the edge.
Next, turn the pieces inside out, leaving the seams inside, and thread the bow base through the resulting small ring, as shown in the photo. The bow tie is ready.

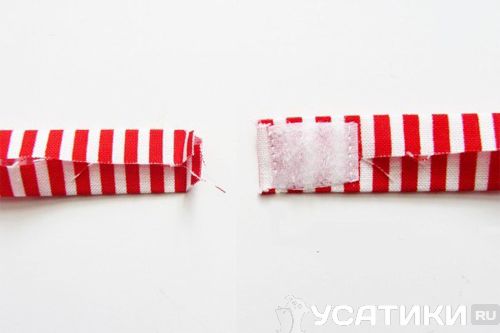
Now it's time to sew the collar. Fold the edges of the fabric toward the center and carefully press them, just as you did with the bow tie. You can topstitch them if desired. Then sew on the Velcro, following its outline and making a few crisscross stitches.
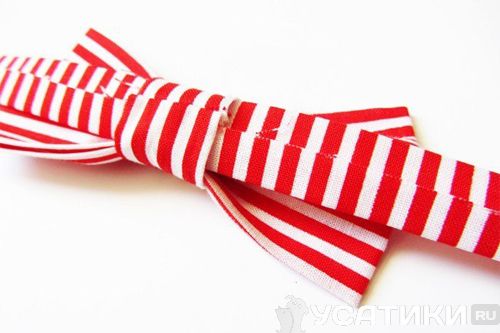
Once finished, the collar is threaded through the same ring behind the bow tie. The accessory is ready, and it's time to call your cat in for a fitting.
Read also:


1 comment
Anna
You made these gorgeous accessories yourself. Simple, beautiful, and original!
Add a comment