
How to make an origami cat
Origami cats are apparently very popular, so it's easy to find dozens of different patterns for making them. We suggest considering several of these options, including a fun origami bookmark. Making these paper cats isn't difficult, and it's perfect for kids.
Content
Lightweight paper cat
This pattern is suitable for teaching children, as it involves a minimum of complex steps. To create an origami cat, you'll need two square sheets of paper. One will be for the head, and the other for the body. You can use sheets of paper of the same size, but it's better if the sheet for the head is smaller. The exact size doesn't matter.
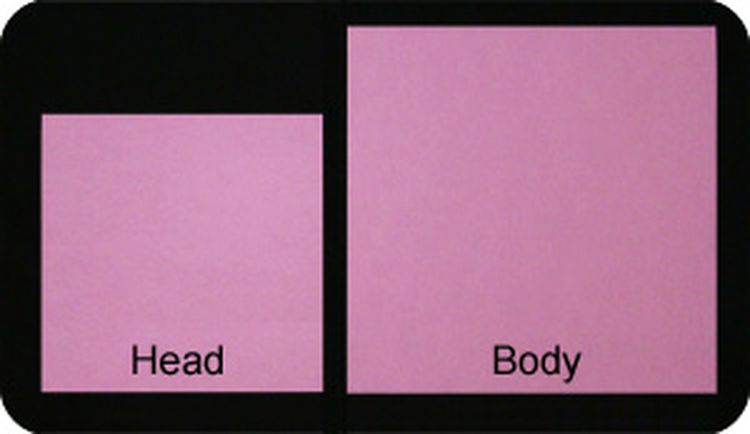
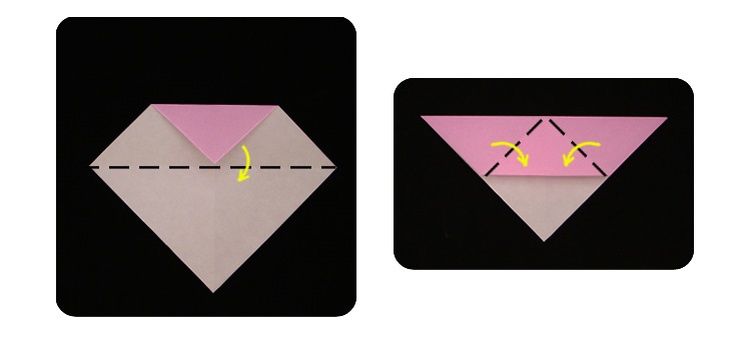
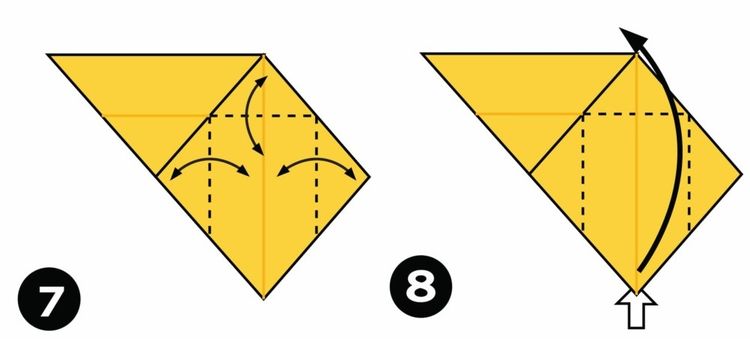
Diagram of creating a cat's head
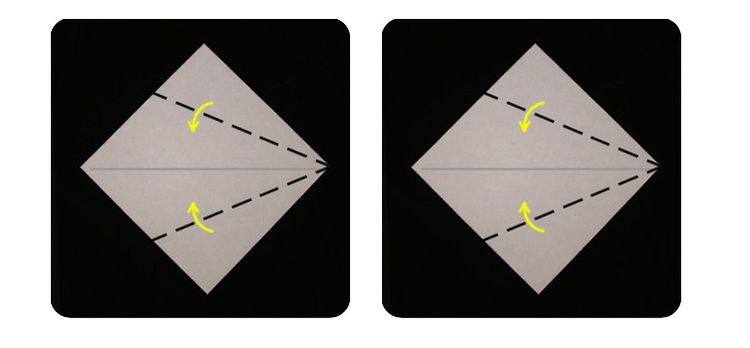
- Step 1: Take the smaller piece of paper and arrange it in a diamond shape. If you're using origami paper, place it white side up.
Fold it in half in both directions to create creases that we can use as guides later.
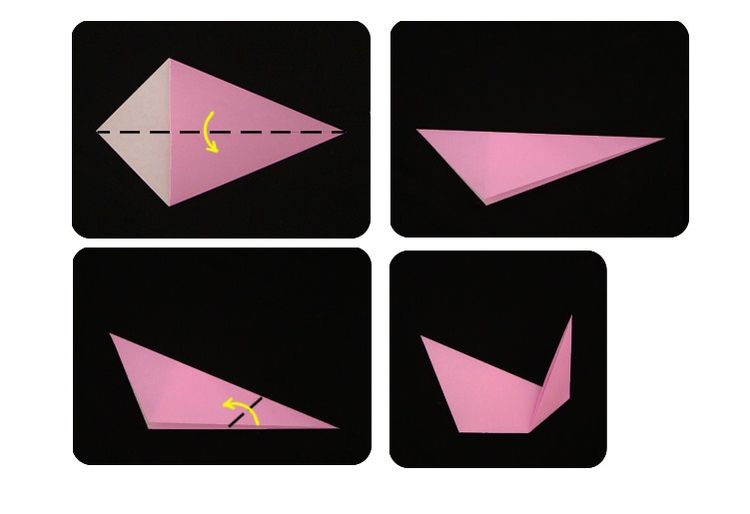
- Step 2: Fold the top corner of the diamond so that its tip is in the middle of the paper.

- Step 3: Fold the paper along the center line. It should form a triangle.
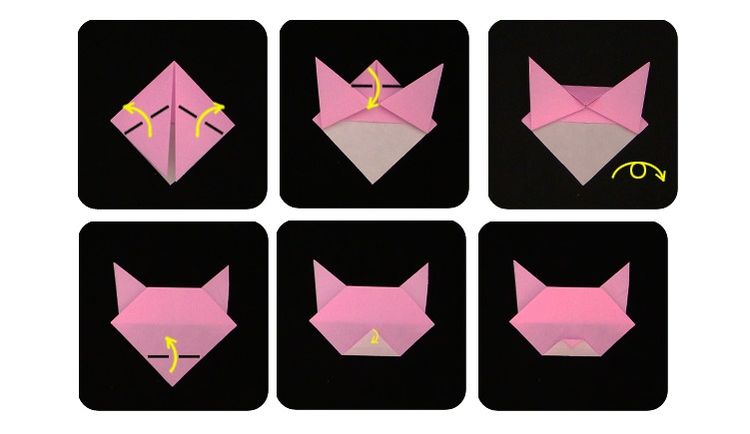
- Step 4: Fold the left and right sides so they meet in the middle to form a square.
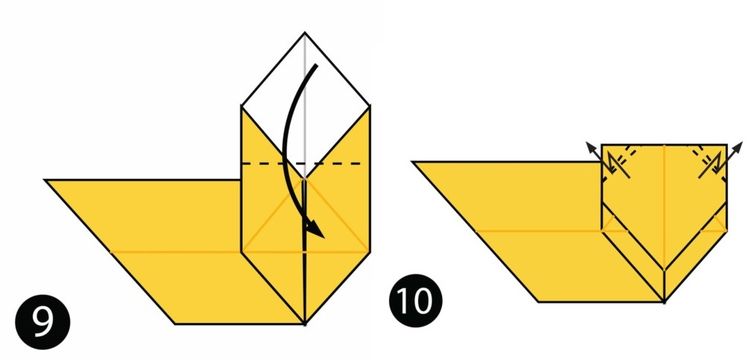
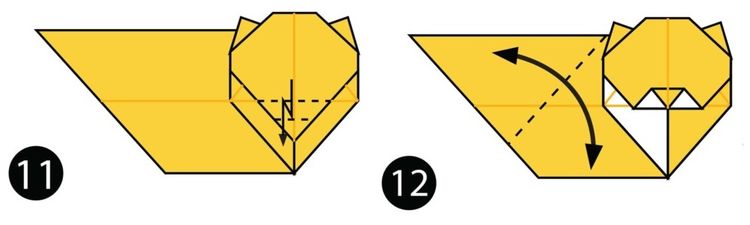
- Step 5: Fold these two corners back so they extend beyond the edges of the shape. These will be the cat's ears.
- Step 6: Fold the top corner of the model to create the crown of the head. Turn the paper over.
- Step 7: Fold the bottom corner of the model to make the chin.
- Step 8: Now fold over a small corner that will serve as the nose.
The head is ready.
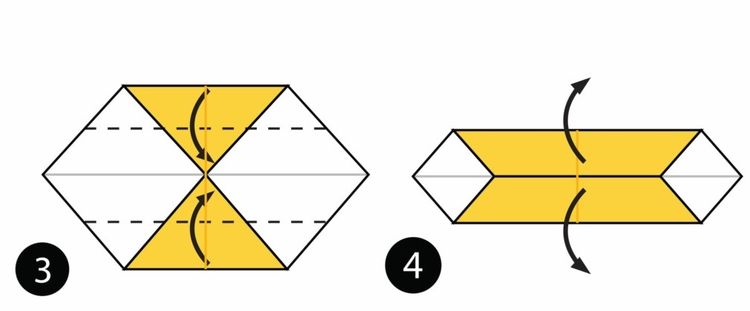
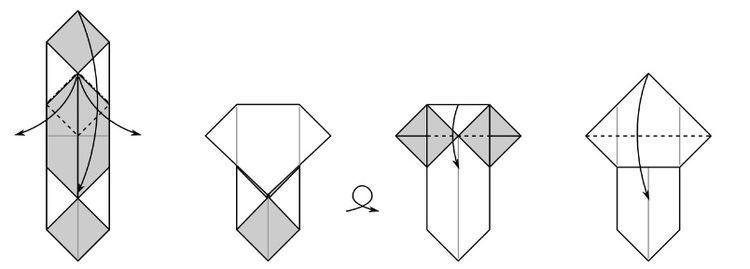
Body assembly diagram
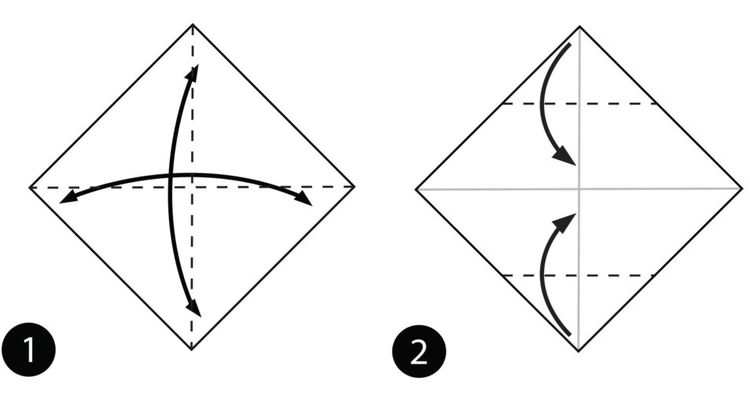
To create the body of the paper cat, take a larger piece of paper and place it in the same "diamond" orientation with the white side facing up.
- Step 1: Fold the sheet in half. Unfold.
- Step 2: Fold the top and bottom edges of the paper so they meet at the crease you made earlier. This will create a cone-shaped form, reminiscent of an ice cream cone. This shape is also called a paper kite.
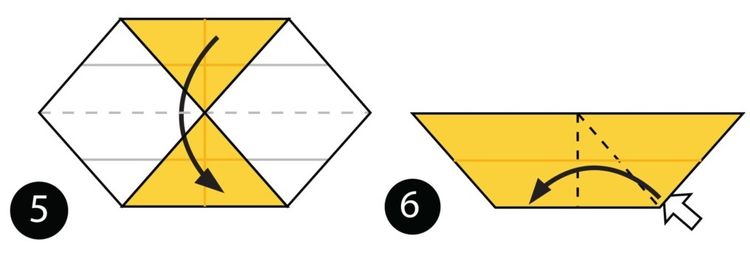
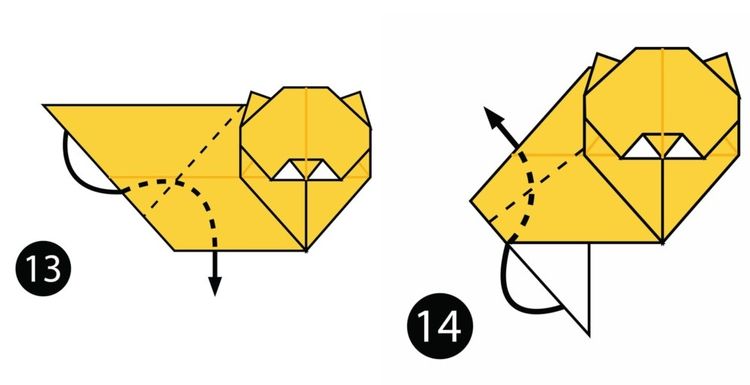
- Step 3: Fold it in half. Rotate it slightly.
- Step 4: Fold the narrower part of the model so that it points upwards like a tail.
If you're working with young children, you can finish the craft at this stage. Place the cat's head on the body, and you're done.
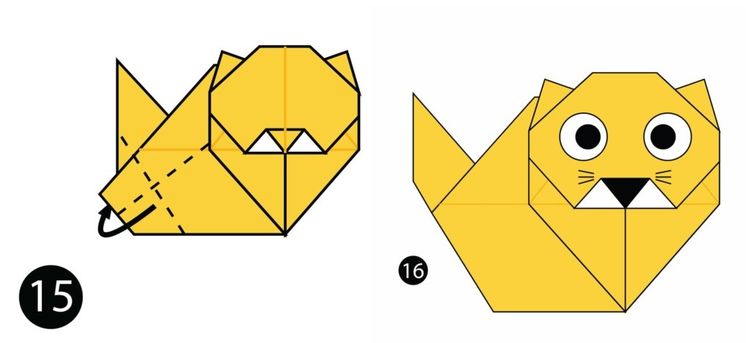
- Step 5: For a more complex design, unfold this final fold and create an outer reverse fold. To do this, turn the paper inside out and place it along the existing folds, as shown in the pictures.
Place the head on the body. If desired, you can draw the cat's eyes, nose, and other facial features.
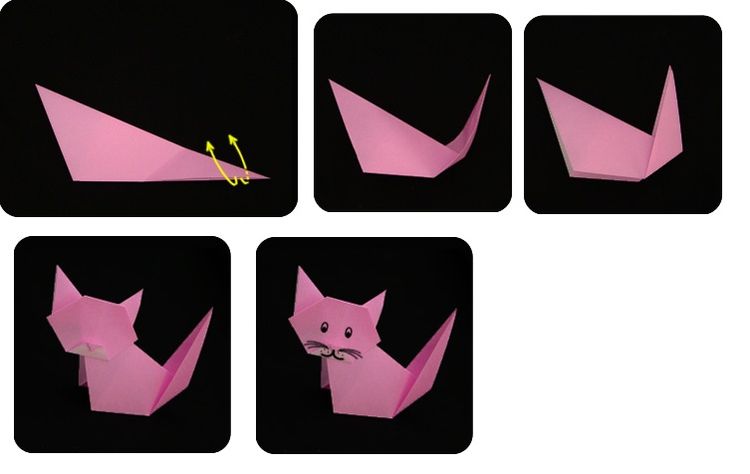
You can also slightly spread out the paper animal's "legs" and stand it up.
Check out our website to see how to do it. plasticine cat, and also how draw a cat's face on a person's face.
Scheme No. 2
This origami cat may seem a little tricky if you don't have any experience, but it's actually not that hard to make.
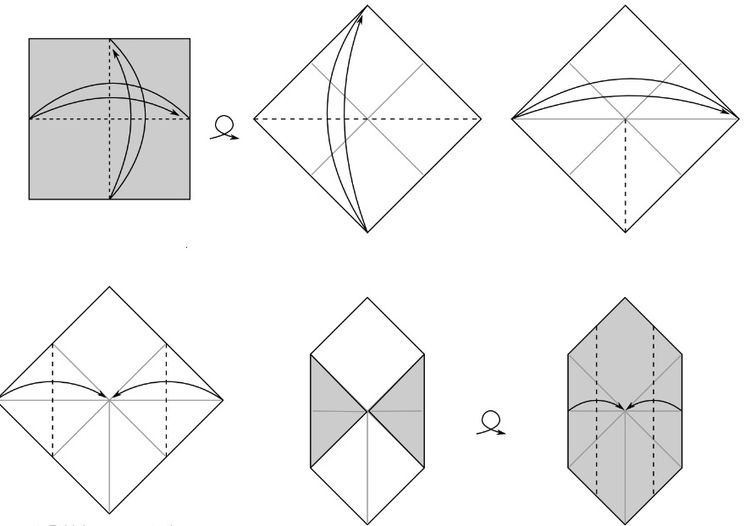
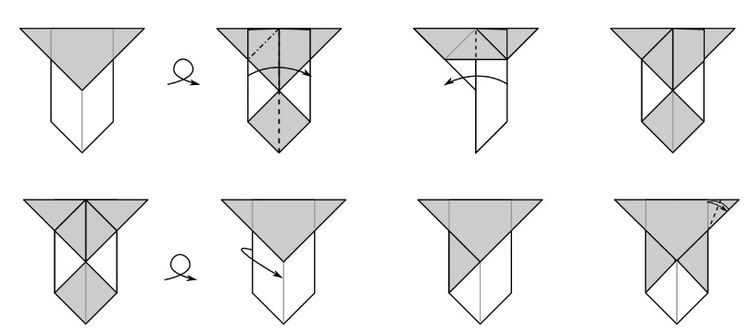
- Take a square sheet of double-sided paper. The white side should be facing you. Fold the paper in half and unfold it in half, facing both directions.
- Fold the top and bottom corners to the center.
- Fold both parts of the sheet to the center along the dotted lines shown in the photo.
- Unfold the folds made in the previous step.
- Fold the sheet in half.
- Fold the right side to the left, then unfold. Use the resulting folds to create a squash fold.
- Fold and unfold the model along the dotted lines.
- Make a petal fold using the folds created in the previous step.
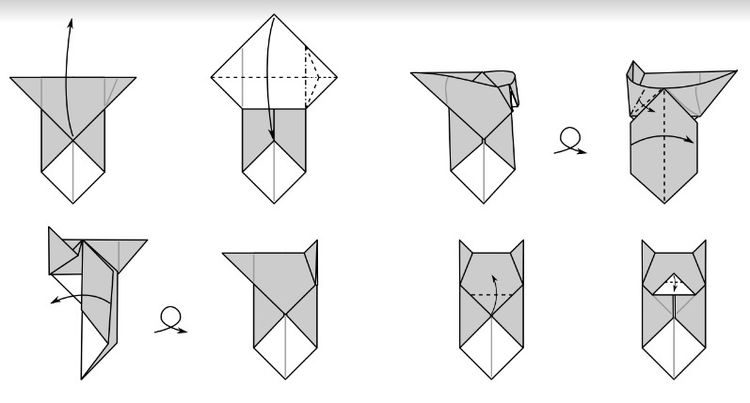
- Fold the top corner of the paper along the dotted line. This will form the base of the animal's face.
- Create 2 folds at the corners to form the ears.
- Make another fold to form the mouth.
- Fold and unfold the left side of the model along the dotted line.
- Make an inside reverse fold using the fold from the previous step.
- Make another inside reverse fold along the dotted line to create a tail.
- Fold the left side of the model back along the dotted line.
- The finished paper cat should look like this:
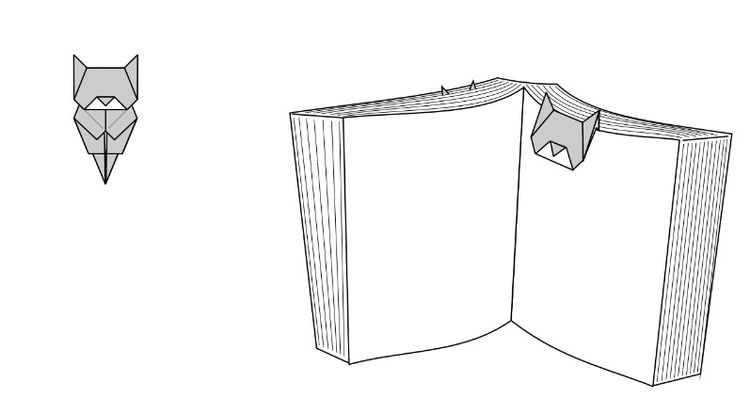
A master class on creating an origami cat bookmark.
This model is also useful because it can be used as a bookmark. The assembly difficulty level is medium, meaning you need to know basic paper folding techniques. The craft will take about 7-10 minutes to complete.
Step-by-step instructions:
- To make an origami cat, take a 10 x 10 cm square double-sided sheet of paper. Place it with the colored side facing up and fold it vertically and horizontally.
- Turn the blank over so the white side faces you and position it at an angle. Fold and unfold the square diagonally.
- Then do the same with the bottom half of the sheet (follow the dotted lines drawn in the diagram).
- Fold the left and right corners to the center.
- Turn the model over with the colored side facing you.
- Fold the left and right sides along the dotted lines so they meet in the center.
- Fold the top corner down, opening up part of the piece at the same time.
- Turn over to the other side.
- Fold the valley along the dotted line.
- Make a valley fold again.
- Turn the model over.
- Transfer the left half to the right, while folding the left corner inward.
- Unfold the previous fold.
- Repeat steps 12-13 on the right side.
- Turn the sheet over.
- Flip the left back forward to change color.
- Do the same with the right side.
- Make a fold along the bisector of the upper right corner.
- Lift the corner up.
- Lower it, folding the right corner inward along the existing folds. This will give the model volume.
- Turn it around.
- Fold the left side over the right. Make an inner fold for the future cat's ear and smooth the piece down.
- Fold the left side back into place. Turn the piece over.
- Repeat steps 18-23 on the other side.
- Make a valley fold along the dotted line.
- Fold it into a valley (this will be the cat's nose).
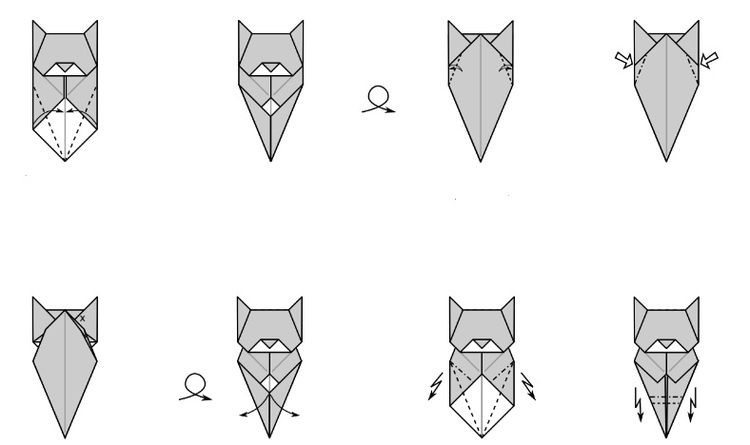
- Make a valley fold along the dotted lines.
- Turn the workpiece over.
- Fold and unfold the sections under the ears.
- Open both corners.
- Insert both sides into the pocket. Turn the model over.
- Unfold the bottom folds.
- Pleat-zipper.
- Finish with a zipper fold to the inside.
The bookmark in the shape of a cat is ready!
Simple origami cat for kids: video
Read also:


Add a comment