
How to make a paper cat
Don't know how to make a paper cat, and your child has been assigned a craft at school? Origami, the ancient art of folding small paper figures, is the solution. It's a great way to develop fine motor skills and spatial thinking. A childhood hobby often becomes a lifelong one. The simplest figures are animal faces.
Classic origami
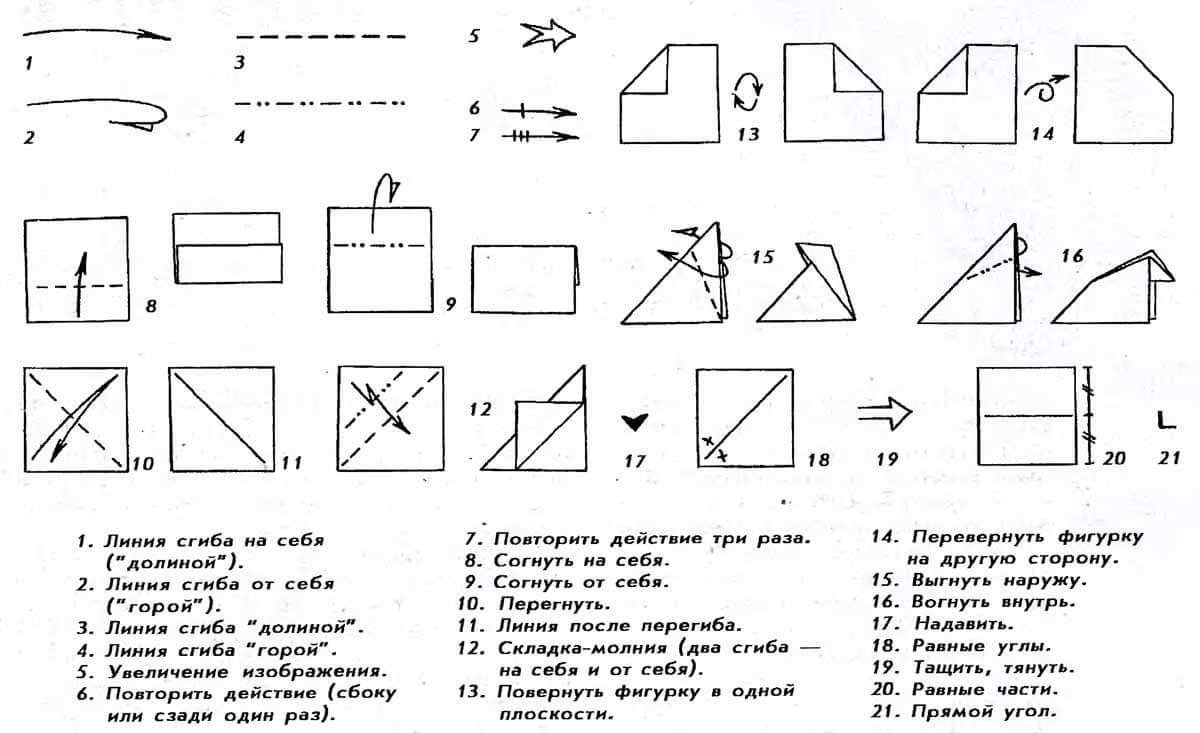
Even a 3-4-year-old child can fold a paper cat. You'll need a small sheet of paper or a napkin. If you're just learning this technique, use a stencil template, which shows the process diagram. Dotted lines indicate fold lines, and arrows indicate the direction.
The first paper craft is a cat face with pointy ears. It takes 5 minutes to make and will give your child all day of fun.
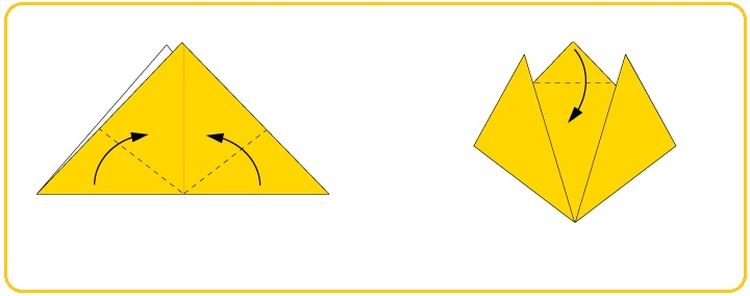
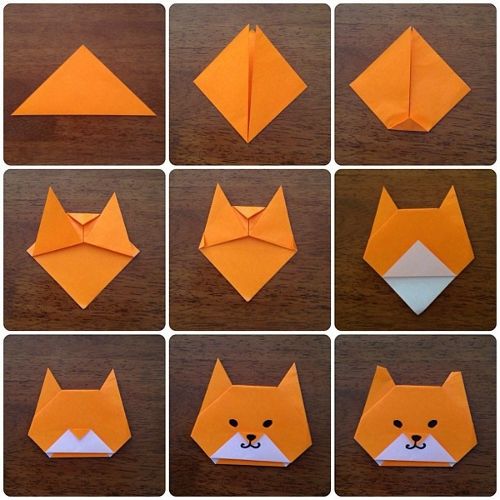
Take a square sheet of paper, preferably special craft paper. If you don't have any, regular office paper will do. Fold the square diagonally, then fold the resulting triangle in half.

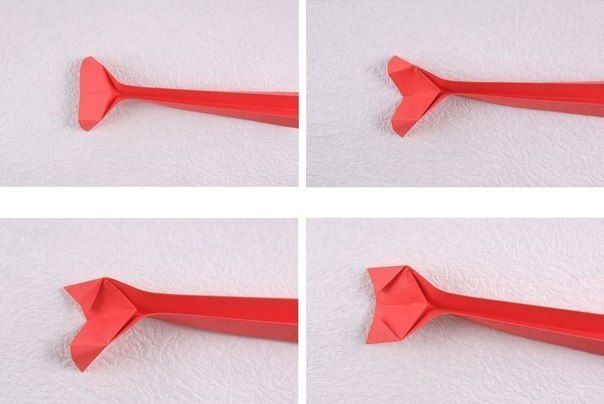
From the base of the midline, draw a 45-degree angle and fold the corners along the bisector. These will be your cat's ears. Fold the top corner back to create the kitten's forehead.
Origami cat The paper craft for kids is ready. All that's left is to paint the face, which your little one will love to do.
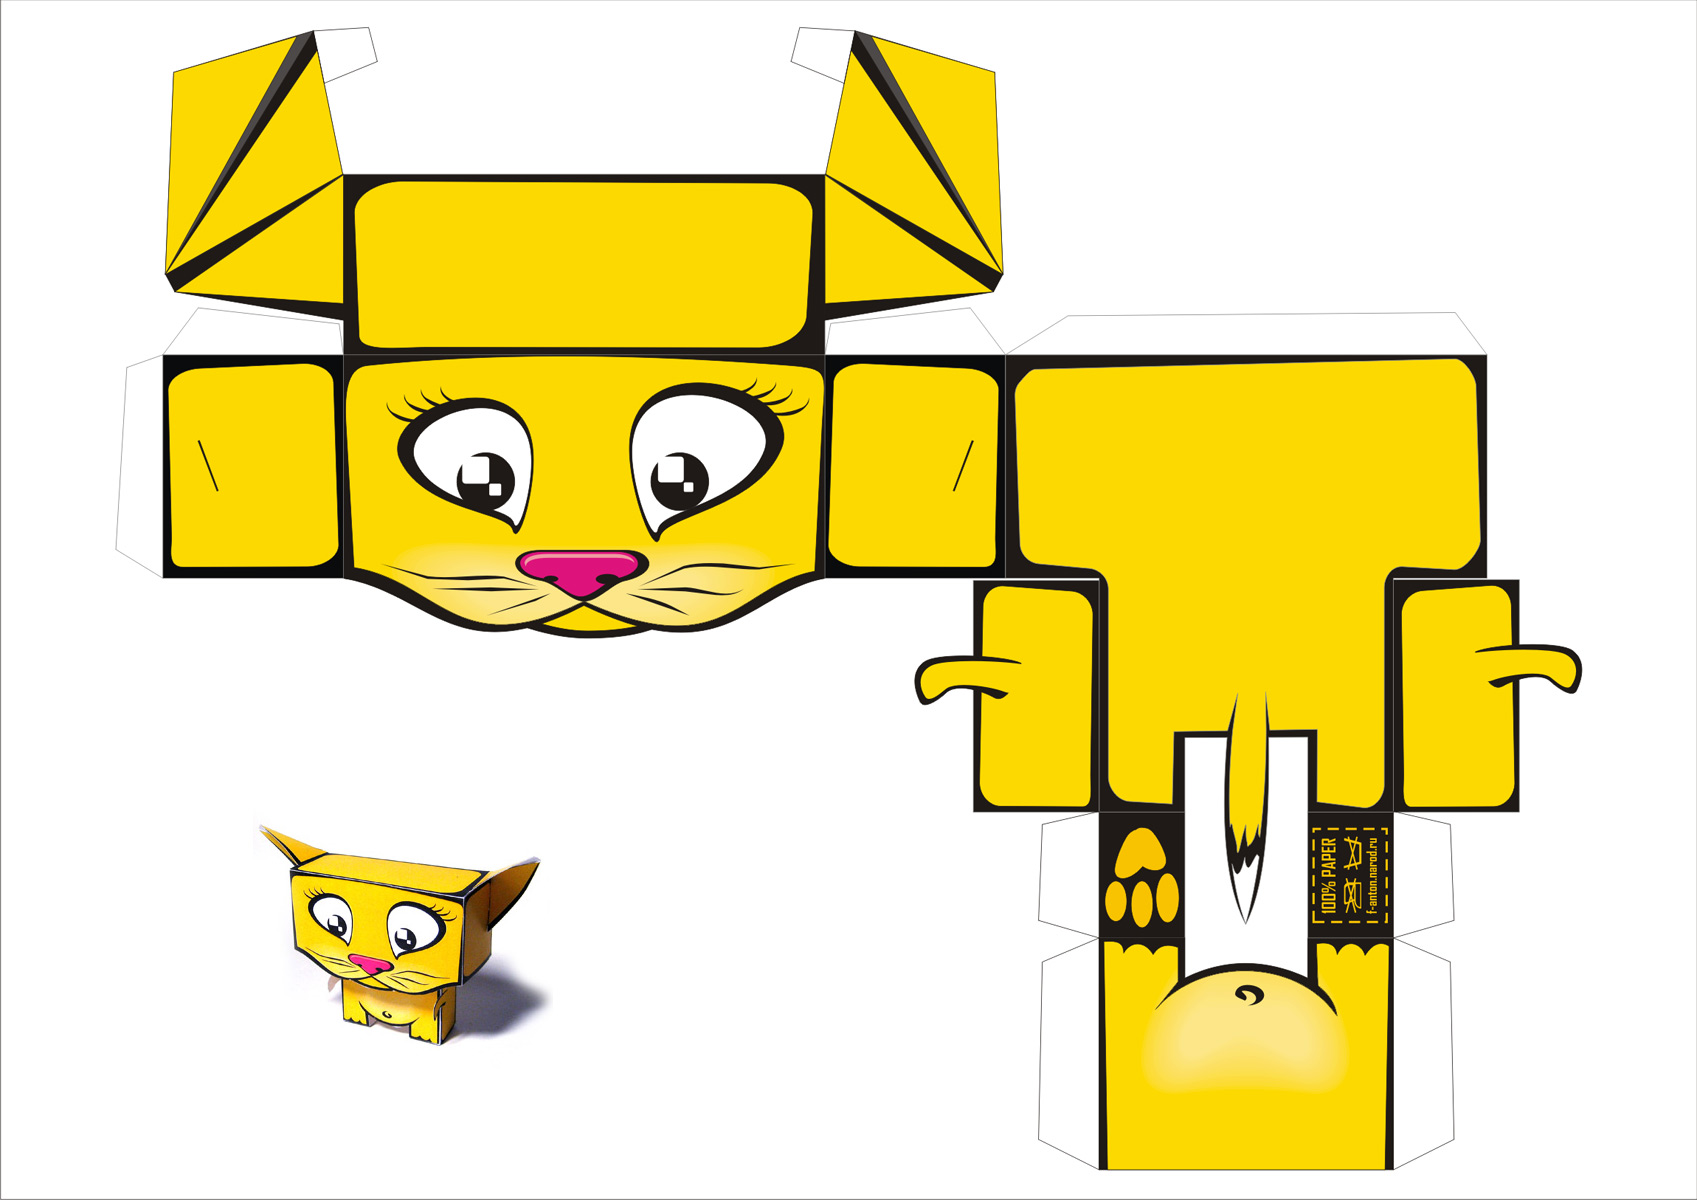
Now we'll learn how to make a round cat face with our own hands. This figurine can be used for finger puppetry or worn on a body to create a paper toy.
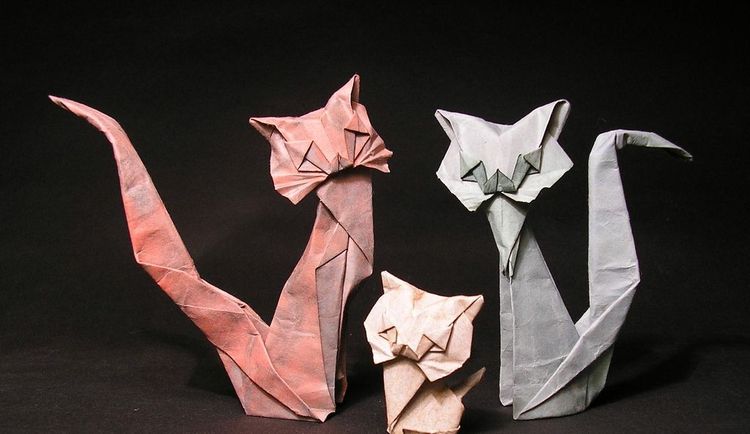
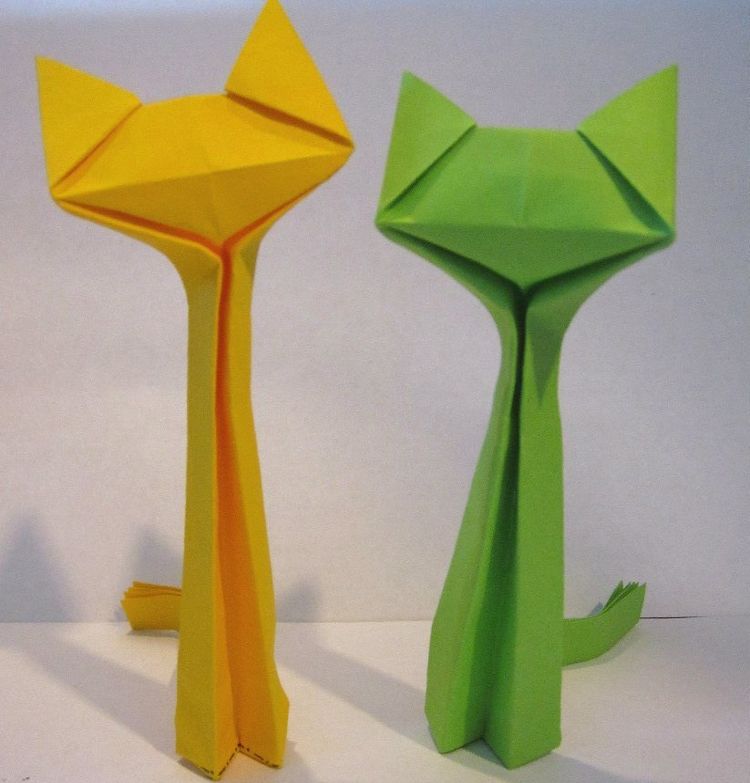
You can easily make a 3D cat using simple origami techniques. Kids love kittens folded using Joe Nakashima's design.
You can make cute cats with large, voluminous heads from a small square sheet of paper. Thick, colorful sheets are best for this. The diagram shows how to make a cat step by step.
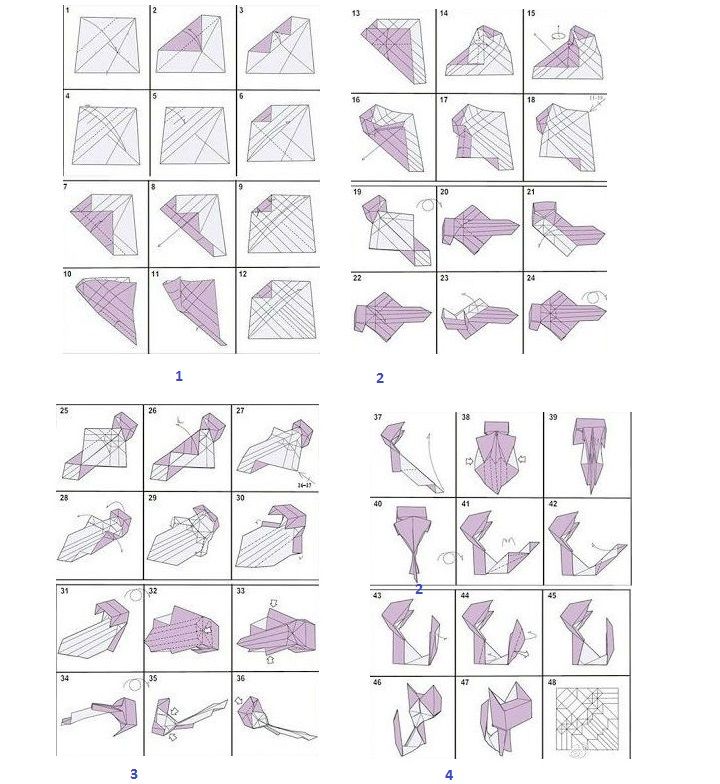
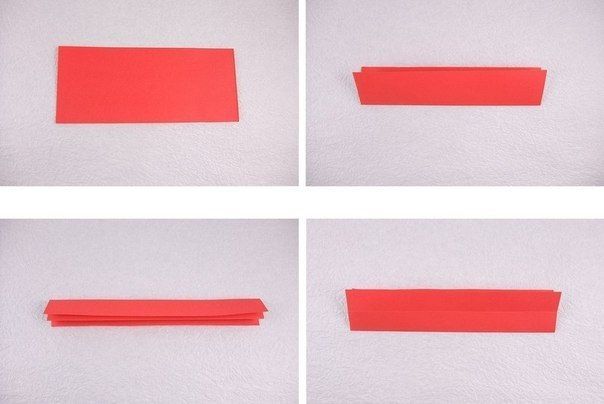
This cute kitty can be made from an A4 sheet of paper. A child is unlikely to be able to complete this craft on their own; they'll need some adult help.
To do this, fold the sheet in half. Cut off 10 cm of the resulting rectangle and work with it. Fold each half in half again, folding the edges toward the center.
After this, the blank is unfolded. The fold lines must be clearly defined. The left corner of the sheet is folded into a triangle, aligning the side and top edges. Unfold the corner and mark the acute angle in the triangle. Carefully fold the sheet along the fold lines to form a small box.
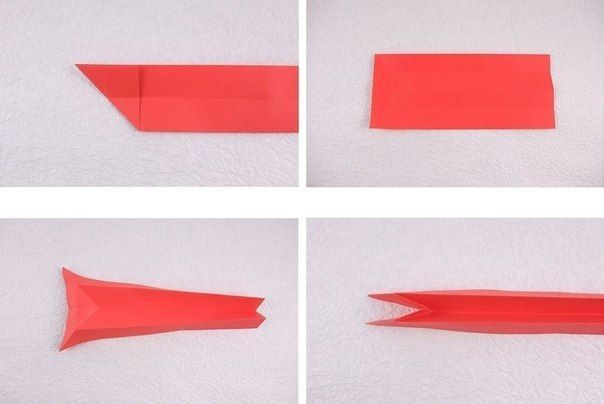
Place the piece on its side and fold one half upward along the fold line, leaving the head (triangle). Do the same with the other half. To form the head, turn the cat so it faces you. Press along the fold lines and fold the ears.
Then bend the body in half to give the cat a graceful appearance, and fold the tail back. Unfold everything again and fold it horizontally.
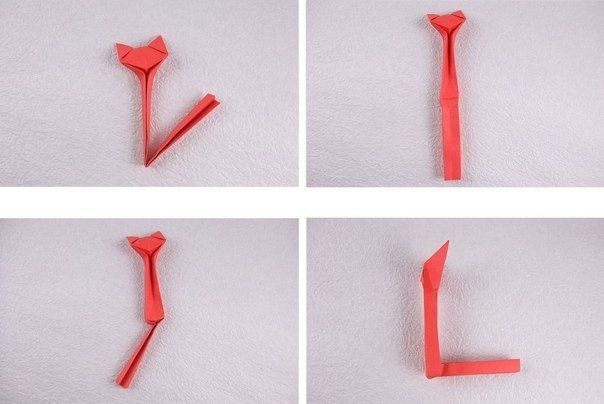
The final step is to slightly unfold the bottom part and curl the tail. You can add eyes and a nose to the figure.
Crafts with glue and scissors
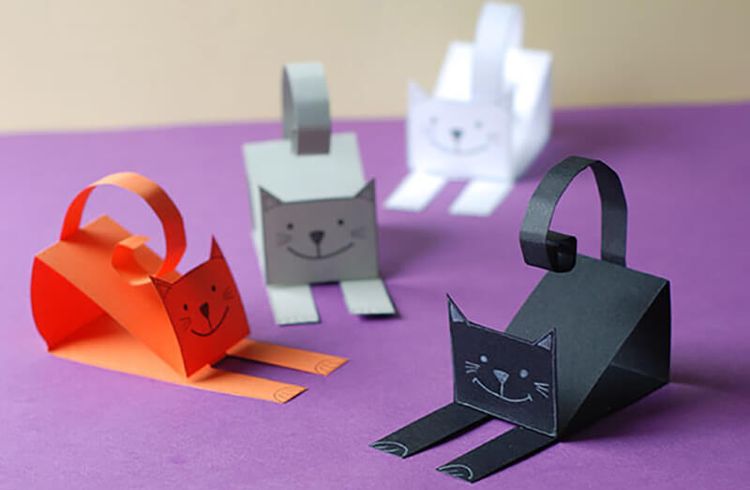
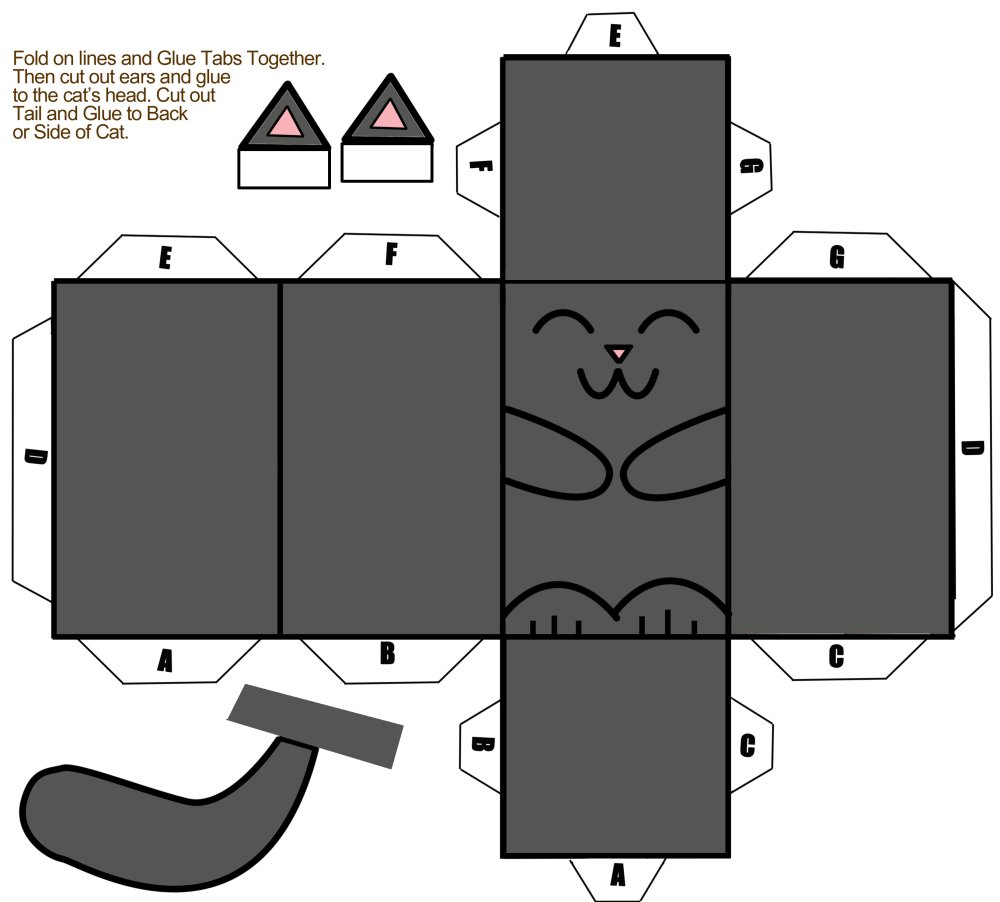
They're made of cardboard. The figures are three-dimensional and more durable. You'll need to print out a paper template for cutting out the cat in advance. Cardboard is more difficult to work with, so to ensure a smooth cut, use a stencil.
You'll need a narrow strip of cardboard, glue, and scissors. Place the template, mark the fold lines, and cut out the legs. Fold the template. Glue the head to the body. Roll a small strip of paper into a tail and glue it in place.
Video:
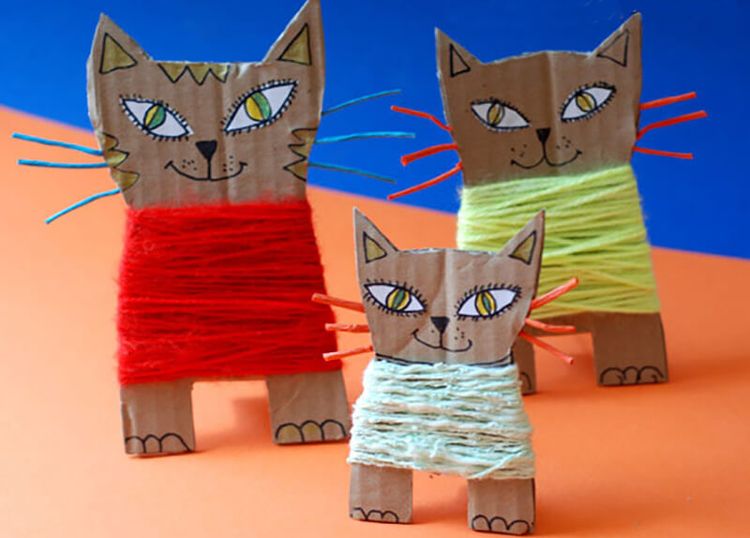
Or you can make a real fluffy cat. You'll need a small sheet of cardboard and some yarn. The fluffier the yarn, the softer the toy will be. Draw a cat's silhouette on the cardboard and cut it out along the outline.
To make the figurine stand upright, shape the legs and fold the extra rectangle between them back to create a stand. Apply glue to the body and begin wrapping it with thread. The figurine is ready.
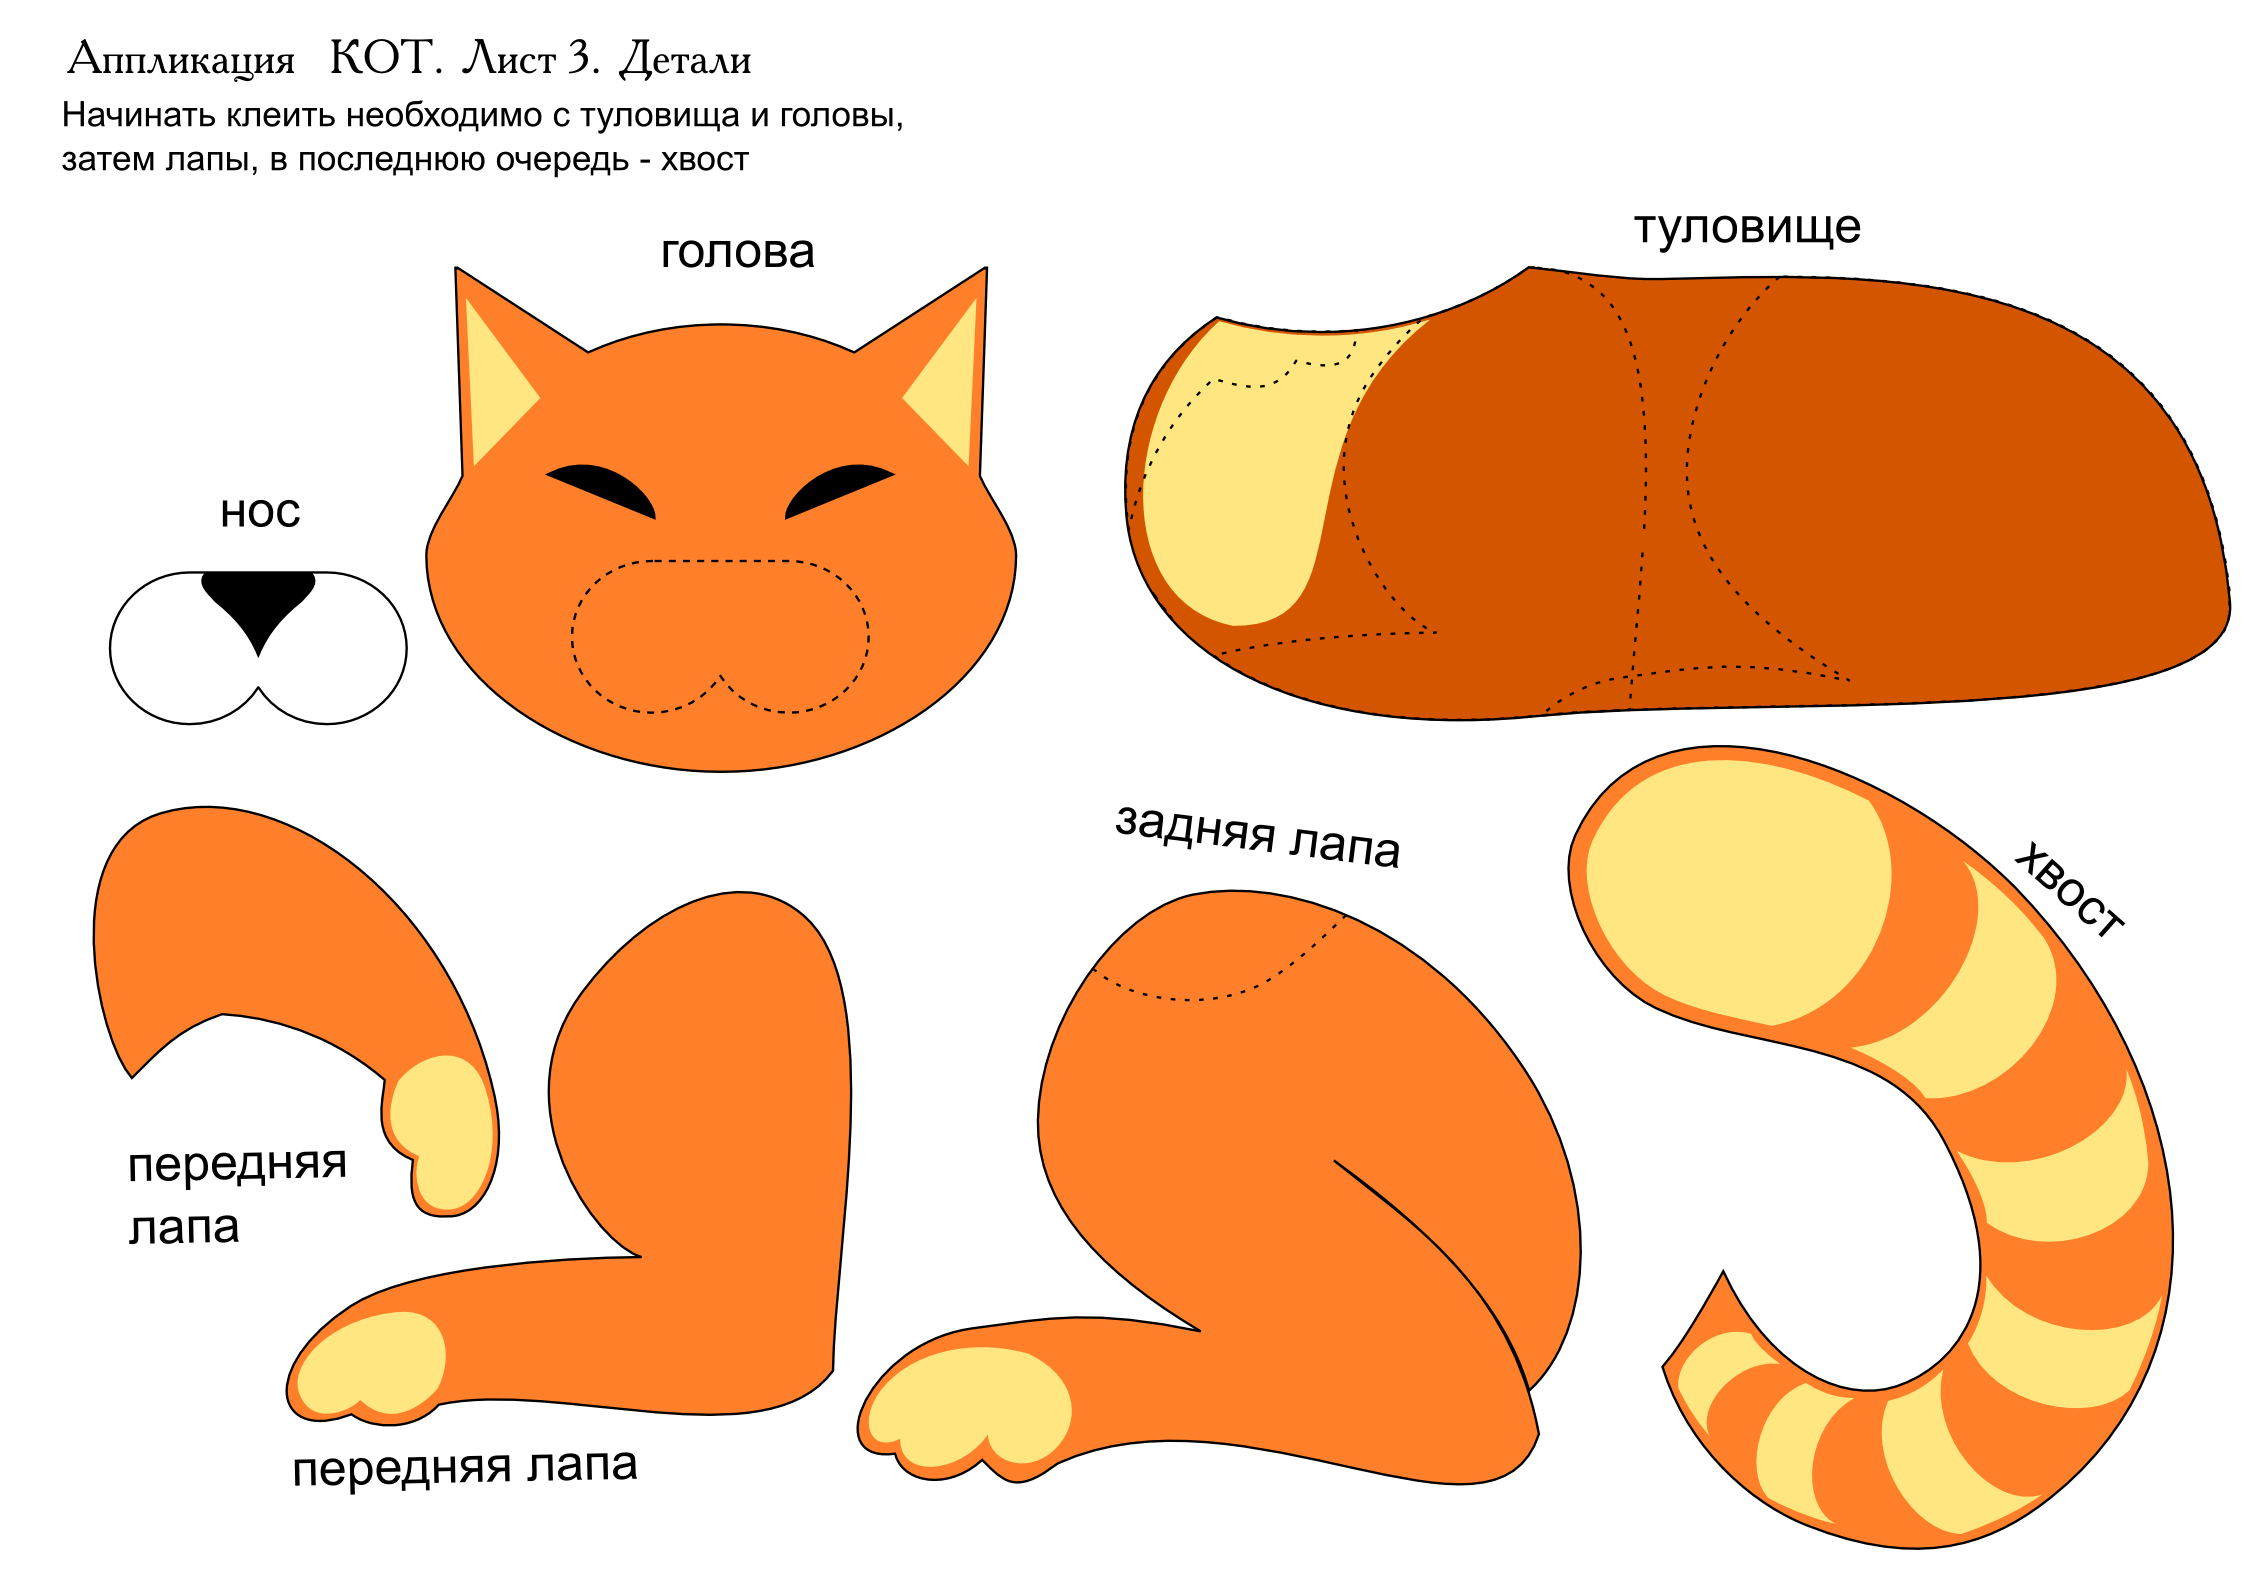
We suggest downloading several stencils that can be used to make a paper cat toy:
Read also:


Add a comment