
How to draw animals step by step
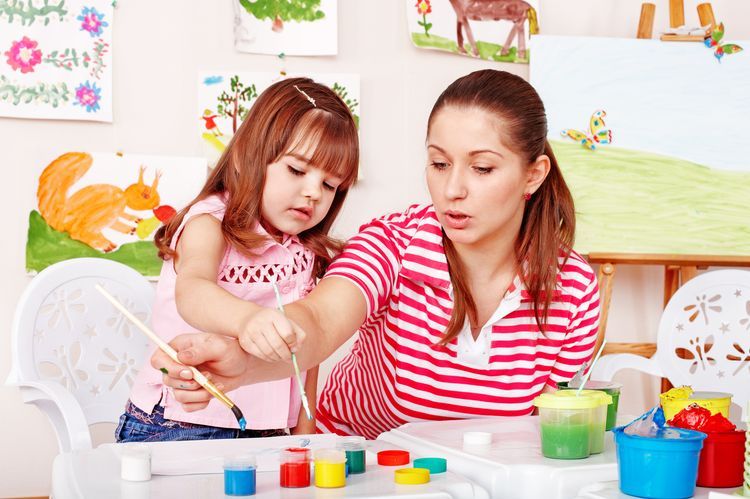
Children become interested in drawing from the earliest years of life. Most children's drawings are of animals. To ensure that the image a young artist creates on paper matches their intended image, they need to be shown and taught how to draw animals step by step.
Content
Drawing Animals Step by Step: A Few Tips
When teaching your child the basics of drawing animals, consider three key points:
- Explain to him what shapes the chosen animal will be made of. Most often, it's a circle, oval, or rectangle.
- Show your child how to make sketches that will later be filled with details.
- Start your training by mastering the simplest subjects. Only after mastering the technique, move on to more complex objects.
To create simple drawings, you will need paper, a medium-hard pencil and a soft eraser, as well as a set of colored pencils for coloring the finished picture.
Animals from circles
The easiest way to teach a child to draw domestic and wild animals is to use simple circles as a base. This option is perfect even for preschool-age children.
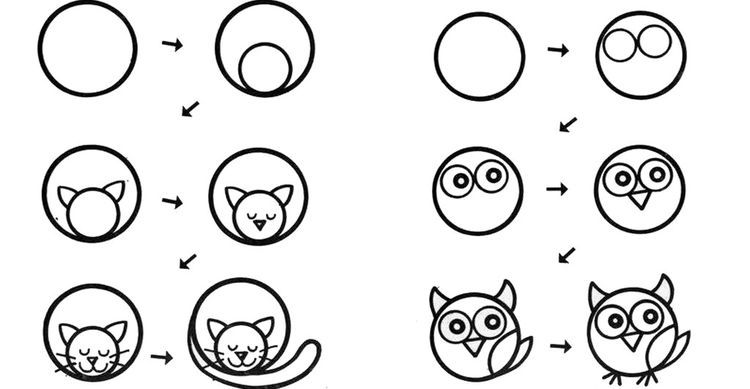
See how easy and simple it all is! Each drawing begins with a simple circle. The young artist's task is to strictly follow the sequence of steps.
Start with the simplest characters – a puppy and a goldfish, or a curled-up cat and a cute owl

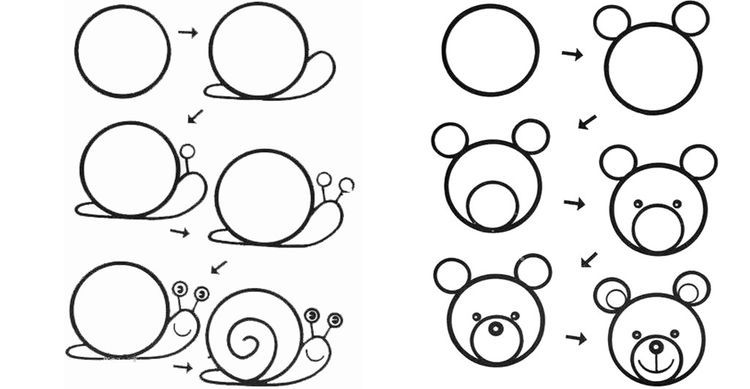
Want to depict a forest dweller? Why not draw the face of a friendly bear cub? Note that the basis of the drawing is simply a few circles of varying diameters.
How about this snail with a house on its back? To create it, you only need to follow six simple steps: draw teardrop shapes for the body, add eyes and a mouth, and create the spiraling shape of the house.
Drawing the underwater creatures isn't particularly difficult. Just add a head and limbs to the round body.
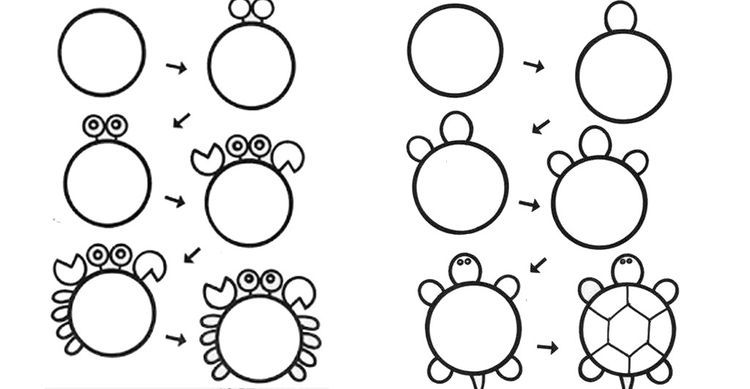
The idea behind these designs is simple: a circle simply "grows" ears, noses, eyes, paws, and tails. Using this simple technique, it's easy to depict not only animals but also beloved cartoon characters, such as Smeshariki.
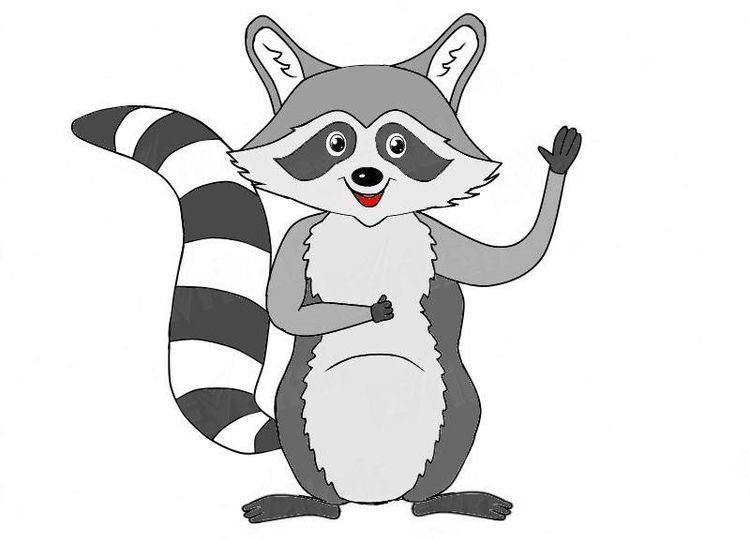
Let's draw a raccoon
Some animals amaze with their unusual appearance and funny habits. Beautiful raccoons are one of them. These adorable creatures captivate with their skillful depiction of emotion. We offer two options for drawing these animals.
cartoon character
This easy-to-execute version is easy to master for both beginning artists and young creative individuals.
We will do the work with a simple pencil, and remove minor flaws with a soft eraser that does not leave marks on the paper.
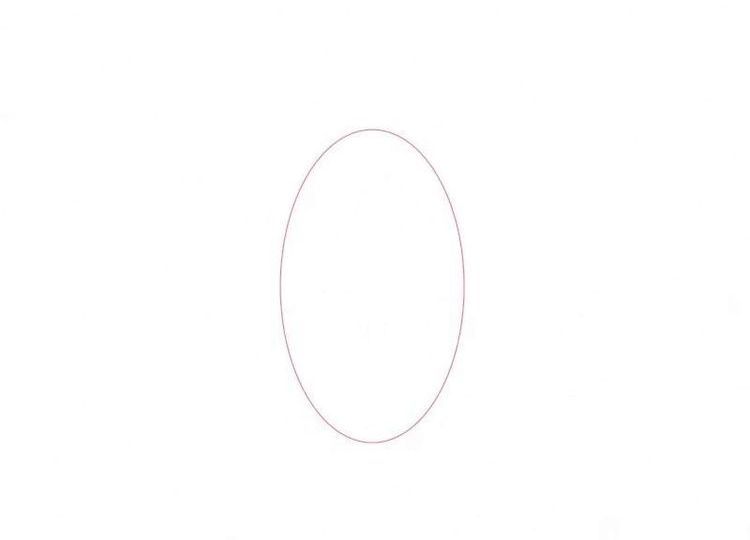
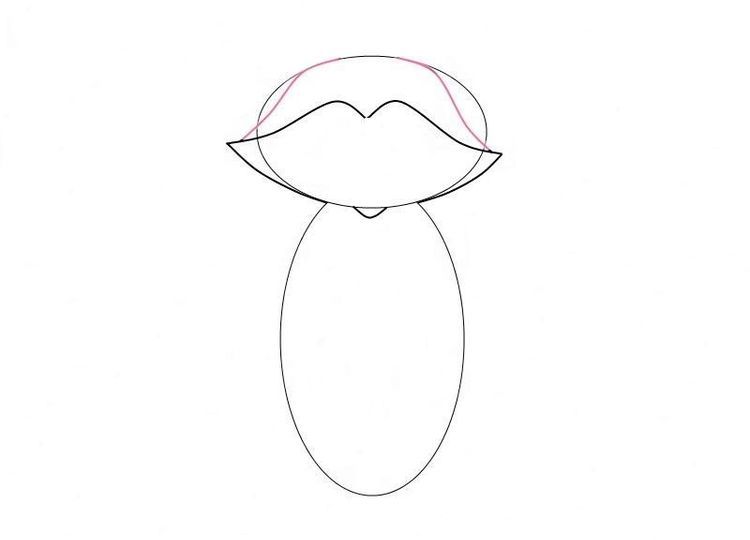
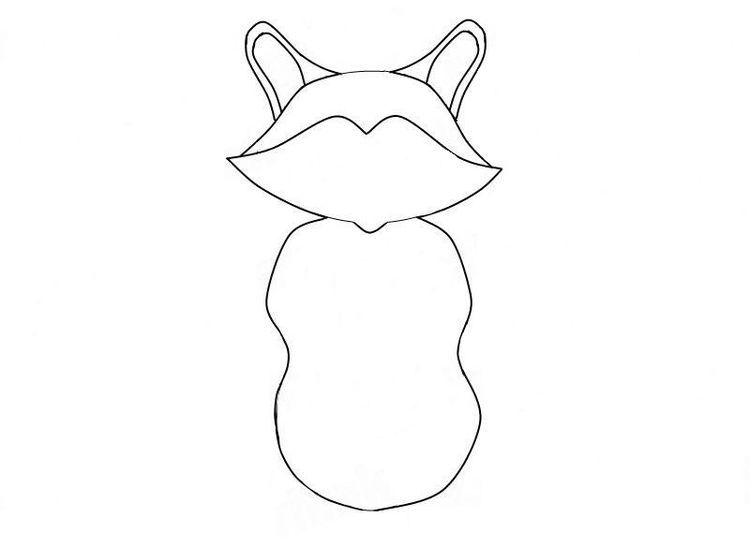
- First, let's draw the body. To do this, draw a vertically elongated oval outline in the lower half of the sheet, closer to the center.
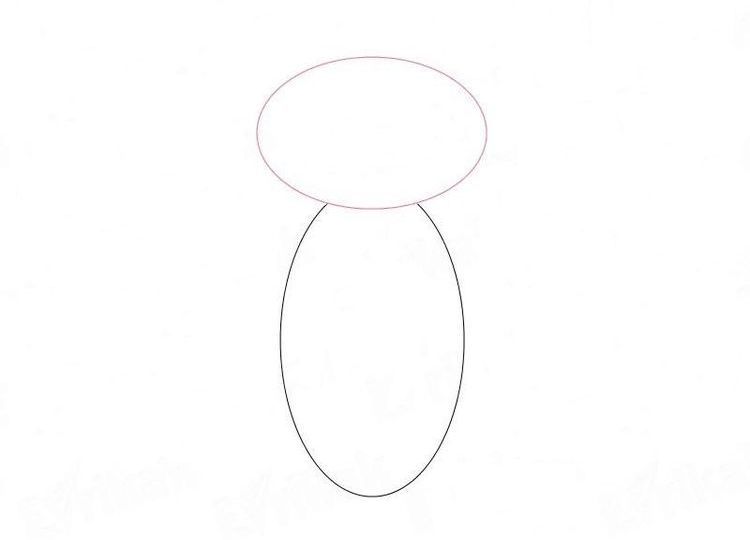
- Let's mark the location of the head. Initially, it will be an oval, slightly elongated horizontally. Its size relative to the body is 2/3.
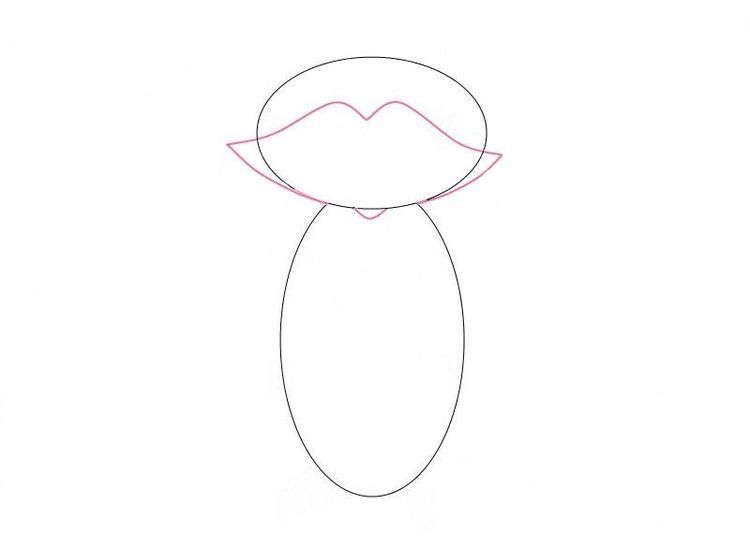
- We'll define the head, highlighting the muzzle area. Its shape will resemble large lips. We'll give the side contours of the top of the head a concave shape. The result should resemble a cap. We'll erase the initial oval contours with an eraser.
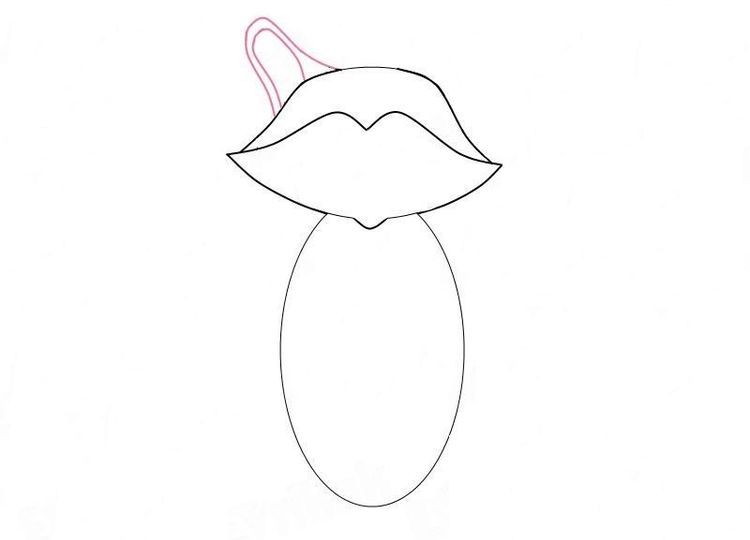
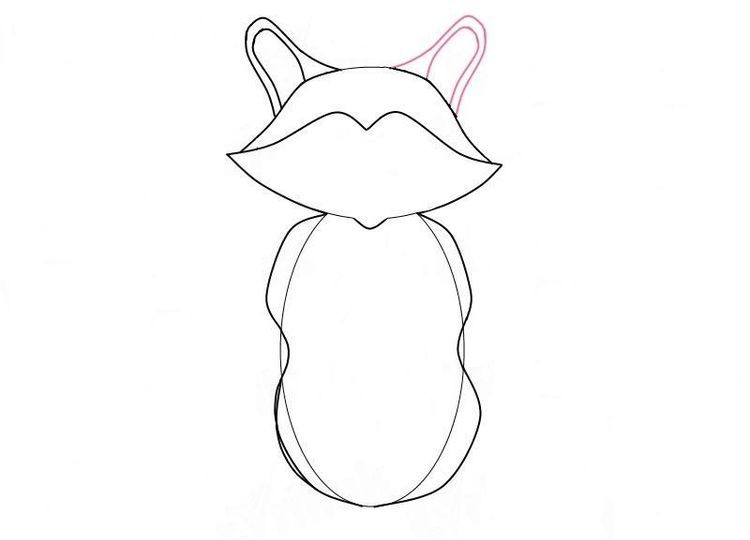
- Draw the raccoon's ear at the top of the head, slightly offset to the side. First, draw the outer contour of the auricle, then the inner one.
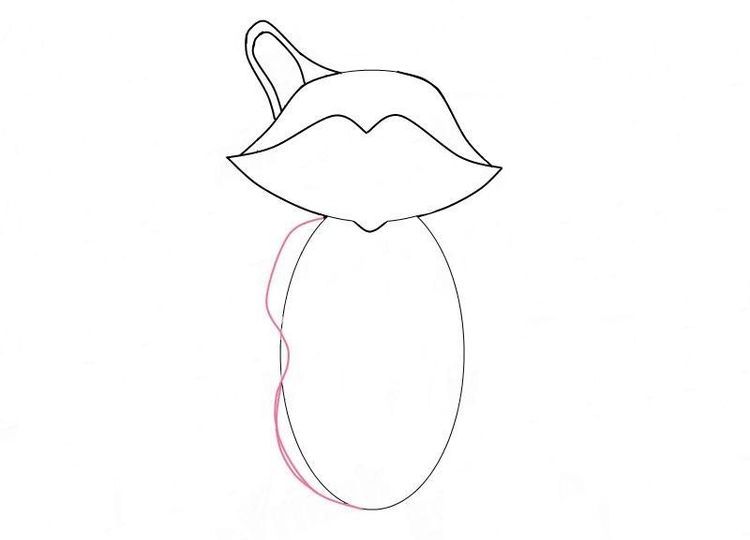
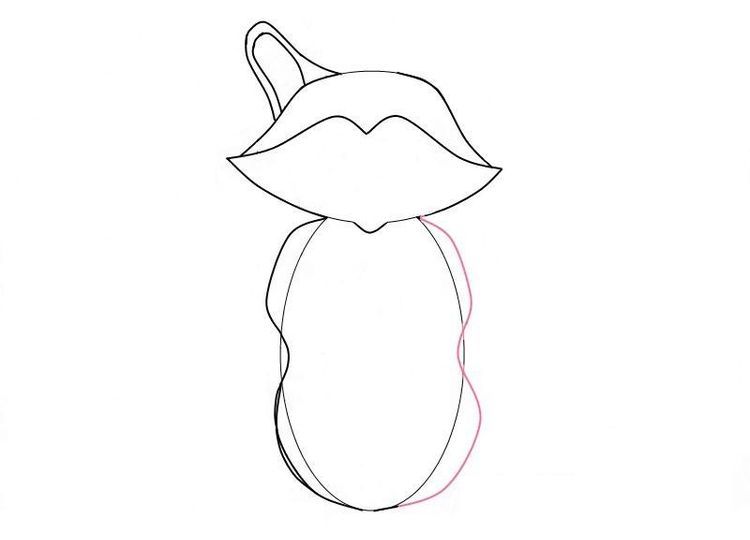
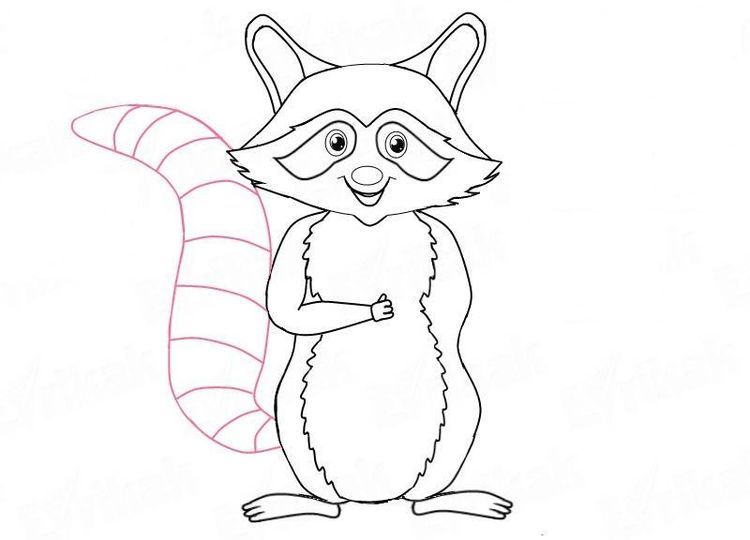
- We give the animal's body the correct outline. Draw the left side as a curved line, tapering slightly toward the center. Draw the right side using the same principle. Both lines should be symmetrical.
- Draw the animal's second ear, placing it at the same angle. Carefully erase the oval that originally marked the body.
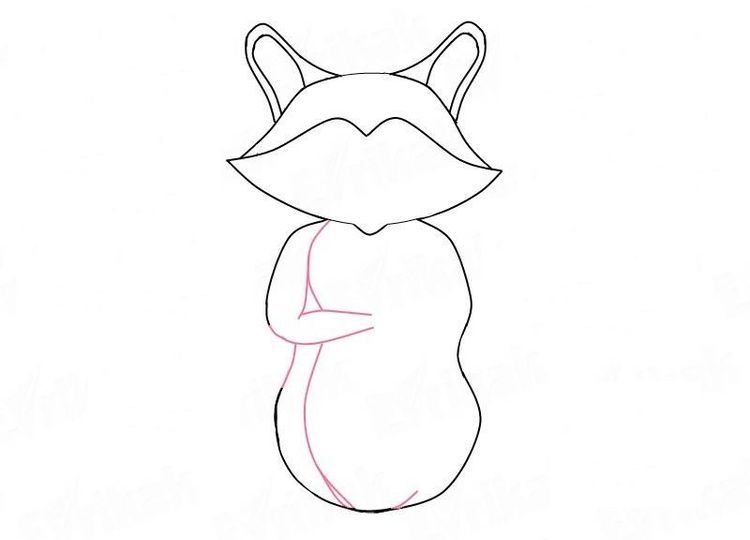
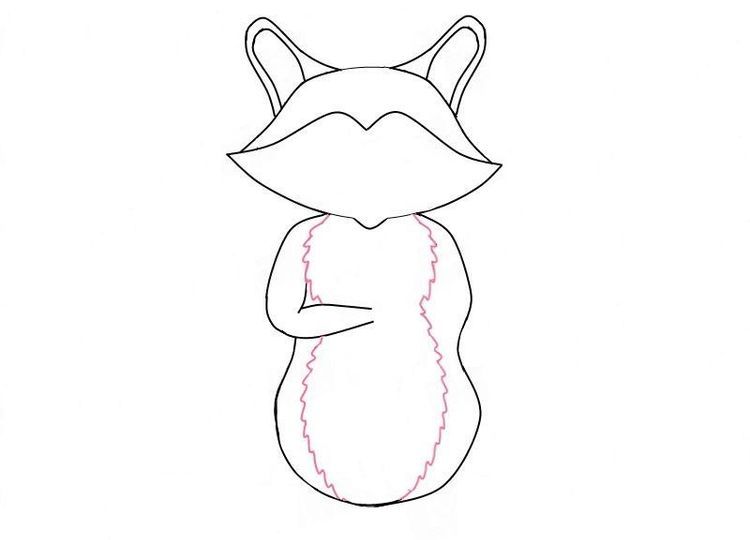
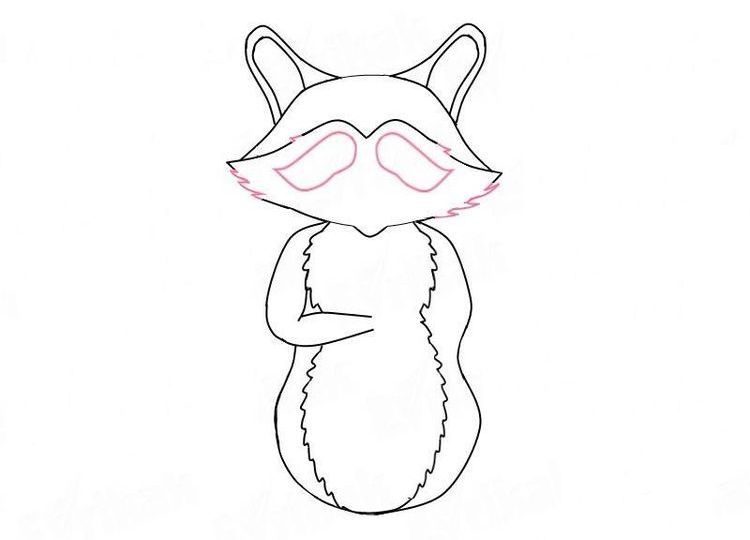
- Let's begin drawing the limbs. Draw the left paw bent at the elbow and pressed against the body. Next, draw a thin inner line, the outline of which duplicates the outer one.
- The inner line is the outline of the raccoon's fur. It should be done in a wave or zigzag pattern.
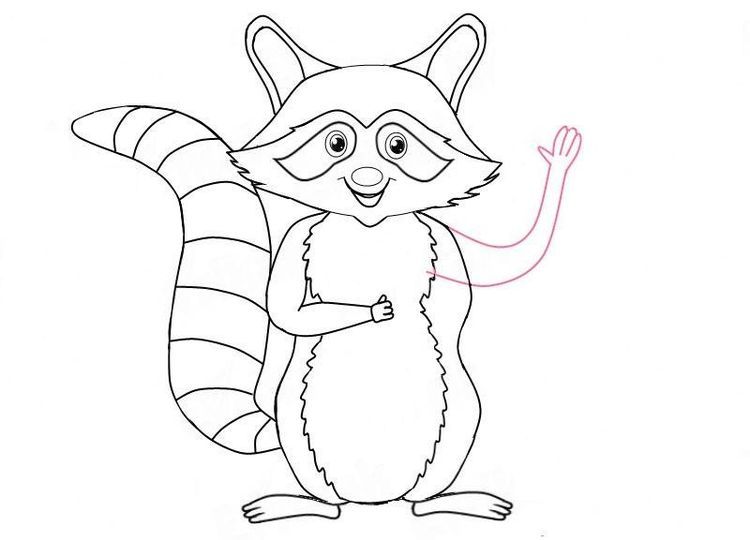
- Let's shape the raccoon's face. To create a contrasting color, we'll outline the eye area with two teardrop-shaped shapes. Inside the spots, we'll draw round eyes. Below them, we'll place an oval nose and a smiling mouth. We'll outline the cheeks with jagged lines, imitating strands of fur.
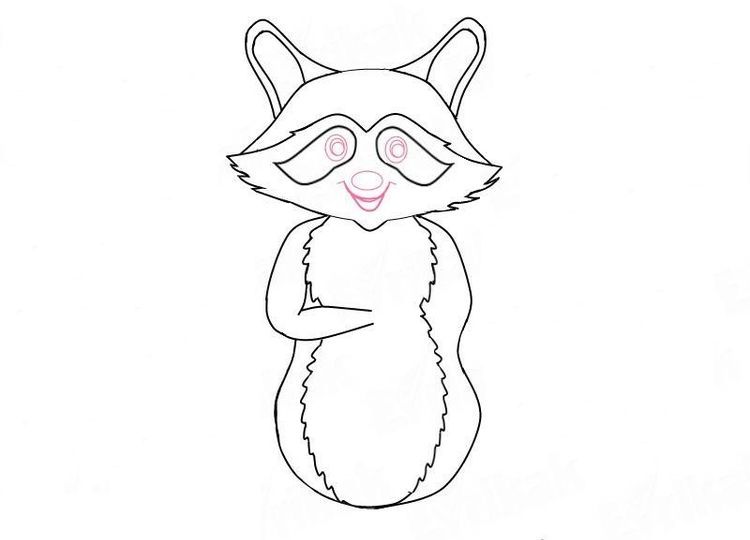
- Draw the raccoon's lower paws. They resemble human paws in shape, only much smaller. Draw them as feet turned outward. Draw the hand of the upper paw as a clenched fist.
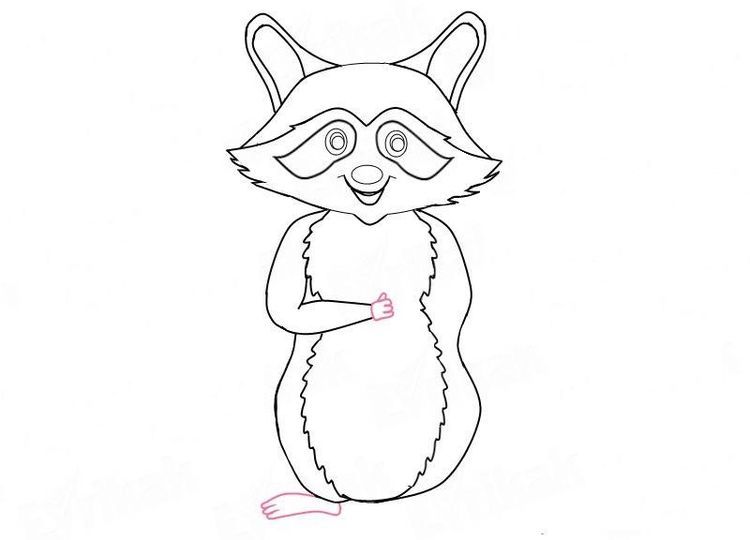
- The raccoon's tail is as long and fluffy as a squirrel's. Its main decoration is its colorful coloring. The final step is to draw the right paw. It is raised upward in a friendly greeting.
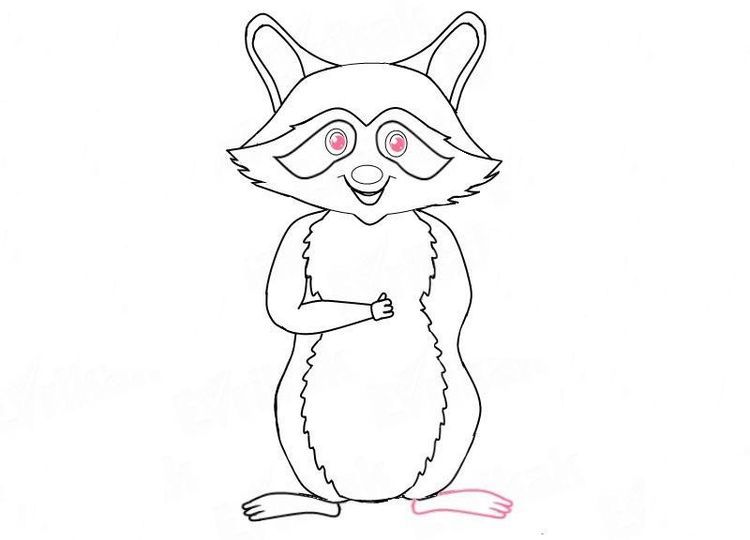
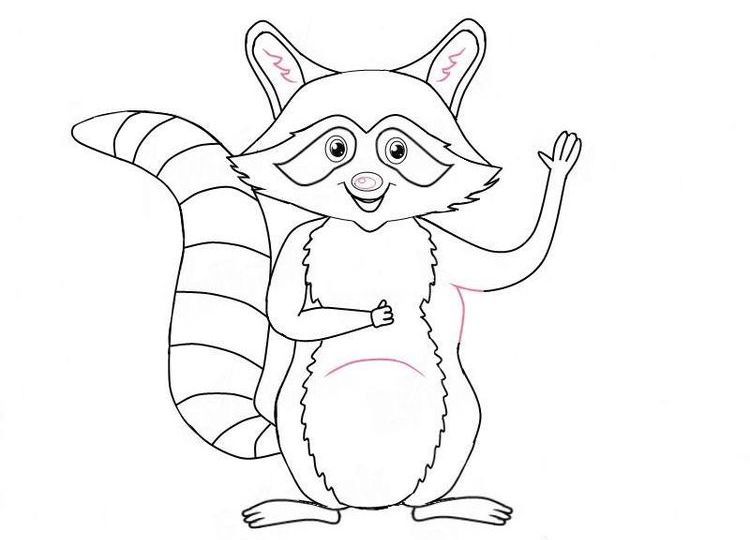
The drawing is almost ready. All you need to do is remove unnecessary lines, draw in small details, and color it using black, white, and gray shades. If you like, you can even make the raccoon resemble the beloved character Rocket from Guardians of the Galaxy.
Realistic image
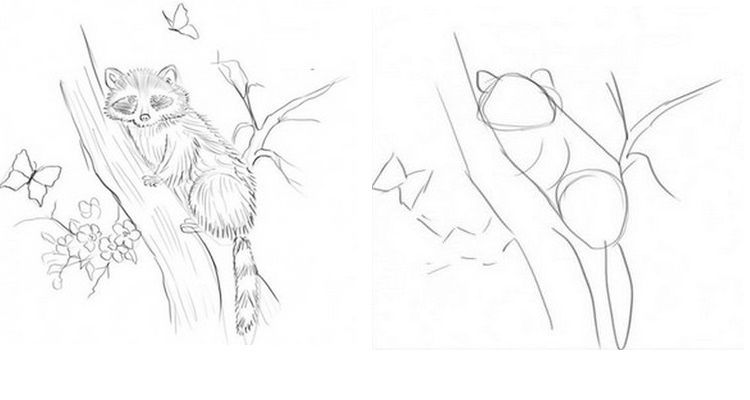
Want to portray a true forest dweller? Follow the guide below, which details how to draw animals step by step.
First, we mark the locations of the main elements on the sheet. We outline the tree trunk and the branch the raccoon is perched on.
Let's outline the dimensions of the animal's figure. Draw the body as an oval, and the thigh and head as circles. Using the outline of the circle as a guide, sketch the animal's muzzle, which widens toward the bottom. Place the eyes and nose in the center of the oval.
We outline the body contours, using broken lines to simulate fur. To achieve the desired effect, they should be placed close together, following the direction of the animal's fur growth. Using similar lines, we outline the front and hind legs and the drooping tail.
Let's begin drawing the face. The steps are clearly presented in the step-by-step diagram.
At the final stage, all that remains is to draw the fur on the rest of the body, and then highlight the fingers with tiny claws.
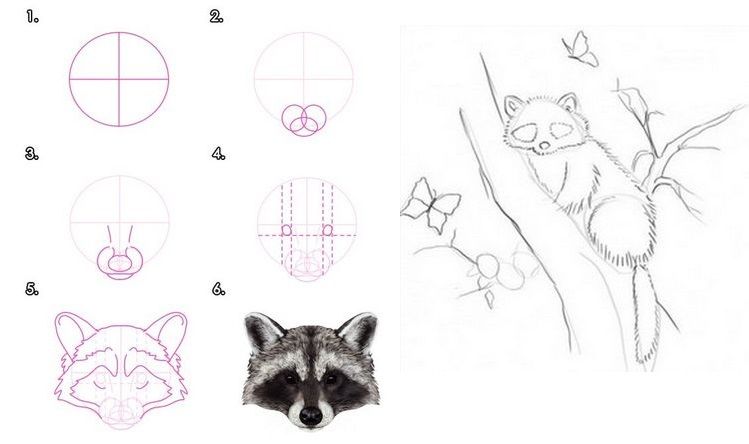
As a finishing touch, add texture to the tree trunk. Complete the picture with blossoming foliage and fluttering butterflies.
The lion is the king of beasts
Members of the feline family rarely leave anyone indifferent. These graceful animals, even as pets, delight children, keeping them company during playtime. But true delight comes from the truly royal feline – the lion. So why not invite your child to draw one?
Cute lion cub
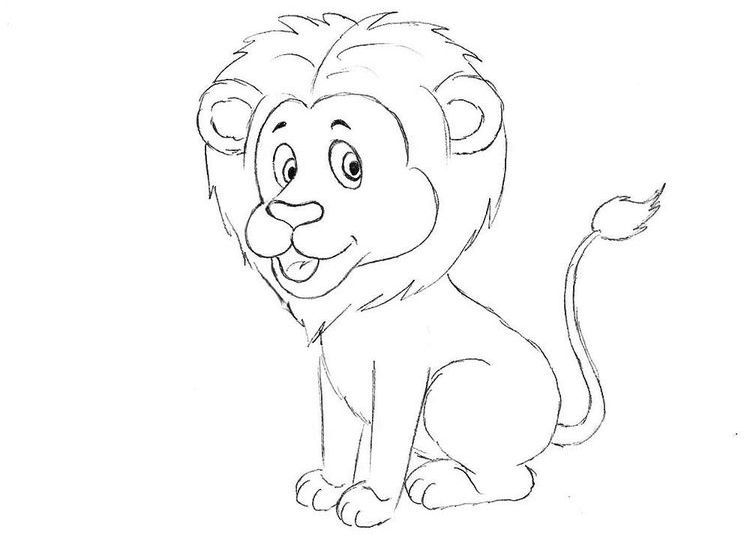
There is nothing difficult about drawing a charming lion cub:
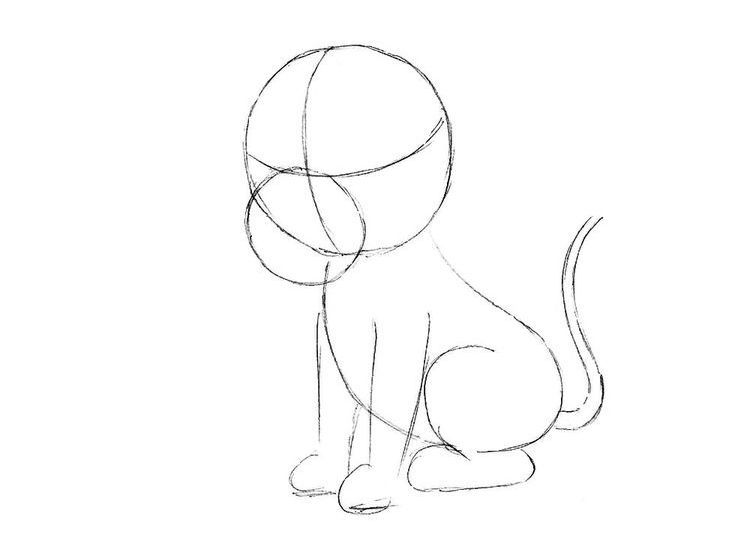
- First, draw the animal's head at the top of the sheet, closer to the center. It's circular. To maintain symmetry, divide the circle into four sections using two perpendicular lines. Since the lion cub is positioned at an angle, make the lines curved and slightly offset to the left.
- Draw the body next to the head, depicting it as a slightly curved oval. Note that the oval is slightly narrower at the top and wider at the bottom. Draw a smaller circle near the lower quadrants of the head. This will form the basis for the future muzzle.
- At the bottom of the oval, we define the area of the hind legs, and at the top, we outline the upright front legs. All legs are tightly attached to the body. Draw the tail using two parallel curved lines.
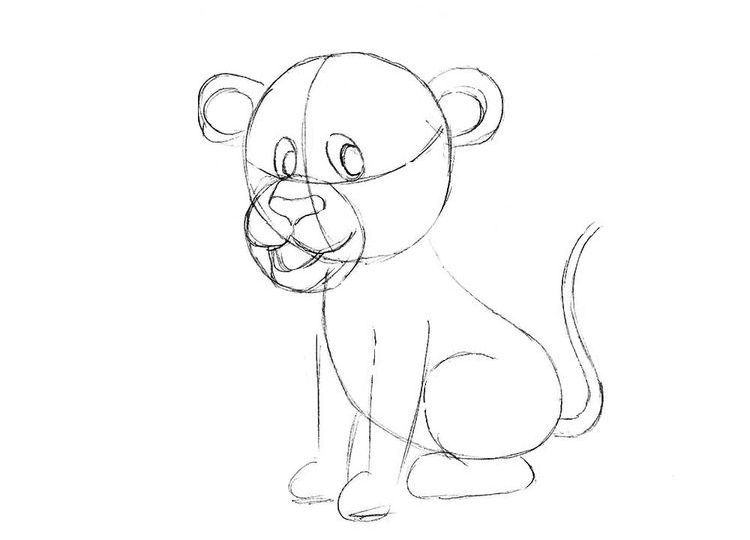
- Let's draw the details of the face. To do this, draw the contours of the eyes closer to the intersection of the lines, and a little lower, the heart-shaped nose. Draw the lower jaw to the circle of the head, first forming the outer contour, then the inner contour—the lower lip. Around the nose, extending to the lower jaw, we outline the cheek area. The cheeks should be symmetrical.
- What could a lion be without a mane? To highlight the shaggy head, draw another circle of slightly larger diameter, 2-3 cm from the outline. Give its frame a jagged shape.
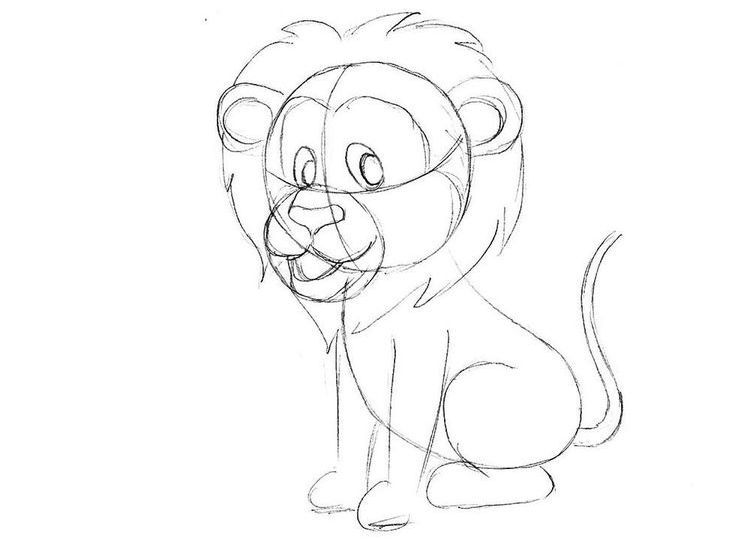
- The final step is to remove the auxiliary lines. After that, draw the tail tuft, color the pupils black, and sharpen the main contours.
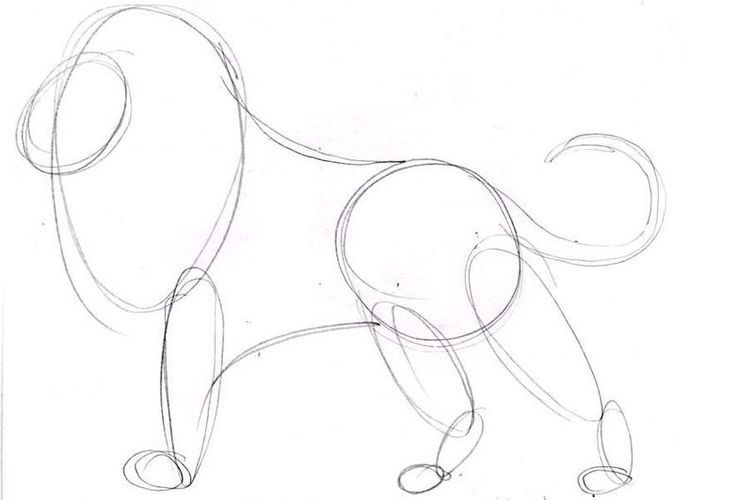
Let's draw an adult lion
Once your child has mastered basic drawing skills, it's time to try drawing a more complex, yet realistic, figure of the king of the beasts.

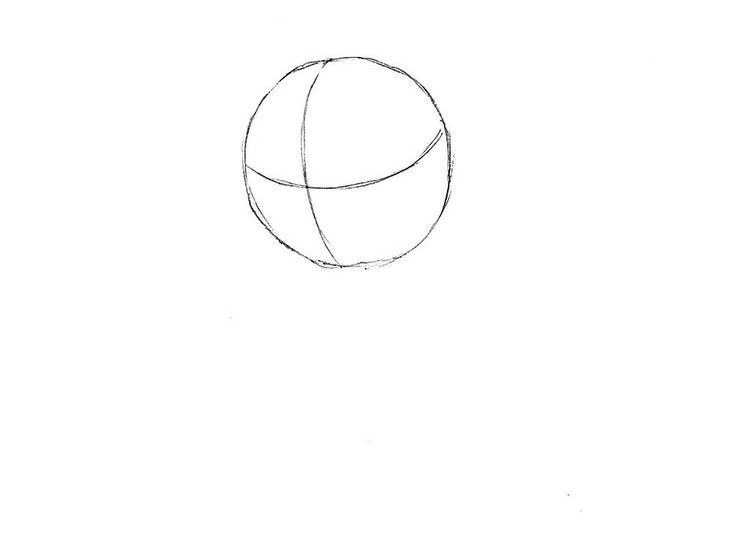
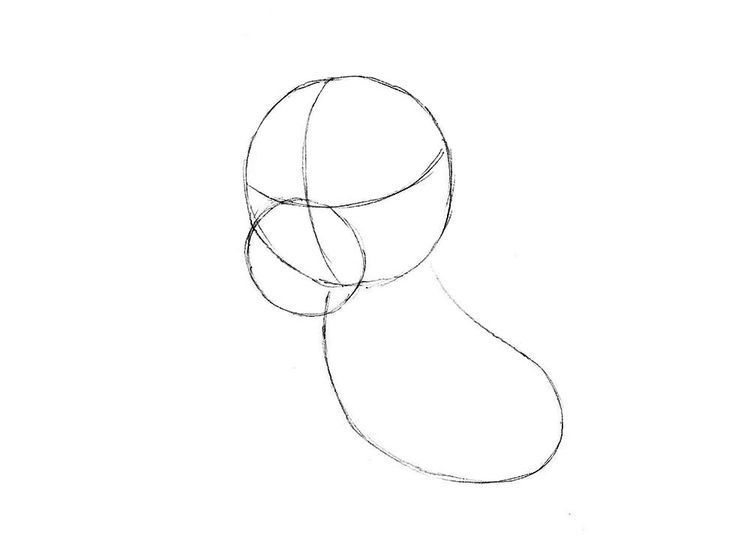
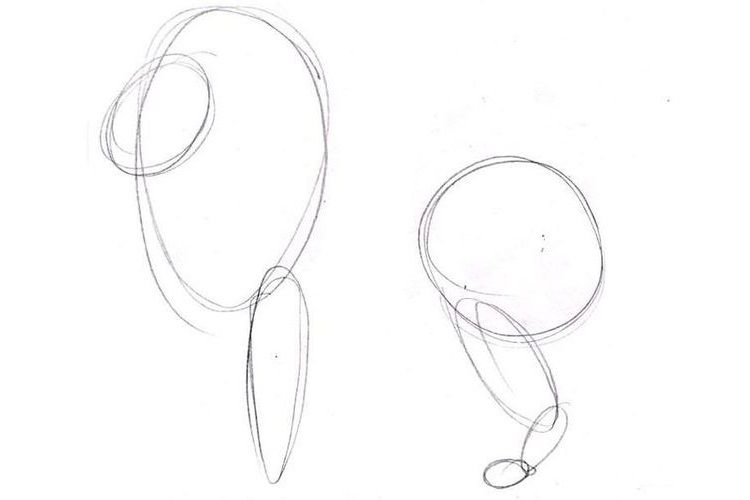
First, divide the sheet into two halves: left and right. On the left, draw the outline of a large vertical oval. This will be the animal's head, framed by a luxurious mane. On the left side of the oval's upper half, draw a circle—the animal's muzzle. Just below the oval, mark the location of the front paw.
On the right side, draw a circle 2/3 the size of the oval. This is the pelvic part of the body. Two connected ovals extend downward from the circle – the bent hind leg.
We connect the main elements of the figure with smooth lines. We finish drawing the hind leg and a long, curved tail. We add an oval to each paw—the foot.
We'll shape the animal's head. We'll emphasize the pointed nose and create a straight line to the brow ridges. We'll create a beautiful, smooth curve to the lush mane. Draw an ear just above the brow ridges.
We outline the second front leg. We make a clearer outline of the thigh area, connecting it to the shin.
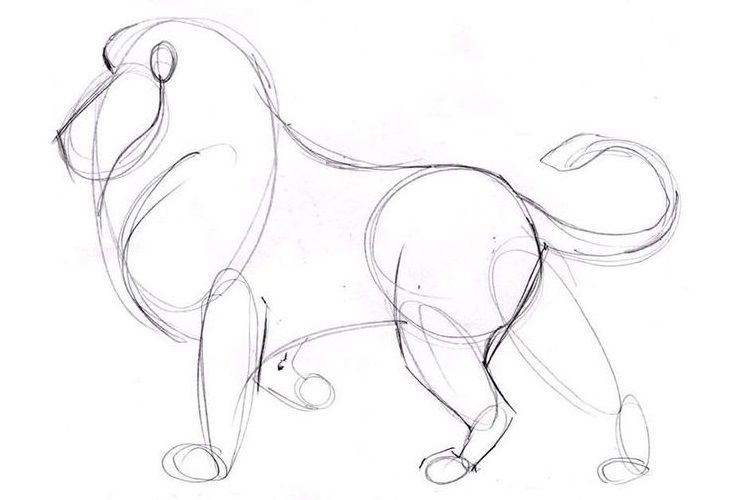
We outline the placement of the eyes and mouth, and sharpen the nose. We highlight the transition from the nape of the neck to the back. Using a curved line, we emphasize the developed chest. We draw the details of the limbs: we highlight the knee joints and the toes.
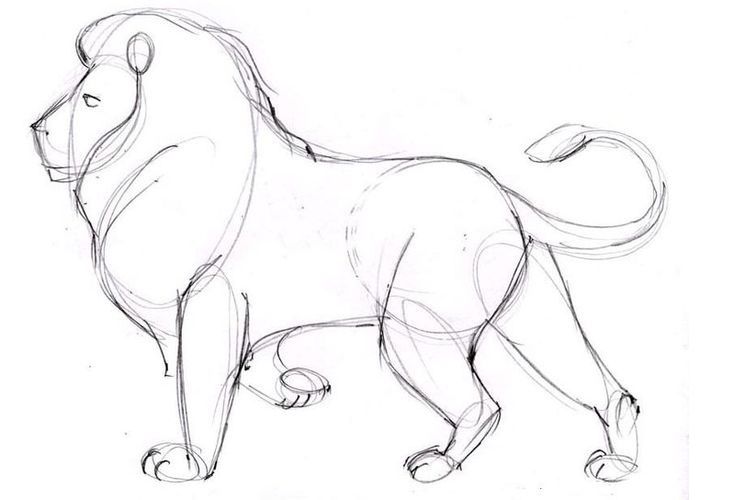
We're defining the lion's mane, creating sharper, more vibrant lines. Parallel, curved lines create a thicker effect.
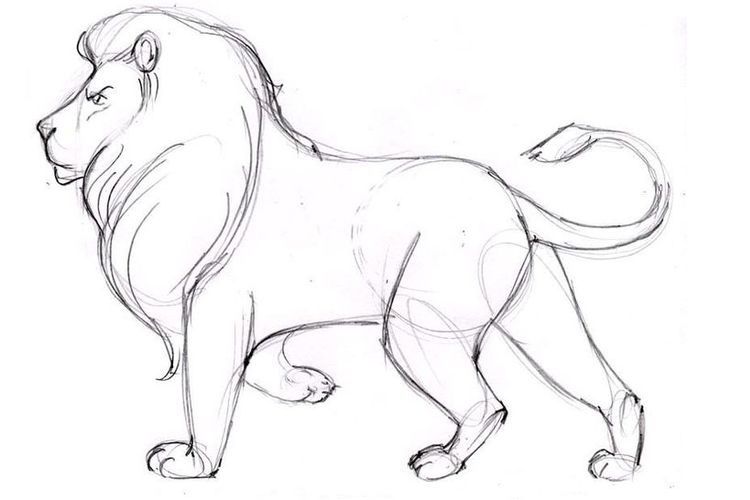
The drawing is almost ready. All that remains is to add some shading. This will add volume and vibrancy to the image.
Finally, a little advice: don't be discouraged if the first drawings don't meet expectations. The main thing is to teach your child to follow the steps and use templates such as lines and geometric shapes. This will help maintain proportions and avoid major mistakes when drawing the animal's elements.
Video tips
How to draw a squirrel:
How to draw a cow:
Read also:


Add a comment