
How to draw cats
Parents of all ages are faced with their child's request to draw a cat. Little ones want to receive coloring book in the form of the wise Puss in Boots, the red-haired mischief-maker from Shrek, or another character from a favorite cartoon, while older children ask for help with schoolwork.
Step-by-step instructions on how to draw cats will help budding artists create their first masterpieces. It's best to start with simple images and only then move on to more complex ones.
Content
Sketches for Beginners
Little ones will love these cute cats. Quick, outline sketches will entertain them while waiting in line or riding public transport. Furthermore, believability, color vibrancy, or shadow depth are irrelevant. Here are some simple examples of how to draw a cat:
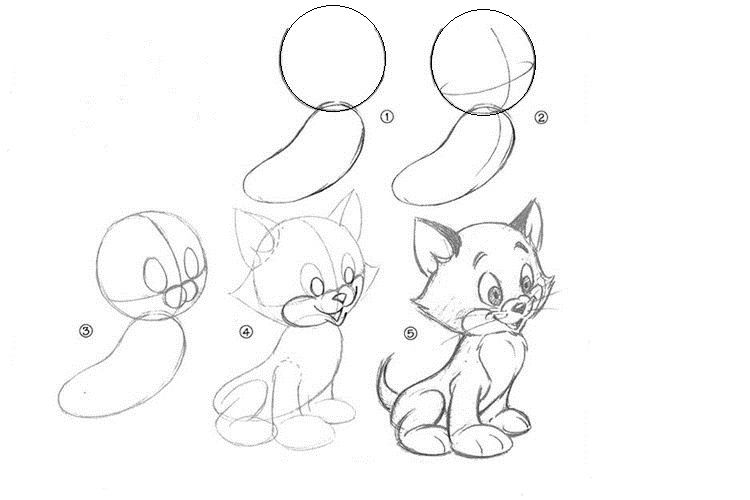
Option 1:
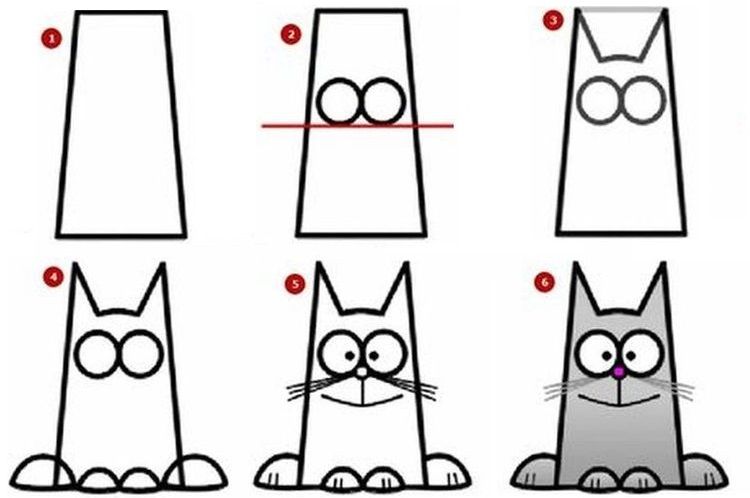
To draw such a funny animal from geometric shapes, you will need a sheet of paper, a pencil or pen, an eraser, and just a couple of minutes of time.
First, draw a trapezoid and mark its center (steps 1 and 2). Then draw the ears and paws (steps 3 and 4), erasing any excess. In step five, draw the pupils, nose, mouth, and long whiskers. Draw claws on the paws. The cat is ready. All that's left is to color it.
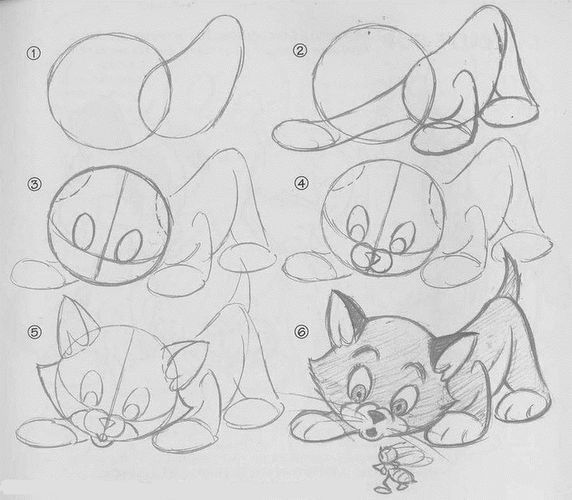
Option 2:

The technique for drawing this cartoon cat is also quite simple. First, the main areas are outlined: the head, body, paws, and tail. Then, the details are drawn: the ears, muzzle, claws, and tail fur. During the final stage, all unnecessary lines are erased, adding clarity to the drawing.
How to draw a cat using pencil
Pencil drawing is beloved by many artists for its lack of unnecessary detail, clarity, and simplicity. Some find it easier than drawing with paints or crayons. Mastering this technique allows for the creation of wonderful, lifelike works. This skill doesn't come instantly, but only after extensive practice, sketching, and trial and error.
Scientists have proven that drawing is beneficial for the psycho-emotional well-being of both adults and children. This process relaxes, helps distract, and gives the nervous system a break. Children develop motor skills, perseverance, concentration, and spatial orientation.
Not everyone will succeed at the beginning, but with time, you'll gain a better understanding of how to hold your hand correctly, control pressure, and understand scale and proportions within the sheet of paper. After six months of regular practice, you'll be ready to open your first home exhibition, and with detailed step-by-step instructions on how to draw cats, this task will be much easier.
Let's start with something very simple. We offer a master class on drawing a kitten:
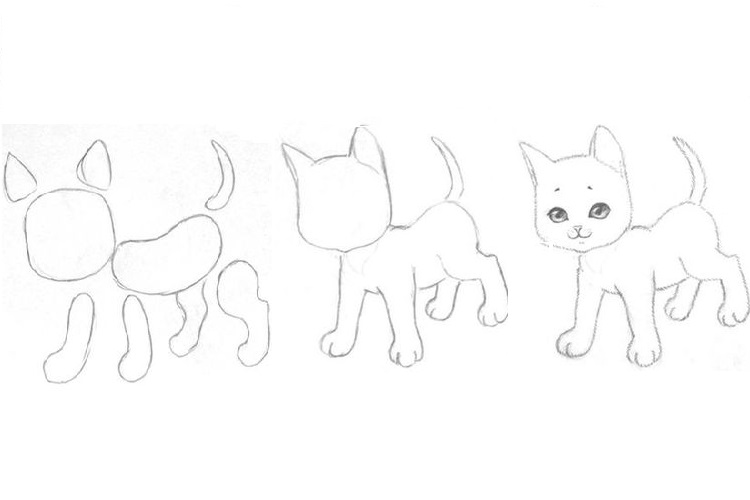
- Everyone remembers from school drawing lessons that a cat's body is made up of simple geometric shapes. The body is oval, the head resembles a flattened circle, the ears resemble triangles with rounded corners, and the tail and paws are elongated ovals. Arrange them on the sheet of paper as shown in the first picture. Avoid leaving large spaces between body parts. Otherwise, the proportions will be off, making it difficult to create a cohesive picture.
- Smoothly connect the drawn figures (step 2).
- Draw the muzzle and mark it. First, divide the head in half. The entire upper part is the cat's forehead. The lower part is further divided into three sections. In the middle section, draw the nose and mouth. The eyes should be positioned so that they form a triangle with the lower border of the nose (step 3).
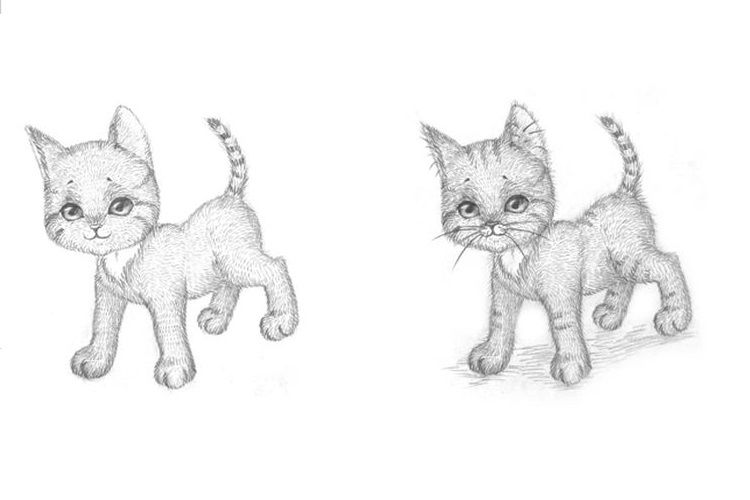
- Gradually replace the outline with small, dense hairs, drawing short lines to give the cat a fluffy appearance, and then completely shade the body. If you want to draw a cat with a white chest, leave the corresponding area unshaded (step 4). When drawing the fur, remember that the hairs should be arranged in different directions.
- To give the drawing a three-dimensional appearance, use bold, arched strokes to highlight the paws, body, and head. Work from the edges toward the center. Add shadows above the nose, eyebrows, and paws. Add whiskers and a few lines on the ears, paws, and tail (step 5). The cat is ready!
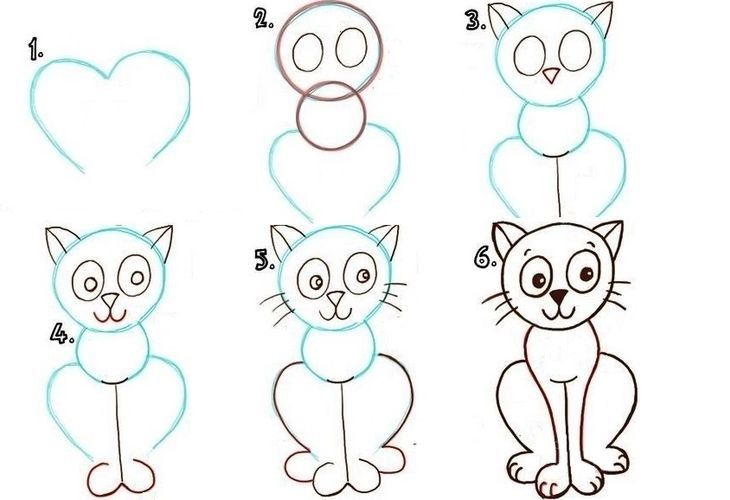
Examples of drawings
You can find numerous tutorials on how to draw a cat yourself in self-study guides and online. Here are a few cat drawings for you to copy:
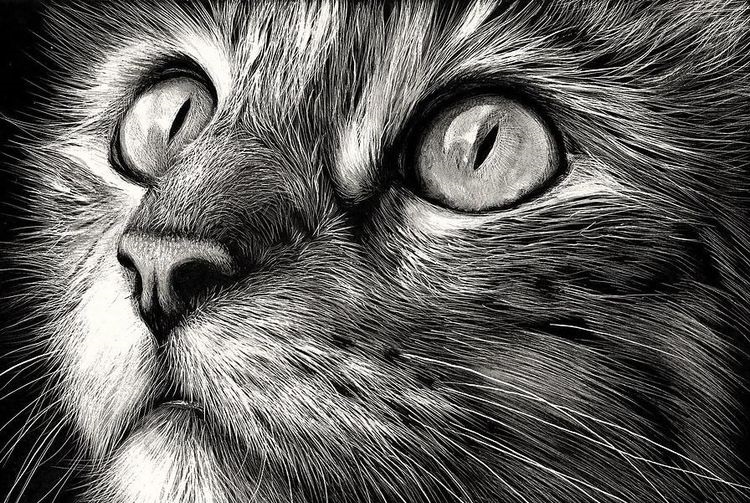
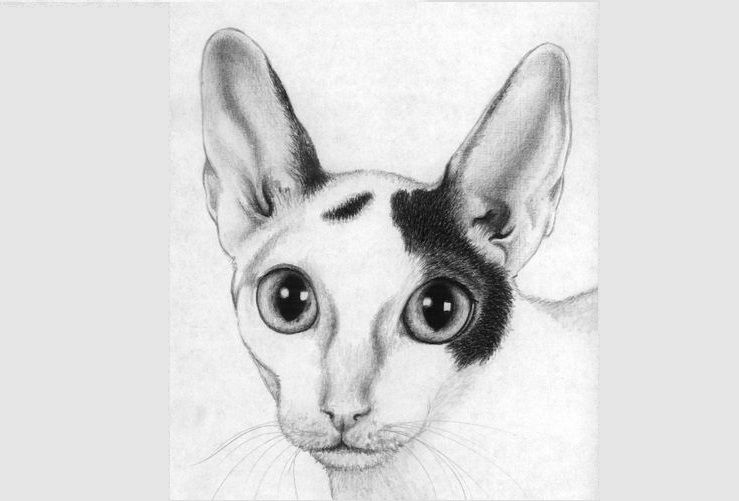
How to draw a portrait of a domestic cat
Using a sketch of a Cornish Rex as an example, you can try drawing a realistic portrait of your pet. At first glance, it may seem completely incomprehensible how to draw such a super cat. However, you don't need to be a professional artist to do this. Even those who have only just started holding a pencil can do it. The drawing process involves just five steps.
What you will need for a portrait:
- Black pen
- Soft pencil (B2)
- Hard pencil
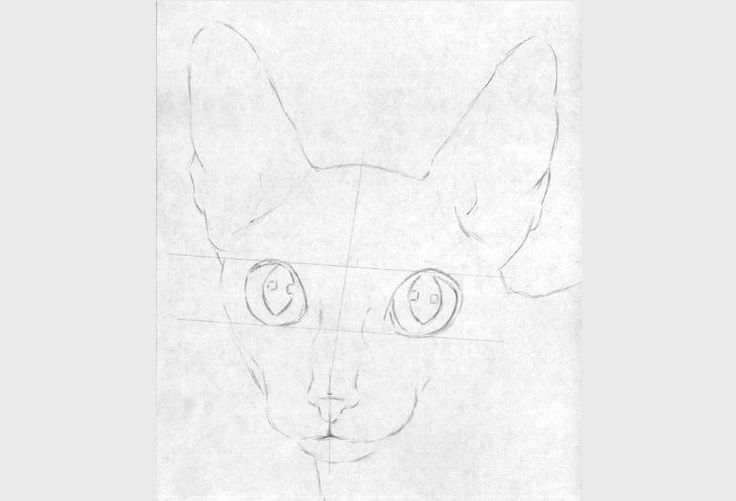
Step 1:
We mark the muzzle and outline the head and neck. Draw a vertical line to mark the center of the muzzle and two horizontal lines of equal length, between which will be the eyes.
Important! The cat is sitting sideways and looking at an angle, so the lines shouldn't be parallel to the edge of the paper, and the left eye should be smaller in size than the right.
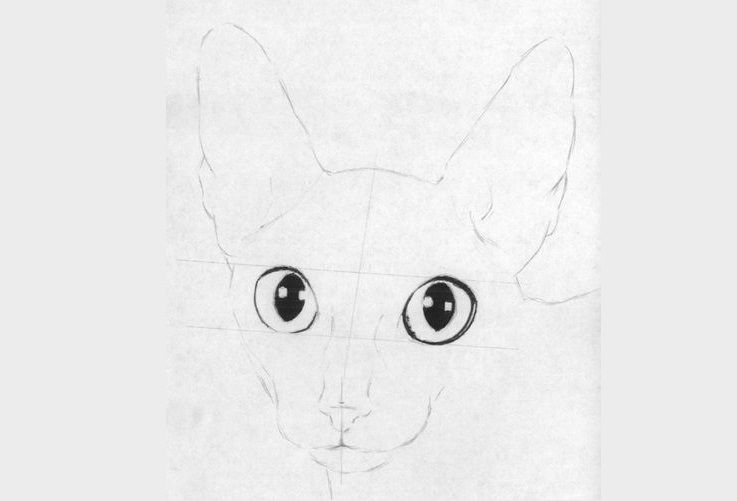
Step 2:
Darken the eyes with a black pen or pencil, leaving space for highlights.
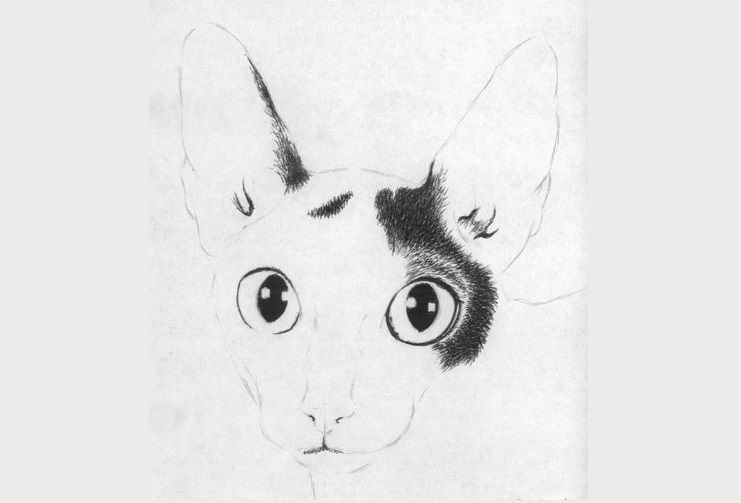
Step 3:
Draw hairs on the ears and above the right eye, applying strokes from the center of the muzzle. The shading density should be uneven and varying.
Step 4:
Using a B2 pencil, draw the eyes in more detail. The shadow around the pupils should be darker, with the darkest area above the pupils. Darken the fur slightly to create a smooth transition of color. Draw the mouth, nose, and ears, darkening the lightest areas.
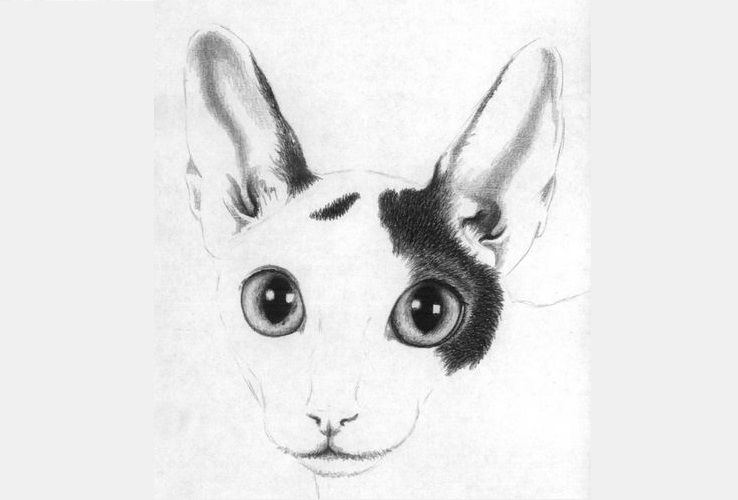
Step 5:
We refine the drawing, adding shadows where needed. We draw the nose, paying attention to the shape of the bridge of the animal's nose. Using a hard pencil, we draw thin, light whiskers.
The portrait is ready!
More video About how to draw cats:
Read also:


Add a comment