
How to draw a dog's face
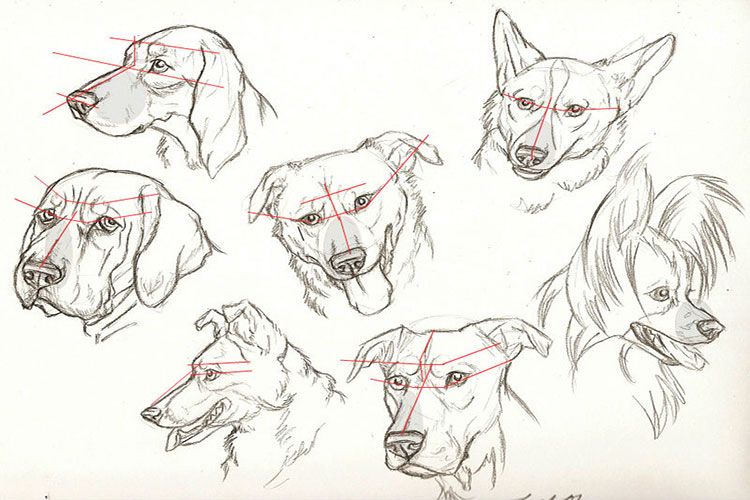
You don't have to be a professional artist to depict a dog's face—the key is to capture the breed's key features. For example, a spaniel, poodle, or Labrador has an elongated mouth with a "heavy" lower jaw, an angular forehead, drooping ears, and almond-shaped eyes. French pugs, on the other hand, seem to be made up of solid circles—their noses are wide and flattened, and their facial expressions are both playful and slightly sad. Even when drawing a cartoon character, it's important to remember the characteristic proportions. A dog's muzzle never takes up more than half the head, and the eyes are aligned with the upper contour of the nose.
Content
Helpful tips
Before starting work, it's a good idea to observe real dogs at home or outdoors. Your eye should memorize the animals' movements, appearance, and emotions. It's also recommended to study canine anatomy to ensure your images are as natural and lively as possible.
At the beginning stages, drawing is easiest and most convenient with graphite pencil. Mistakes are easily corrected, and you don't have to worry about finding the right color combinations, which is problematic for beginning artists. It's a different matter when expressiveness and volume are achieved solely through contour and light and shadow.
It's advisable to use pencils of varying degrees of hardness: medium ("HB") for auxiliary lines and soft (approximately "2B") for outlining contours or shading. Lead that is too hard can tear the paper, so any grade higher than "H" is not suitable for artistic work.
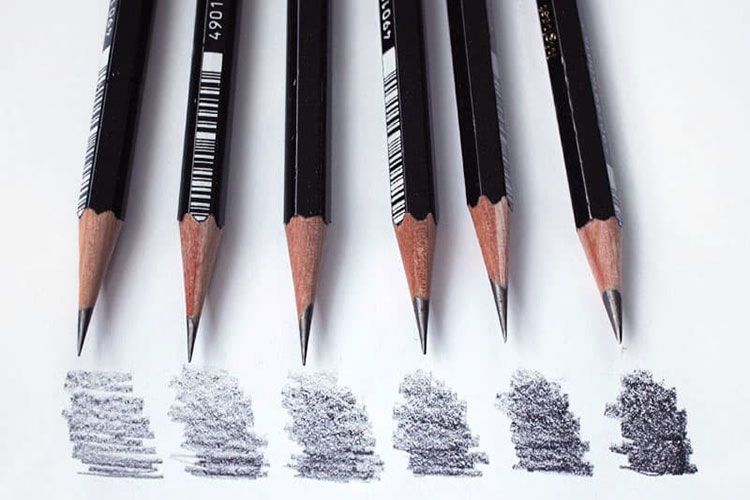
Soft pencils, starting from "3B," require some experience. They create rich tonal spots and lines that are difficult to remove, making the drawing quickly dirty and untidy. You'll also need two erasers: a rubber eraser and a kneaded eraser for cleaning large surfaces, such as KOH-I-NOR or FABER-CASTELL. It's also recommended to buy pencils from these brands.
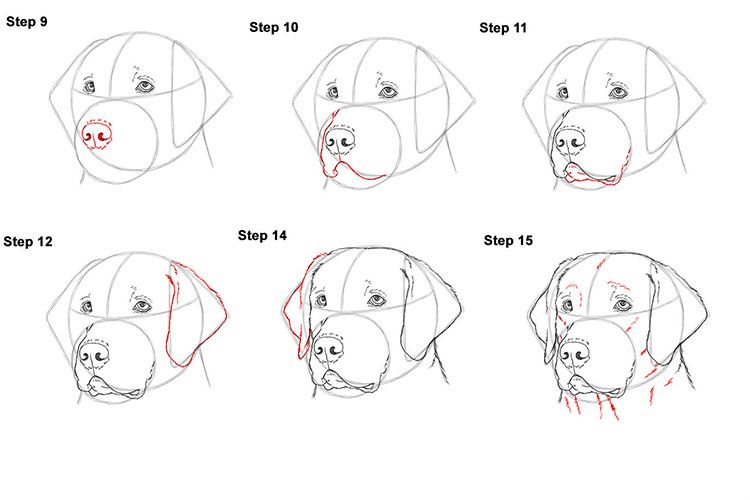
How to draw a dog's face step by step:
- When drawing any object, always move from simple to complex. First, outline the general outline of the dog's head—a circle or oval, positioning it roughly in the center of the sheet.
- Thin lines indicate the center of the muzzle, the level of the eyes, nose, mouth, and ears.
- They make a contour drawing and clarify the proportions.
- Using a soft pencil, carefully draw in the details: eyelids and pupils, nostrils, the shape of the lips and teeth, if the dog is baring its teeth, outline the folds of the skin and the outline of the fur.
- They add volume through chiaroscuro.
A simple option for children
Preschool artists don't need graphic masterpieces, but rather the opportunity to express themselves and believe in their abilities. Therefore, the image should be as simple yet recognizable as possible, as in the example below. If a child has trouble drawing a dog's face on their own, adults can help them.
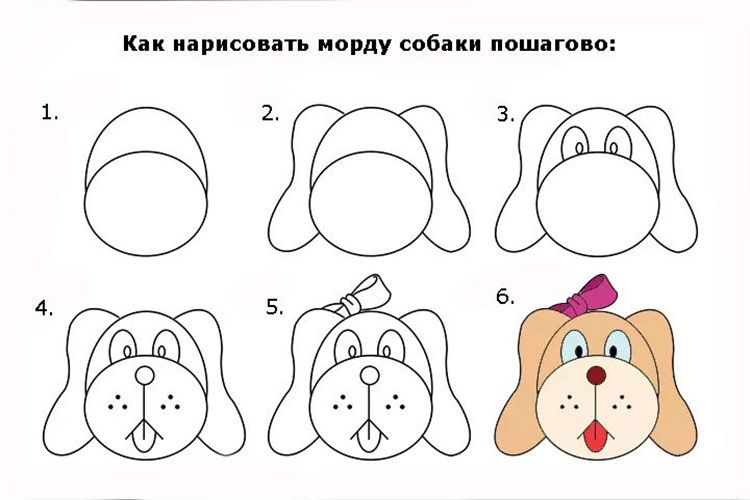
Step-by-step instructions:
- Draw a wide oval. You can cut a stencil out of cardboard first, so the child only has to trace it. Add another oval, rotating it 90°. Now we have the base.
- The next step is to draw the ears.
- We also make the eyes oval, or more accurately, slightly narrowed at the bottom—egg-shaped. We draw pupils inside.
- At the bottom of the muzzle, draw the nose and slightly open mouth. Place a few dots on either side to indicate whiskers.
- A cute bow will add charm to the animalistic “portrait”.
- For very young children, parents can draw the dog's face entirely in pencil. All that's left to do is color it with markers or crayons.
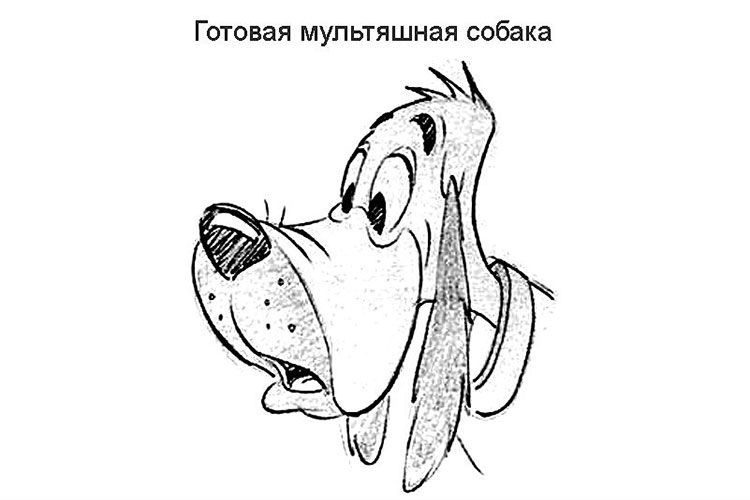
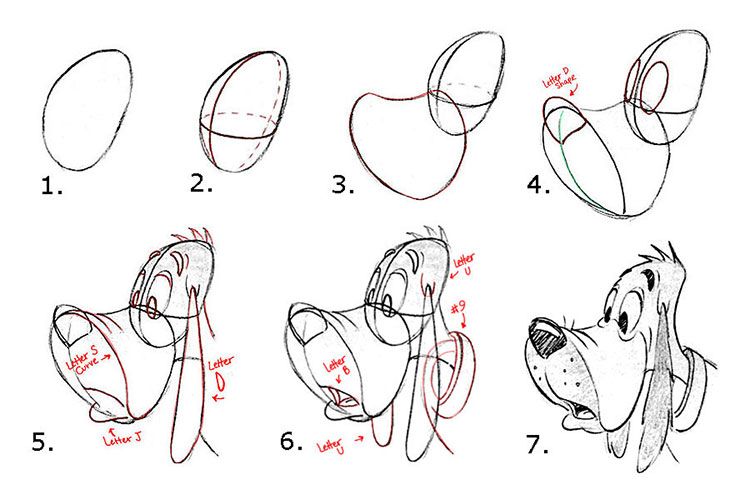
Cartoon Pluto
Generations grew up on Walt Disney's classic cartoons. Even today, his characters remain beloved and recognizable, despite the widespread obsession with anime. That's why children aged 6 to 9 will happily draw Mickey Mouse's best friend, the clumsy and funny puppy Pluto.
Step-by-step instructions:
- We start with an elongated oval, placing it at a slight angle. There's no need to strive for a perfect shape; something recognizable is enough.
- We give the figure volume using conditional lines, as shown in the figure.
- We'll add a fragment in the shape of an irregular heart at the bottom. This is our Pluto's face.
- Draw a nose reminiscent of an English "D" and eyes. Position them using the lines drawn in step 2 as a guide.
- We are working on the details according to the provided sample.
- We try to copy the original drawing as accurately as possible in order to convey the specific expression of Pluto's face.
- We erase all the auxiliary lines. We apply shading to the ears, the front of the mouth, and the dog's head. We highlight the eyes, eyebrows, mouth, and nose with black. Don't forget about the highlights.
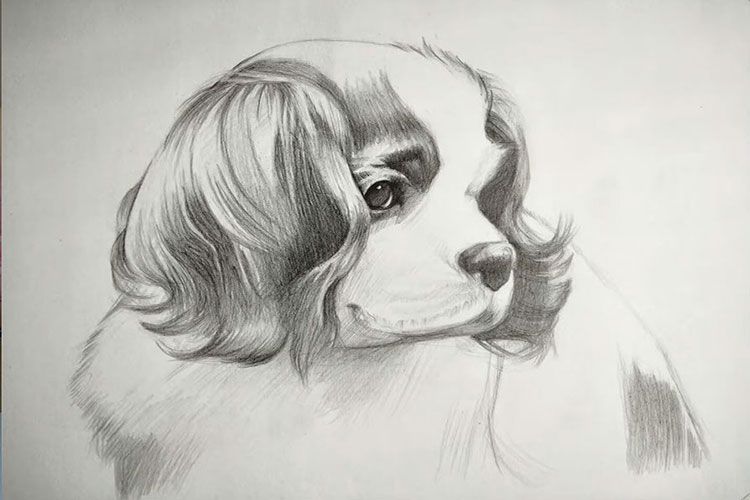
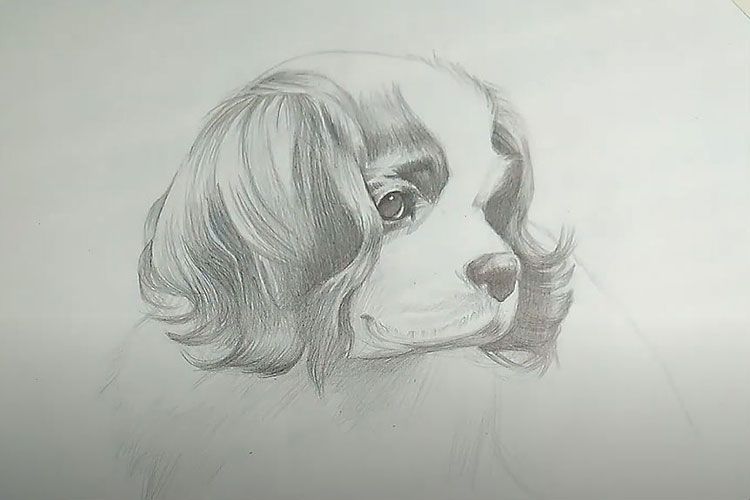
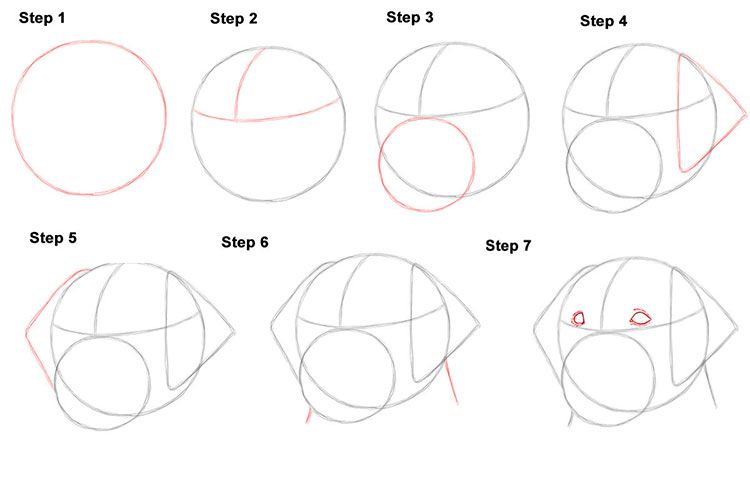
Realistic sketch from a photograph
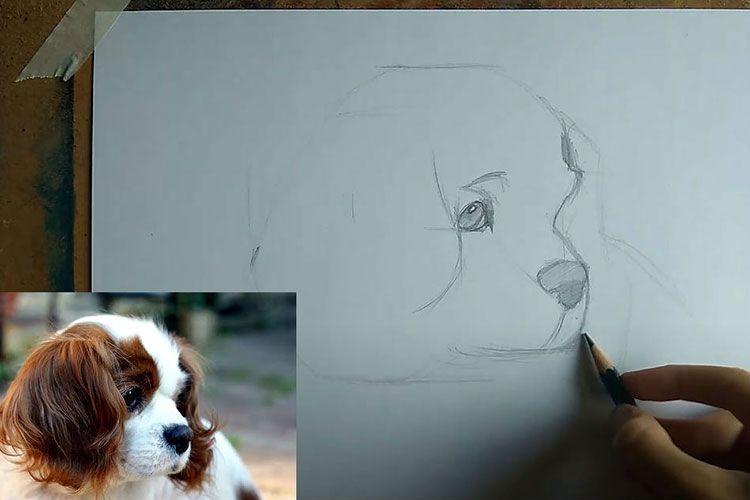
Animals are constantly in motion, so drawing them from life requires skill. Photographs are a different matter entirely, and a beginner should learn from them. Images rotated three-quarters look best, as they clearly show volume. This charming example of the fashionable Cavalier King Charles Spaniel is posing in just such a position:
Step-by-step description:
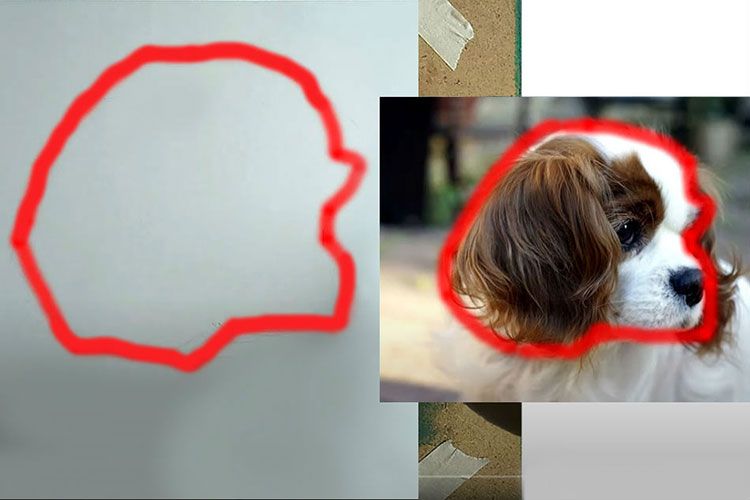
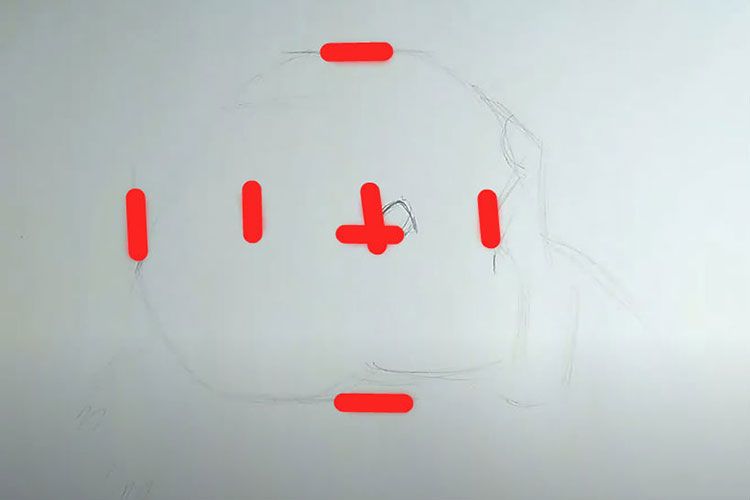
Begin drawing the dog's muzzle with a thin, well-sharpened pencil of "H" or "HB" hardness. Use notches to mark the position on the sheet and the approximate dimensions of the head. Make the guide lines barely visible—they will need to be erased later.

The sample shows red notches in key locations that will make it easy to outline the spaniel's silhouette. We'll try to transfer these to the sheet of paper without using measuring tools—this is excellent training for our eye.

We draw the outline of the head along the notches. We compare the proportions with the photograph and correct any inaccuracies. We're not including the ear, which is in the background, in the silhouette for now.
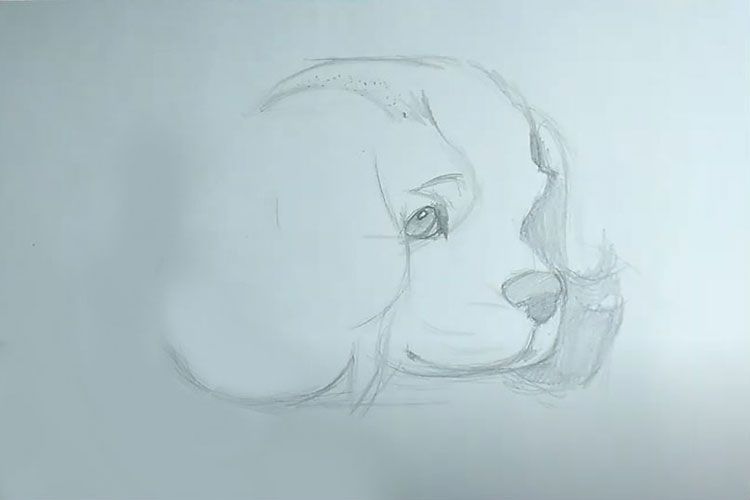
Having outlined the contour, we complete the missing elements—the spaniel's ear and shoulders. We also mark the position of the eyes, nose, and the width and height of the muzzle.
We begin drawing the details. At this stage, we focus primarily on the eyes. In this case, since the head is turned three-quarters, only one needs to be drawn. Don't forget about the eyebrows. We outline the nose.
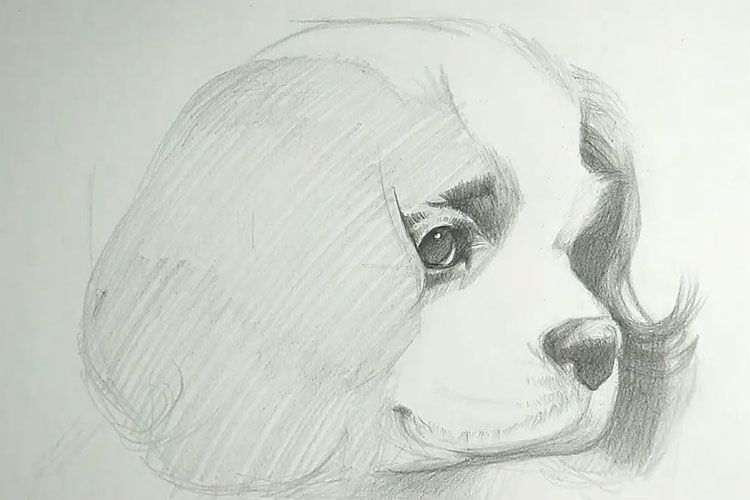
Once the muzzle is mostly drawn, refine the outline of the far ear and use light shading to outline the darkest areas. Also, check out How to make dog appliques on our website.
Use an eraser to remove the construction lines. Switch to a soft 5B pencil, which effectively enhances the shadows, making them rich and deep. Apply strokes in the direction of the fur's growth, imitating its texture.
Finally, using a fine-edged eraser, remove some of the shading on the top of the head and the front ear. This will enhance the contrast between the darkest and lightest areas.
Important! To create the illusion of aerial perspective, draw the strands of long hair on the front ear more carefully than the rest of the image.
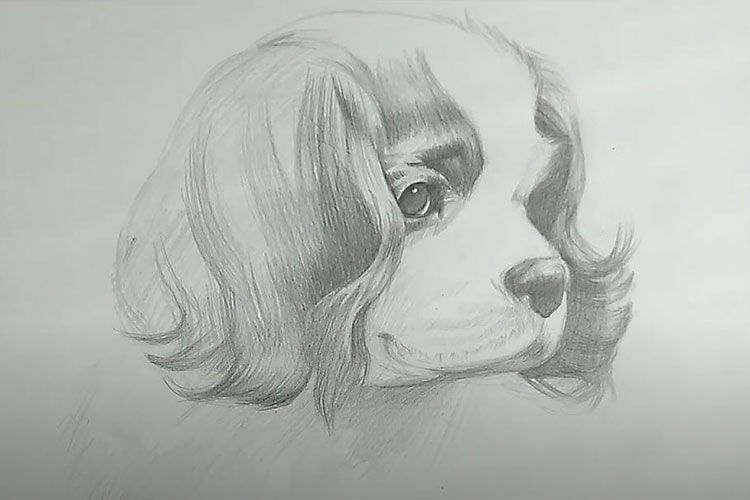
At the end we outline the contours of the body.
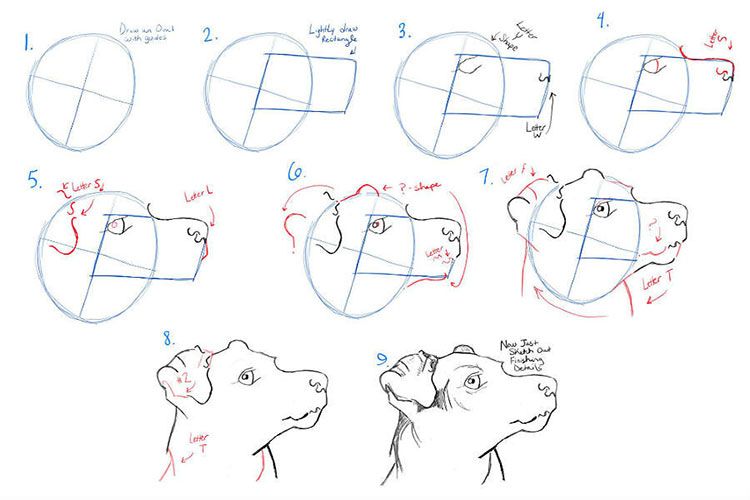
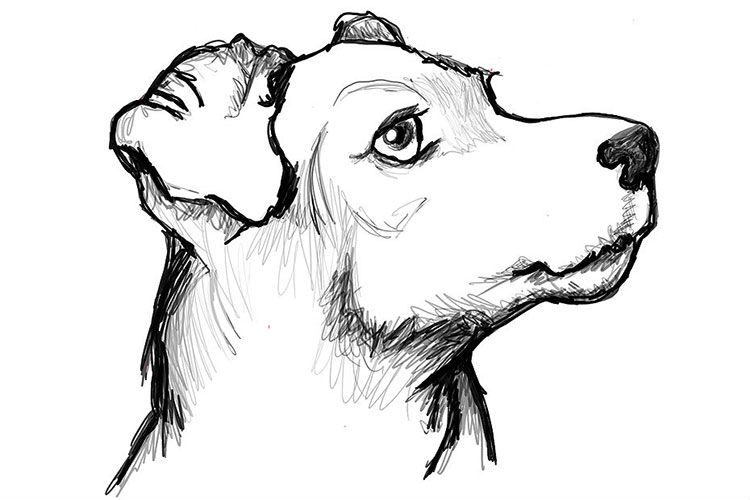
Smooth Fox Terrier
A classic step-by-step drawing that can be done with a pencil, pen, or marker:
Labrador
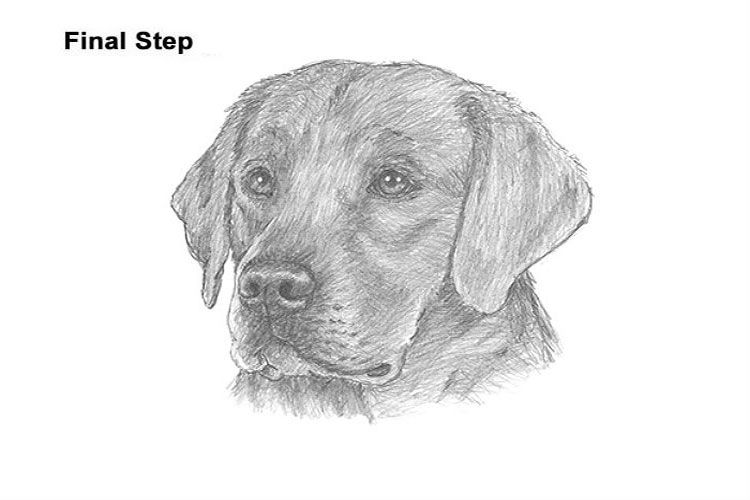
Finally, here's a video with a detailed description of the cute puppy drawing:
Read also:


Add a comment