
DIY cat hammock
As cat owners know, these stubborn animals have a habit of lying on their owners' clothes, leaving clumps of fur or claw marks, and climbing into closets and making a mess. A DIY cat hammock is a great solution to this problem. It will clearly mark your pet's permanent spot in the house.
A hammock can be placed anywhere—under a chair, under a table, on a low shelf in a closet, or near a warm radiator. Furthermore, it's quite easy to make your own, saving not only some space but also the cost of buying an expensive item from a pet store.
Felt hammock
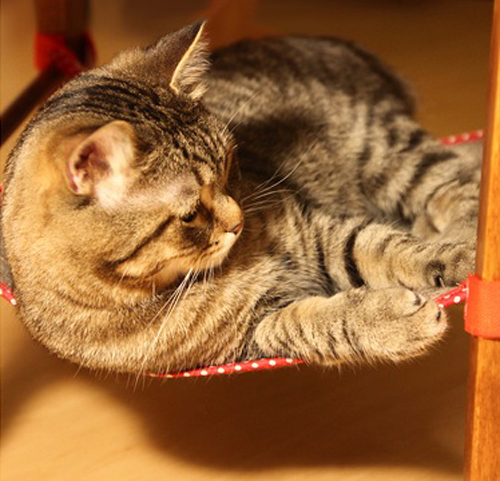
This tutorial will demonstrate how to make a cat hammock yourself using the materials mentioned above. The material is quite comfortable and will definitely appeal to your cat. You can hang the hammock between the legs of a chair.
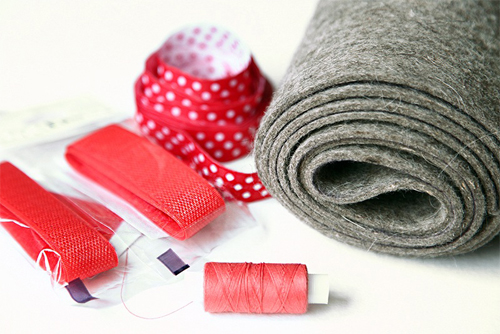
To make the product you will need:
- felt;
- Velcro fasteners for clothing;
- strong sewing threads;
- tape for covering a hammock.
Avoid smooth felt strips, as they wear out quickly. Before purchasing the material, measure the distance between the chair legs. If the felt is too large, trim the excess with scissors, then mark the edges with a ruler and a soft pencil.

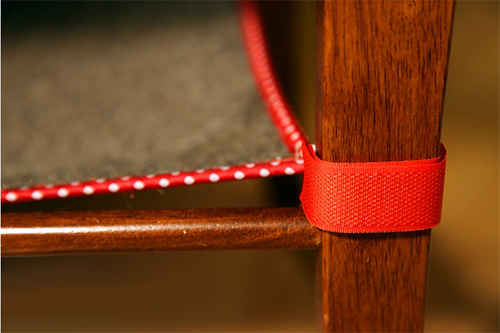
Once the hammock base is prepared, it needs to be reinforced by binding the edges with ribbon. To make it easier to work with, you can secure the ribbon with paper clips. This will prevent it from slipping and will give the hammock a neater, more even finish.

It is worth noting that it is not necessary to use Velcro to attach the hanging cat bedYou can use the same ribbon to make loops that you can then use to tie the hammock to the chair legs.


However, Velcro is more practical to use, attaching quickly and securely, allowing you to adjust the hammock's tension. It doesn't slip or unravel, unlike tape. In this case, the excess tape is trimmed, and the Velcro is sewn on top. It's important to securely stitch the area where the tape will be joined.


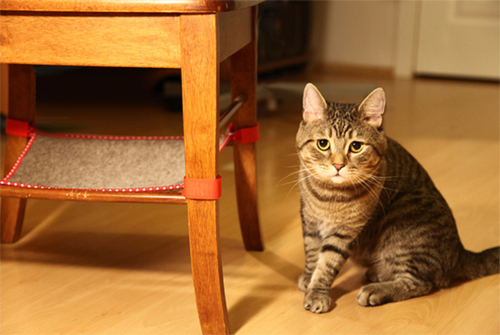
That's all there is to it. All that's left is to secure the hammock to a chair and make sure it isn't moved, as this could disturb your cat's sweet slumber. Then you can confidently invite your pet to your housewarming party.
Using a similar method, you can make your own hammock for your cat on a warm radiator during the autumn and winter.
If desired, other materials, such as fleece, can be used for this hammock. When purchasing edging tape, it's recommended to fold it in half to ensure the optimal width.
The color combination of the materials is equally important. This will allow the finished product to better blend with your home's decor and be pleasing to the eye. Don't be disappointed if your pet is initially indifferent to the new bed. It will take time for it to get used to it, and then the owner's efforts will surely be rewarded with a pleasant purr.
Wicker hammock
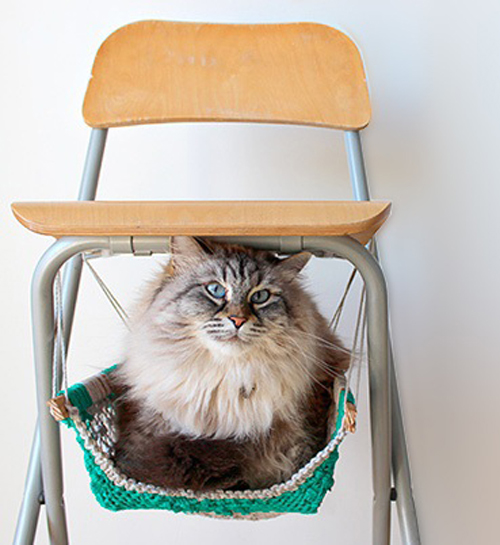
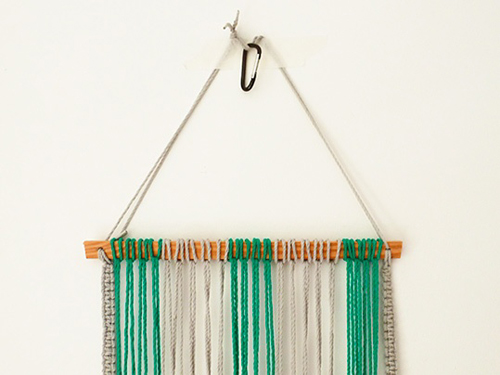
The next hammock design is perfect for crafters. This macrame hammock is very similar to the woven version often found in cottages and private homes, the only difference being the size. The tutorial below will help you figure out how to make a cat hammock using this technique.
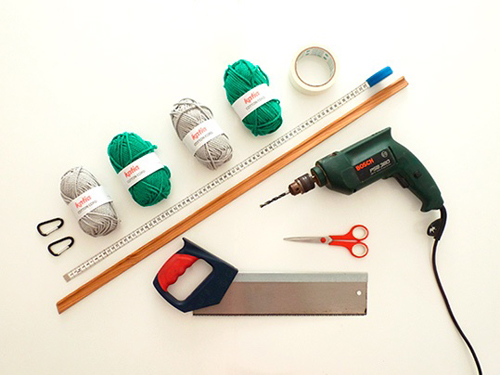
To make it you will need:
- threads for macrame weaving (you can use knitting threads);
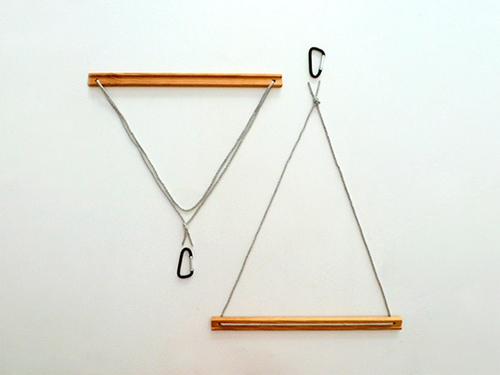
- a wooden plank approximately 70 cm long (depending on the distance between the chair legs);
- two carabiners for fastening the finished product;
- ruler for precise measurement;
- tape for fixing threads;
- scissors;
- drill;
- small saw.
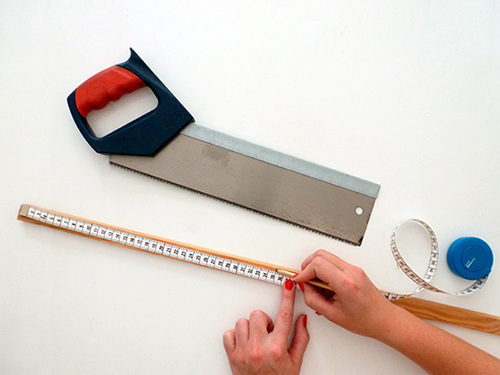
Using a ruler and pencil, mark the center of the plank and then cut it in half. Alternatively, you can use two smaller planks.
Slightly indented from the edges of the planks, drill holes into which the hammock's strings will be threaded. It's important to ensure symmetry, otherwise the hammock will be lopsided.
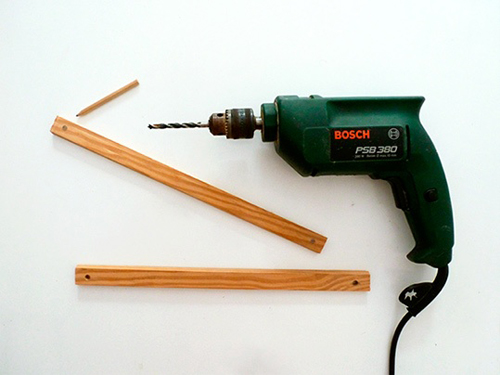
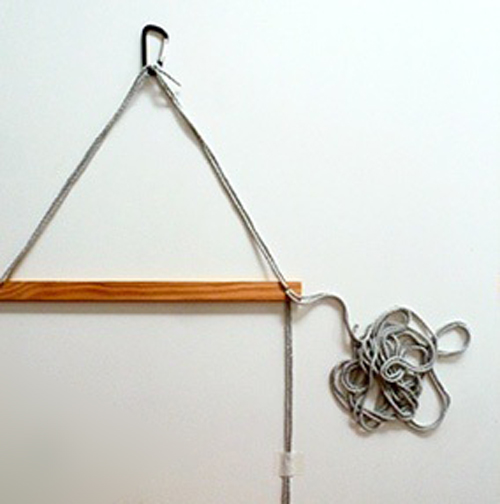
The string runs the entire length of the bar, exits through both holes, and gathers into a knot at the top, which will be used to attach a carabiner. Measure the string length yourself, depending on the height of your chair. The hammock should provide ample space for your cat to be comfortable, but it also shouldn't drag on the floor.
Next, thread a double thread through one of the holes. This is used to begin weaving the hammock's borders. Again, the length of the hammock will depend on the size of the chair. It's recommended to try your work on several times as you work.
Photos 18-27 clearly show the weaving process. Standard knot patterns are most often used for weaving in this technique.


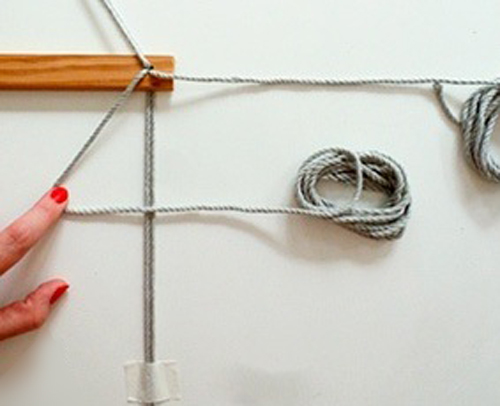
For ease of weaving, you can secure the base thread with tape. This will prevent it from shifting, resulting in a neater pattern. As you progress, you can easily remove the tape and secure the thread lower down.
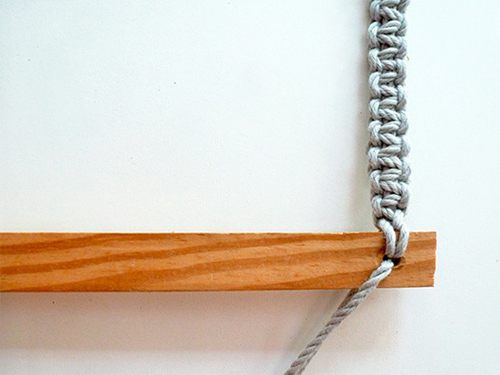
The end of the chain is threaded through the hole on the second plank and securely fastened. The same steps from photos 16 through 27 are repeated with the holes at the opposite end of the planks.
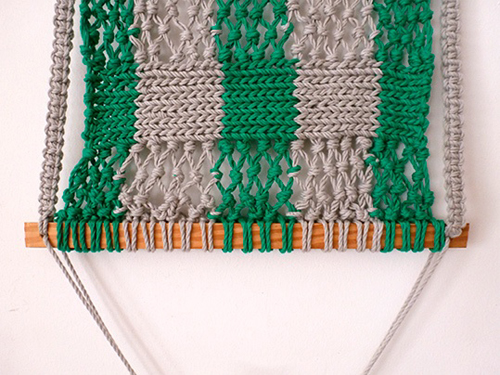
Once the weaving base is ready, it's time to begin creating the pattern itself. It's worth noting that the proposed design is just one of many different patterns. It can be modified or even replaced as desired.
To begin, threads of different colors are secured to the top bar. In this case, 4 green and 4 white threads are alternated.
The mesh effect is achieved through knots. The rest of the pattern resembles knitting, but it's still a macrame-style weave, achieved by alternating threads.

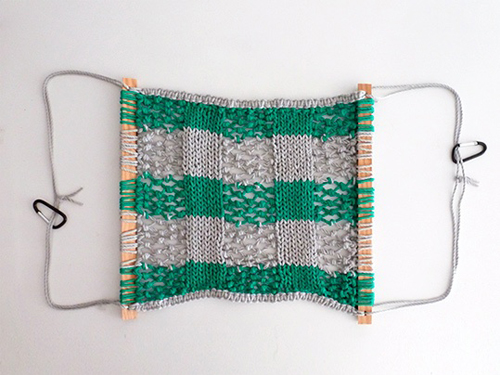
In the final step, the threads are secured to the second plank in the same way as the first. Any excess is trimmed, and the finished patterned fabric is carefully stitched together with the hammock border. All that remains is to install the finished hanging bed and invite the chief critic.

Cat hammock on radiator
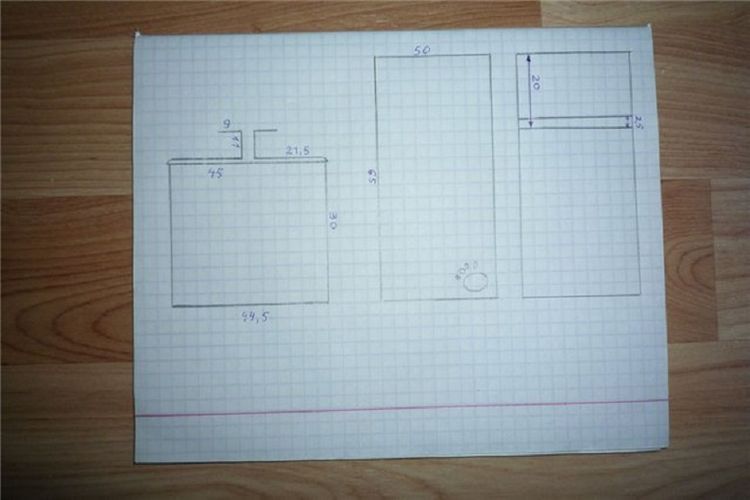
You can make a hanging bed for your beloved four-legged friend yourself and attach it to a favorite warm spot—a radiator. To make it, you'll need black metal tubing. First, draw a diagram of the design, ensuring it's spacious enough for your pet to rest and sleep.
A thick, wide wire, which must be able to support the animal's weight, is sometimes used as a frame. You will also need:
- measuring tape;
- nippers;
- hammer;
- large needle;
- threads;
- insulating tape;
- scissors;
- pliers;
- dense soft fabric.
The pet is measured in a lying position, from its head to halfway down its tail. This will be the length of the hammock and the fabric covering it. On average, an adult pet of average weight needs a hammock 65-70 cm long and 25-30 cm wide.
To determine the size of the folds that will hold the cat's hammock, measure the width of the radiator. Then, using pliers, a hammer, and wire cutters, create a square structure with hooks for the holders.
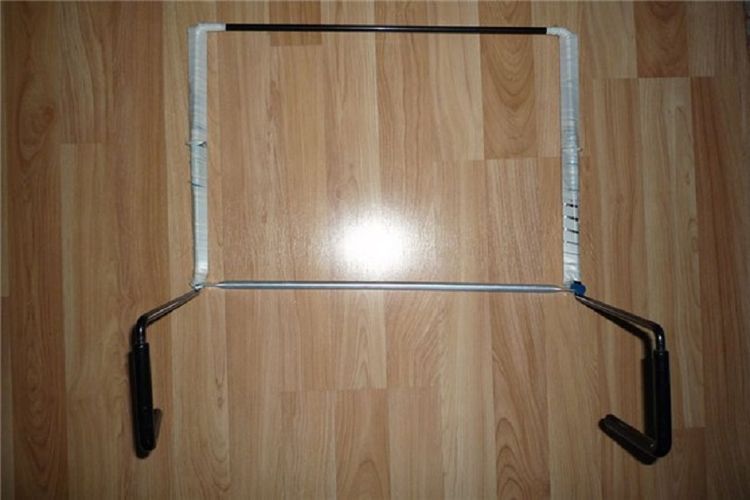
To soften the metal sides and joints of the workpiece and make the hammock as safe as possible for the pet, they are wrapped with thick electrical tape.
Regular plush or fleece fabric can be used as a soft frame. They are easy to brush off lint and machine or hand wash.

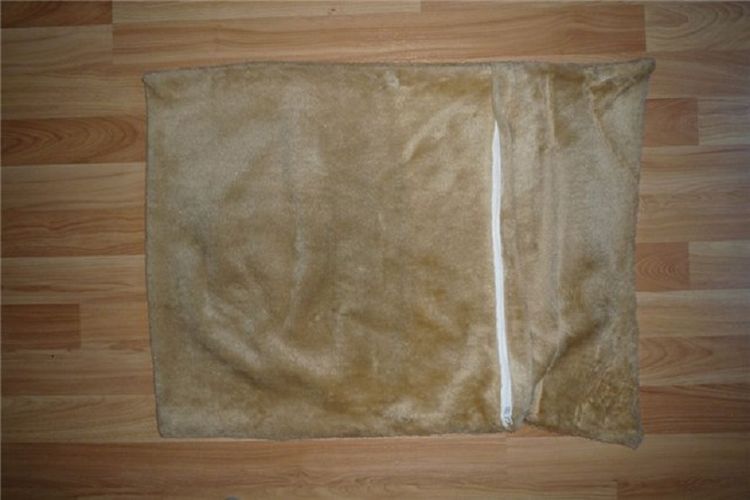
The hammock's border is also cut to the dimensions of the metal frame, leaving small gaps for sewing the fabric. Two pieces of plush or fleece are cut for this project. They are sewn together by hand or with a sewing machine on three sides. An opening is left on one side to allow the fabric cover to be stretched over the metal sides.
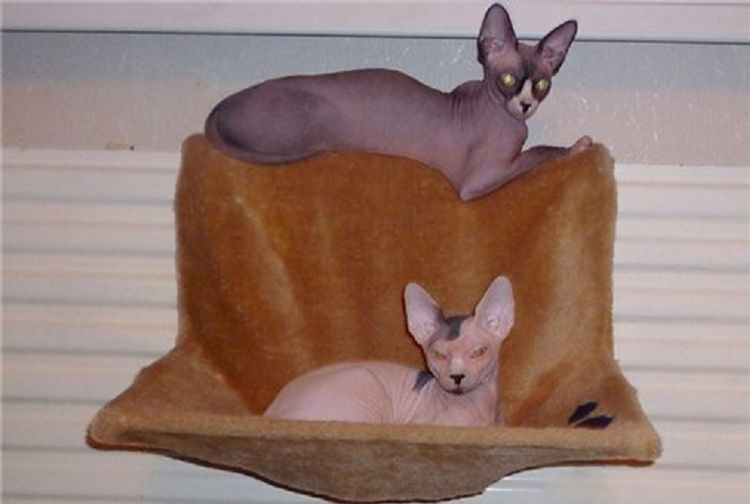
The hooks that secure the frame to the radiator can also be lined with soft fabric. Veterinarians recommend frequently ventilating the room and avoiding allowing the animal to lie near the radiator for long periods of time to avoid weakening its immune system.
Read also:
- Cat house: buy or make yourself?
- How to make a cat collar yourself
- How to make a cat out of wool with your own hands


Add a comment