
How to build a dog house with your own hands?
Every barking dog, whether kept outdoors or in an apartment, needs its own home—a dog house—to live comfortably. Striving to provide their pet with the most comfortable accommodations, owners don't limit themselves to building a simple board house. Therefore, today, enclosures featuring family crests, double-glazed windows, and terraces are no longer surprising.
A dog house can be decorated in any way you like. However, your four-legged friend won't feel comfortable if it's placed in an awkward location. The following tips will help you avoid mistakes.
Content
Where to place the booth
To prevent your pet's shelter from ending up in a puddle after heavy rain, it should be placed in an elevated location. A shady corner with level ground is ideal. It's best to place the kennel near a large building, on the leeward side: this will prevent drafts from hitting it in bad weather. Dense bushes can also provide good wind protection.
A dog house shouldn't be adjacent to a garage. Furthermore, it shouldn't be installed under a roof, which could expose ice and snow to falling snow during the winter.
When in or near the kennel, the dog should be able to observe the house door and the main entrance to the yard. For guard dogs, a pen with a house located some distance from people is suitable.
Building a dog house yourself – photo instructions
Using the provided diagram, you can build a comfortable and secure doghouse for your dog in just a few hours. And you won't need to purchase any special materials.
One of the most important aspects of building a dog house is choosing the right size. After all, you want your pet to feel as comfortable as possible. So, when building a dog house, you need to start by determining its shape and size.
I want to say right away: if you're not a fan of unoriginal designs, forget about building complex structures. Not only will it waste your time, but it will also prevent your dog from settling into its new home.
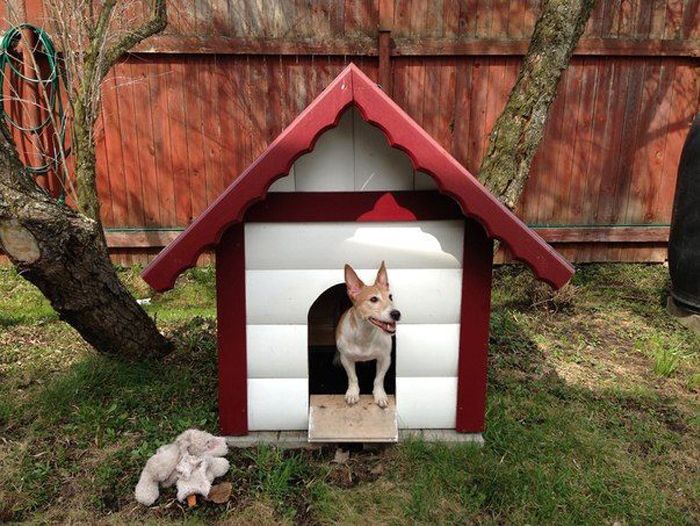
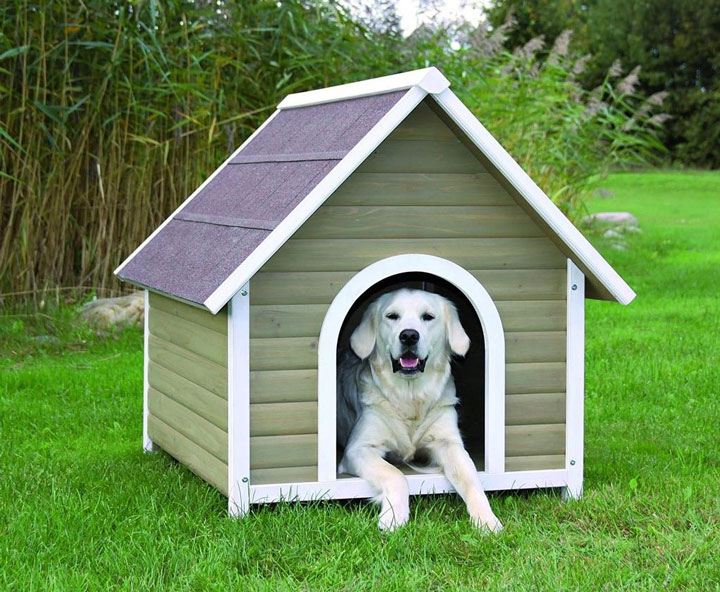
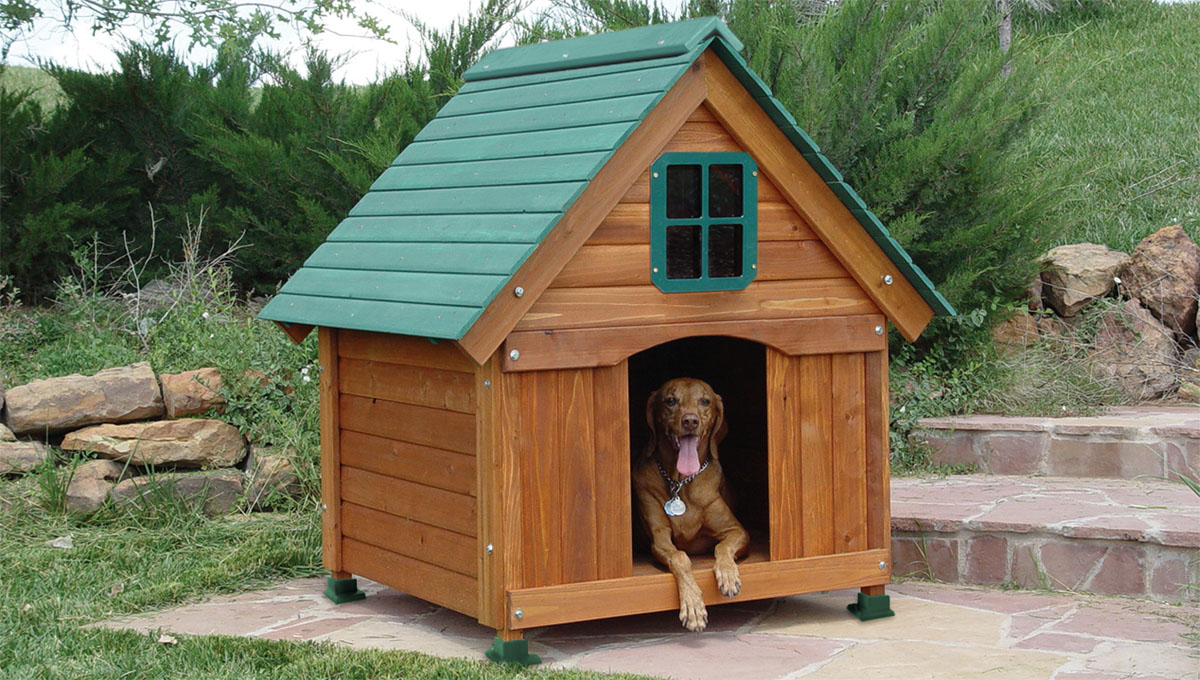
The ideal option is a rectangular doghouse. It's best to have the entrance on the side and a pitched roof. See the photo for an example of an ideal doghouse.
Make the roof removable. This will make cleaning the dog house easier later.
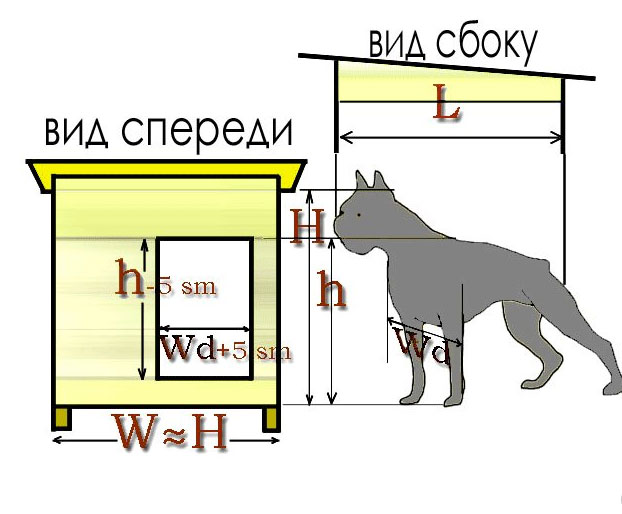
When drawing a dog house, consider the dog's dimensions. Measure your pet's height and length. Also consider the dog's chest size. See the picture for the optimal dog house size ratio for each dog breed.

One of the basic rules when drawing up a dog house plan is called "plus five." The gist of the rule is this: when calculating the dimensions of the dog house frame, add 5 cm to the width, height, and depth.
Now that we've covered the small but important details of building a dog house, it's time to choose the material. The most popular materials for dog houses are various types of wood. This material has many advantages:
- environmental friendliness;
- ease of use;
- low cost.
It is better to take a coniferous species.
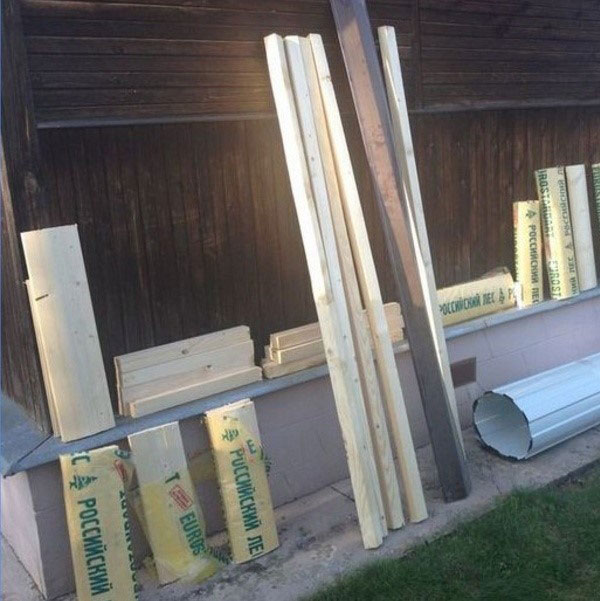
To avoid a long wait, prepare your dog house materials and tools in advance. You'll need the following:
- sand;
- nails;
- lining;
- plywood;
- hammer;
- parchment;
- roofing felt;
- foam plastic;
- door hinges;
- edged board;
- metal corners;
- antiseptic impregnation;
- dry timber 40x40, 100x100, 100x50 mm.
Don't forget to sand the wooden parts, otherwise your dog will get splinters in his paw. Regarding additional wood preservative treatment, it's best to take your time. Treat the kennel once it's ready, and only on the outside, as the pungent odor may scare your dog away from its new home.
Assembling a dog house
As mentioned earlier, it's best to have a pitched roof for the kennel, as most dogs enjoy lounging on the roof of their home. If you plan to keep your dog in the kennel permanently, ensure it's thoroughly insulated during the construction phase.
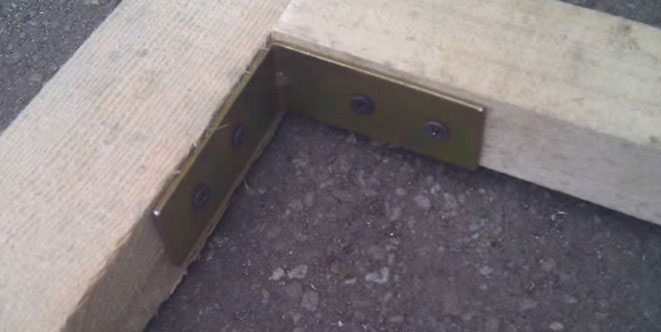
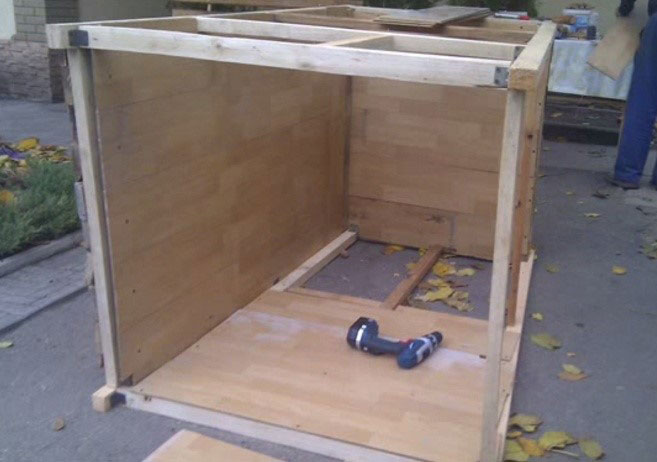
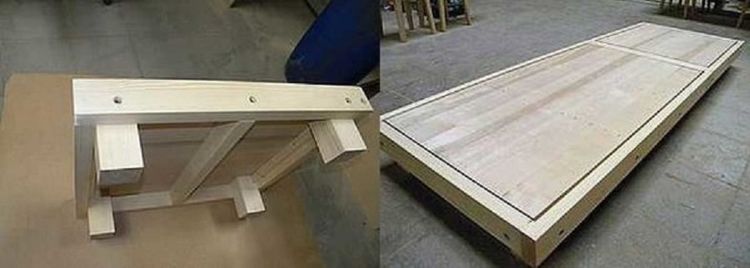
So, let's get started building the doghouse! First, we'll prepare the base frame. For this, we'll cut 40x40 lumber to the dimensions calculated in the drawing. We'll connect the lumber sections using metal corners. See how it looks in the photo.
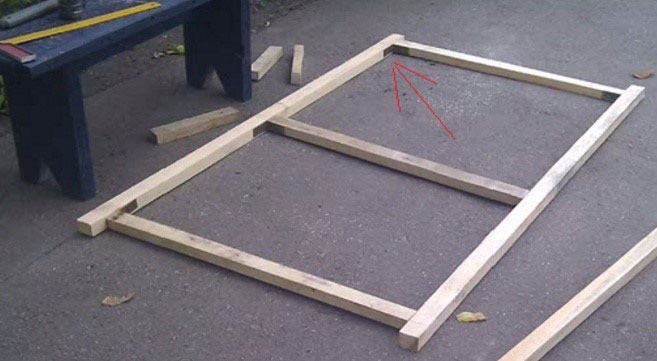
If you're building a dog house for a larger dog, you can reinforce the frame with additional crossbars made of timber. Sheathe the finished frame on one side.
After this, place the frame so that the bars are on top, as in the photo.
Line the inside of the frame with parchment. You can use a stapler to secure it. Then cut the foam to size and insert it between the slats. The height of the insulation should be identical to the height of the slats. Lay another layer of parchment on top of the foam and finish with the sheathing. That's it – the finished floor is ready.
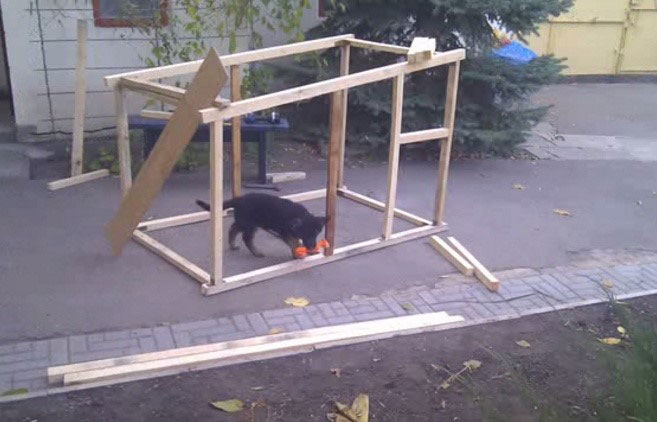
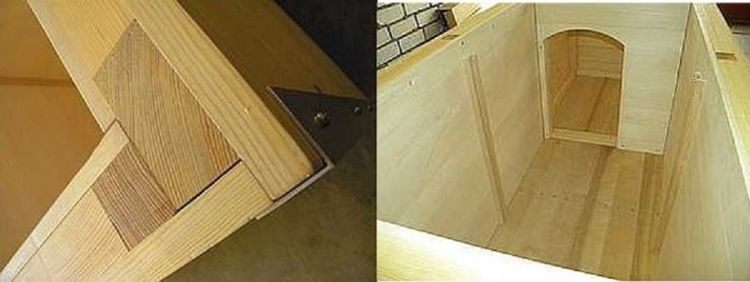
The third step is assembling the frame. Take a 100x100 mm beam and cut four pieces. Two will be equal to the height of the doghouse, and two should be 10 cm longer. Nail these pieces to the corners of the bottom. The longer pieces will go to the front, and the shorter pieces to the back.
This is the base of the dog house. Next, cut the lumber to size for the top base. You can also nail a couple of vertical pieces on the sides. Just like when assembling the frame, use metal brackets to secure the wooden parts. See the photo for an idea of the frame you should end up with.
After this, insulate and sheathe the finished structure.
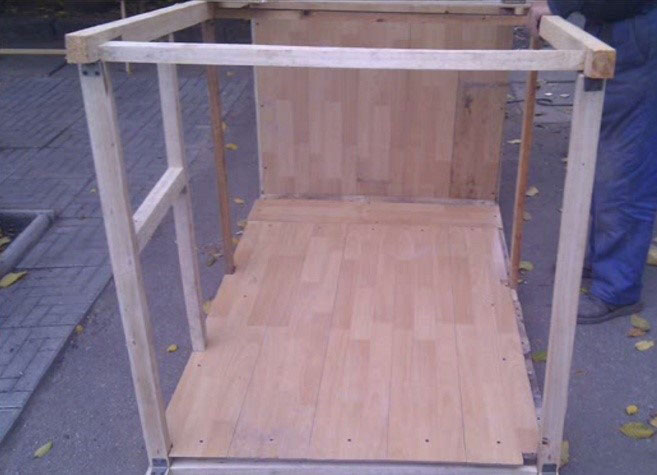
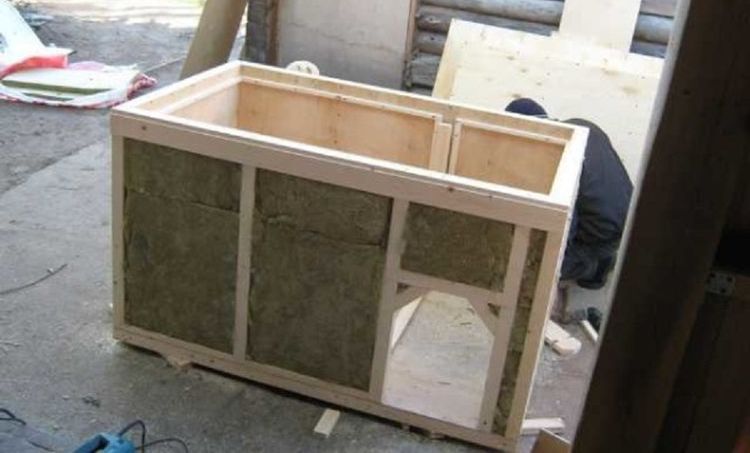
First, cover the outside with clapboard. Then insulate the walls using a method similar to the bottom: parchment, then foam, then parchment, then plywood. Consider the size of the nails when attaching the cladding. Nails shouldn't be too large, otherwise the dog could injure itself on the protruding nail tip. The photo shows the wall of the kennel prepared for insulation.
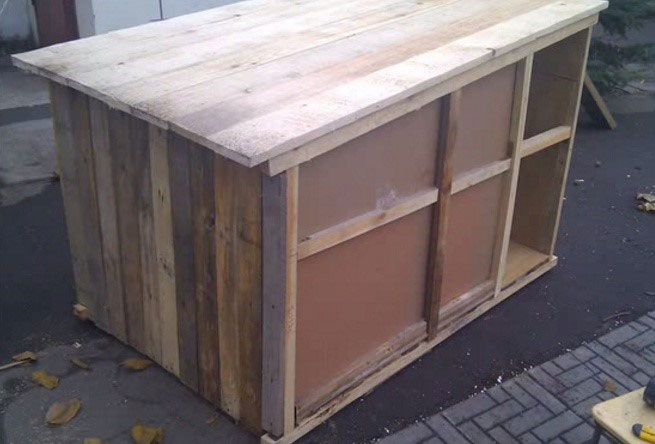
The next step in building a dog house is installing the roof. Use the familiar 40x40 lumber and assemble the frame. Calculate the frame size based on the interior perimeter of the kennel. Using the same method, insulate the frame with foam and plywood. The only thing to consider is the size of the top paneling: it should be 10-15 cm larger in diameter than the frame on all sides. This will help protect the kennel walls and access hole from the elements. Lay roofing felt over the finished roof.
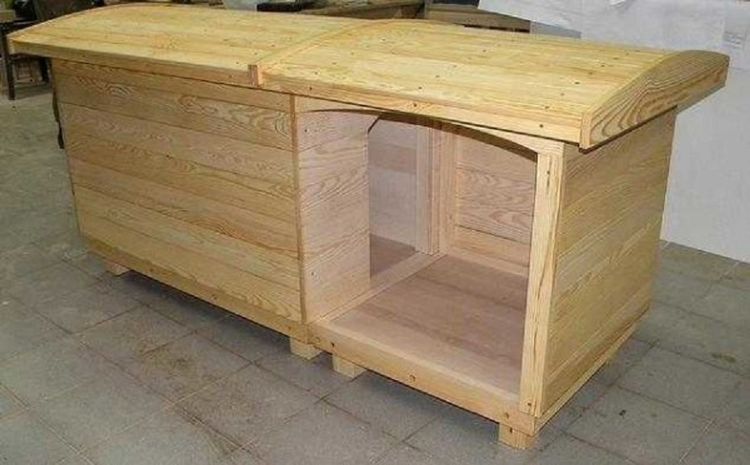
Treat the finished kennel with an antiseptic and let it dry. Then, nail roofing felt to the bottom of the kennel around the perimeter, and then nail the treated beams to that.
It should look something like the picture.
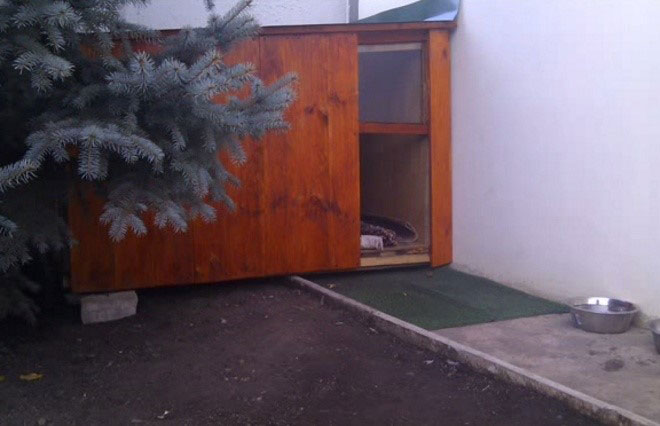
Basically, the dog house is ready. If you'd like, you can trim the ends of the sheathing and the access hole with trim and lay tiles on top. Basically, it's time to finish the cosmetic work.
But even if you leave everything as is, the dog will still be grateful for a comfortable and warm kennel in which to hide from the heat and cold.
How to build a doghouse yourself (video)
Building a booth: nuances and recommendations
What should you pay attention to when building a cozy dog house?
Design
When planning the design of a dog house, it's best to choose a prefabricated or collapsible model, as it can be easily disassembled if needed. A kennel built this way can not only be moved to another area but also quickly disassembled and reassembled, allowing for cleaning and disinfection. Regular cleaning of the dog house is essential.
Material
The choice of material deserves special mention. Pine and larch are the optimal woods for this purpose. A kennel made of pine boards can easily last 10 to 13 years, meaning the dog will be able to live in it until old age. Larch is a more expensive material, but it has a longer lifespan than pine. Owners decide on the choice of wood based on their budget.
The same roofing solutions are used for installing a roof as for a home. Natural tiles are not recommended for building a dog house.
The floor of a pet's house shouldn't be stone or concrete, as these materials are cold and can cause arthritis in dogs. Ideally, the floor of a kennel should be made of dry wooden planks. Important: the flooring elements must fit precisely to prevent gaps. Otherwise, cracks in the floor can cause injury to the animal. A slight slope toward the exit will make cleaning easier.
To prevent the inside of the house from being blown through by all the winds, the joints, corners, and corners should be seamless. A dog house will be warmer if it's constructed with double walls, with the spaces between them filled with wood shavings or other insulating material. However, the insulation can become a haven for parasites. Such a house should be disinfected frequently. The entrance to the kennel can be covered with a piece of coarse, thick fabric.
To prevent wood rot due to high humidity, it's important to consider a rainwater drainage system. A wet and rotting doghouse can easily become ill. Treating the wood with moisture-repellent products is not recommended in this case; veterinarians do not recommend it.
Insulated dog house
In the yard of a private home where a guard dog lives, it's essential to have a warm doghouse. Building one yourself is very easy. It will certainly become a comfortable shelter and resting place for your pet, as well as reliable protection from precipitation and winter cold.
To build a wooden dog house without gaps, use solid wood, including tongue-and-groove boards, as well as clapboard, which is much more durable than plywood, which gradually cracks when exposed to snow and rain. Brick and concrete are not suitable for a dog house living outdoors, as they are very cold in winter and hot in summer.
If you make a dog house from thin plywood, you will need additional insulation for the product.
Mineral wool or thin foam blocks are used as insulation, but the latter material is practically impermeable to air, so the house must have good ventilation or at least a few air-flow gaps. In addition to insulating the walls of the kennel, mineral wool is also used for the roof and floor, but not in a very thick layer. It's best to simply sprinkle dry straw inside the kennel and change this bedding several times a month. Thick fabric cut into wide strips or pieces of tarpaulin are sometimes hung over the entrance to the house as an additional way to insulate the dog's home.
To make the simplest winter shelter, first make two wooden pallets on timber legs. Then join them together.
Next, timbers are secured in the corners. Four of these go into the shed itself, and two are at the front for the wind-resistant walls. After this, the interior is lined with clapboard, incorporating 7 cm thick foam plastic. The exterior of the shed is then covered with clapboard. To prevent water from seeping into the joints between the wooden planks, the gaps on the top of the shed are covered with a strip of the appropriate width.
To achieve a more rigid and durable structure, solid boards, rather than edged ones, were used for the exterior wall cladding. An insulated wooden panel was used for the roof. If solid boards are not available, several wide boards are first fastened together and covered with insulation (such as parchment or mineral wool). A slight slope is desirable for the roof to allow water to drain. To improve the roof's watertightness, its underside is covered with a thick film and secured with a construction stapler (if a stapler is not available, simple nails will do).
Insulated dog house The dog house is ready. To give the dog house a more aesthetically pleasing appearance and extend its lifespan, its exterior is treated with Pinotex. Experts recommend treating the wooden bottom of the house with an antiseptic during construction. It's also advisable to make the roof removable for easier cleaning and to provide necessary veterinary care in case of illness.
Avoid making the structure too tall and spacious. A pet doesn't need a spacious kennel in winter, as heating it with body heat is quite difficult. A kennel with a small overhang, windbreaks, a convenient entrance, and good thermal insulation will do.
A warm dog house made by yourself: video
Read also:


Add a comment