
DIY cat bandage after sterilization
Sometimes a cat may require abdominal surgery. This may be due to gastrointestinal disease or spaying. After the surgery, the animal is placed in a special dressing called a blanket or bandage. This prevents the cat from licking the wound and promotes faster healing.
Content
Why does a cat need a post-operative bandage?
The most popular use of a post-operative bandage is to protect a cat's incision after sterilizationHowever, there are other equally important functions:
- Protecting the seam from dust and wool, thereby preventing inflammation.
- Limiting the pet's flexibility, thereby reducing the risk of suture divergence when licking the groin area and hind legs.
- To prevent various blood-sucking parasites from entering the wound, special antiseptic wipes are placed under the blanket to absorb blood and prevent the smell of blood from spreading.
Important! Using a bandage on a cat after spaying is not necessary. Some types of sutures do not require a special compression bandage. Also, a cat may not have the instinct to lick the wound.
Benefits of a homemade bandage
If the cat is about to undergo a major operation, then horse blanket It's important to plan ahead. You can make a bandage for your cat after spaying or buy one at a veterinary pharmacy. The first option is the most appropriate for the following reasons:
- A store-bought bandage will most likely not fit and will require adjustment to the animal's body size.
- A homemade bandage will be intended for multiple use, unlike a store-bought one.
- The material used to make store-bought blankets is thin and gets wet quickly.
Don't think that making a cat bandage requires sewing skills. The pattern is quite simple, and the process itself takes little time. You can make a bandage for your cat after spaying using household items.
From hosiery
If your cat is small and you have a couple of long socks lying around, you can use one of them as a bandage. To do this, make four holes in the chosen sock or knee-high for the paws. Thread a soft lace through the top and bottom, and cut a small hole at the wound site to allow for changing the dressing. It's important to choose the right size knee-high so its length matches your pet's size from shoulder blades to pelvic bones.
The downside of this type of bandage is its high stretchability. It allows the cat to easily bend, which will not provide the necessary support.
An alternative option is to make a headband from tights. The process is the same, but you'll need an extra opening for the neck.
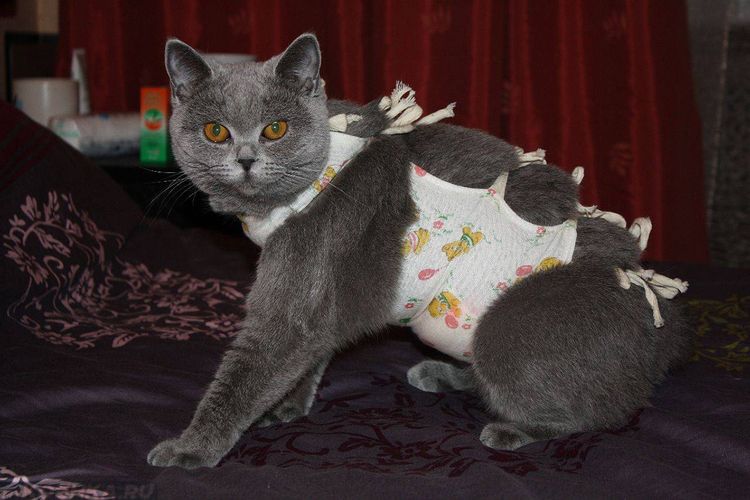
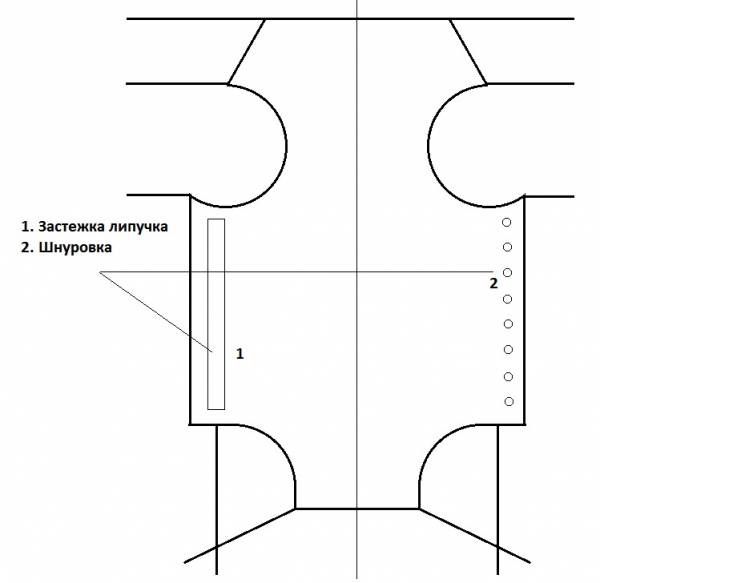
Blanket with ties
If the owner decides to sew a bandage for a cat after sterilization, then the procedure will be described below.
The product features ties at the neck, back, shoulder blades, and above the tail. To make it, you'll need:
- A rectangular piece of breathable material.
- Measuring tape.
- Paper for transferring the pattern.
- Some synthetic padding.
- Scissors, thread, needle, pencil.
The entire step-by-step instruction is contained in eight steps.
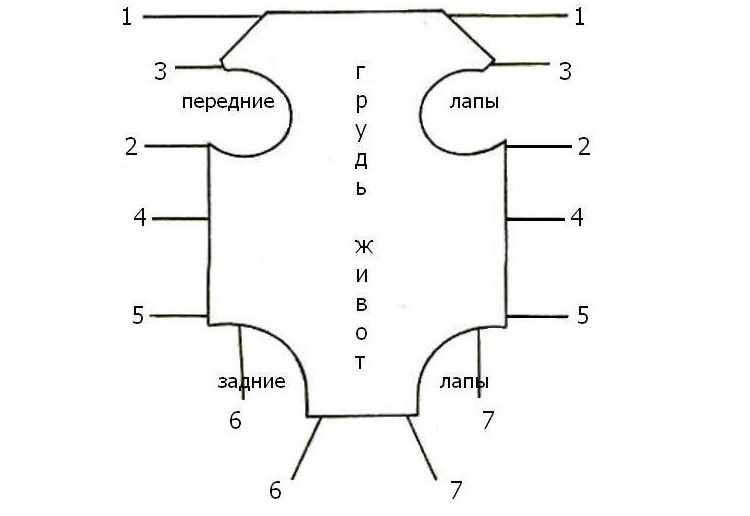
- We divide the sheet of paper for the pattern in half with a vertical line.
- We apply the measurements taken relative to the drawn line, where:
A, A1 - length from the neck to the beginning of the tail, plus 1-1.5 cm for the seam allowance at the bottom and 4 cm for the collar allowance.
A, A2 - length from the beginning of the neck to the shoulder blades.
A3, A1 - length from the croup to the beginning of the tail.
B, B1 – full neck circumference.
B, B1 - the width between the front right paw and the left (measure tightly!)
G, G1 - full chest circumference (measure tightly!)
D, D1 – abdominal circumference under the ribs
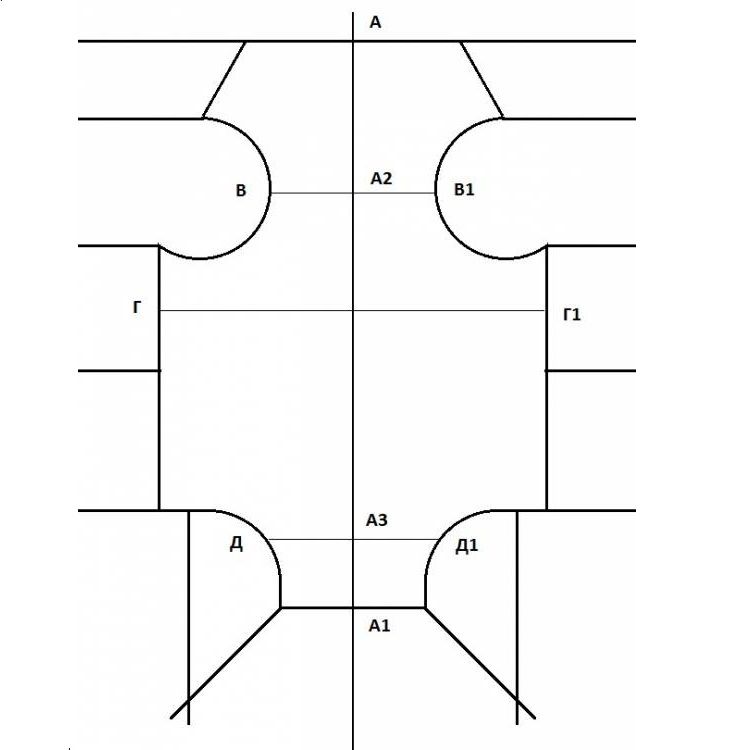
Important! Don't forget to leave seam allowances along all vertical markings. 0.5–1 cm on both sides is sufficient.
- We cut out the resulting pattern and transfer it onto the fabric.
- We cut out the blank.
- Sew along the markings and overcast the edges.
- We put synthetic padding in the collar area and sew up the roll.
- We adjust the ties and the blanket itself to the required length and size during the fitting.
- If necessary, adjust the bandage using darts.
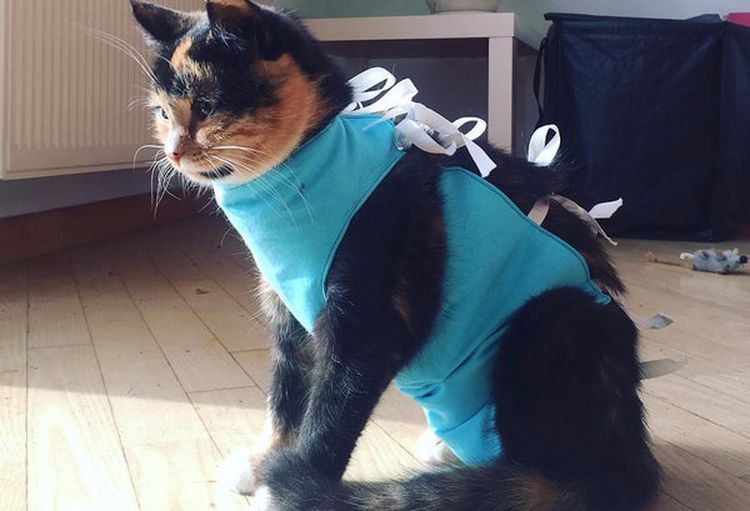
How to use a protective blanket
Before putting a bandage on your cat, wash it thoroughly, rinse it several times without using household chemicals, and iron both sides. Put the blanket on very carefully. If the cat tries to remove the bandage, you can loosen a few ties for a while. Reassure the cat, pick it up, pet it, and then tighten the bandage properly again. Experience shows that after three or four attempts, the pet will accept the bandage.
If the cat turns out to be typical and continues to try to pull off its unusual “clothing,” then the only option left is to constantly keep watch over it.
Important! Remove the bandage daily and carefully inspect the incision. Even natural cotton fabric restricts air circulation and can cause suppuration. In this case, you will need to change the antiseptic wipes more frequently. Never tighten the bandage too tightly. Yes, it should hold the incision securely, but not too tightly. It's better to loosen the bandage than to make it unbearably tight for the animal. If the bandage becomes heavily soiled, it should be washed.
A postoperative bandage is an important aid for a cat's proper and rapid recovery after abdominal surgery. However, when making one or choosing one in a store, it's always important to remember that the product should be supportive, not harmful or cause additional discomfort to the animal. Therefore, it's always important to pay close attention to the size of the blanket and the fabric it's made from. A bandage will definitely help the postoperative scar heal within 5-7 days after the procedure.
Read also:
- How long should a cat wear a bandage after sterilization?
- How does a cat behave after sterilization?
- An alternative to sterilization of cats


Add a comment