
How to Make Dog Appliques Yourself
Applique is a simple and fun craft that everyone loves since childhood. You can make a dog applique yourself: it makes a wonderful gift, a decorative element, or an accessory for the holidays.
If an adult wants to make the craft, they can choose an interesting option that will take some time but will leave them happy with the finished product. However, if a child is creating the dog appliqué, it's best to choose a simpler option that doesn't include many small elements, as their underdeveloped fine motor skills won't allow them to skillfully handle small parts.
Content
Suitable materials
There are several main materials used for this type of craft:
- Paper or cardboard. Silicate glue or PVA glue is sufficient to connect the individual elements of this appliqué.
- Fabric. The elements of such crafts need to be sewn together. Sometimes you can use glue, but this is only acceptable if the fabric isn't completely saturated with glue, as the product will look unsightly after drying. If you use glue to create an appliqué, felt, then the parts of such a dog can simply be attached to each other, so they connect well together.
In addition to these, you can use leaves, cotton wool, buttons and other objects that your imagination suggests as auxiliary materials.
Various application options
Using step-by-step instructions, making a dog out of any material is easy. It could be a specific breed or a small puppy.
From paper
This dog looks very original, but even preschoolers can make it, especially since it doesn't take much time to make.
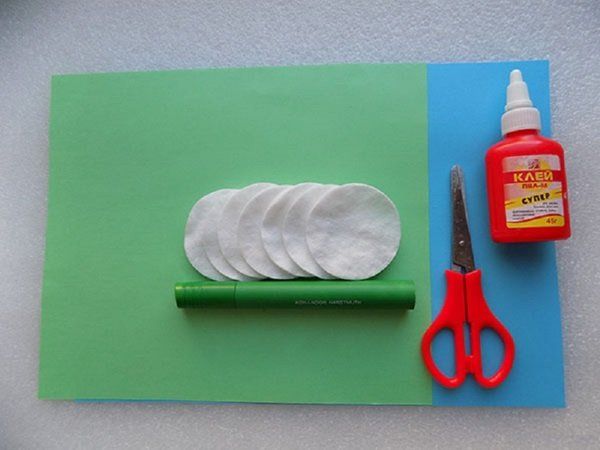
What you will need:
- cardboard for the base;
- a sheet of paper (white or colored);
- PVA;
- scissors;
- simple pencil;
- marker, felt-tip pens, pencils or crayons;
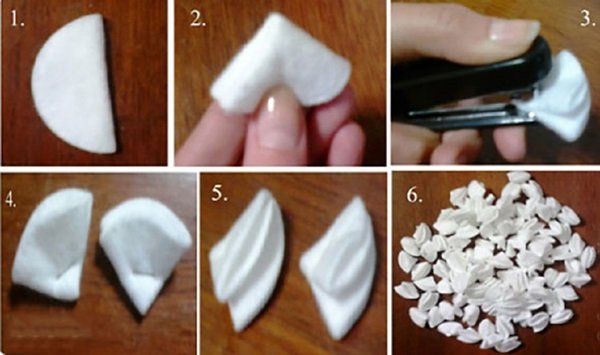
- cotton pads;
- stapler.
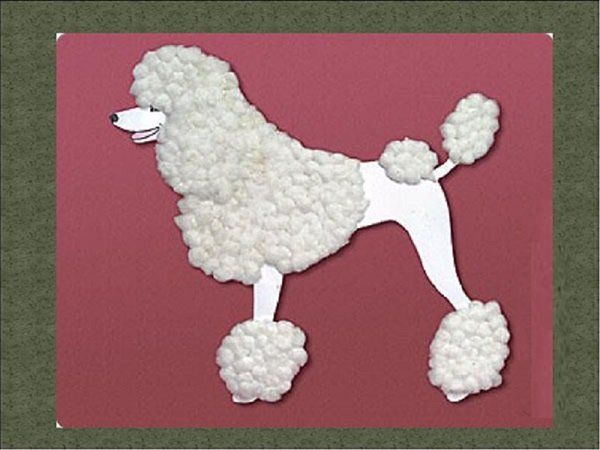
- First, you need to apply a poodle stencil to the sheet. This will be very easy if you print out the image and cut out the necessary pieces.
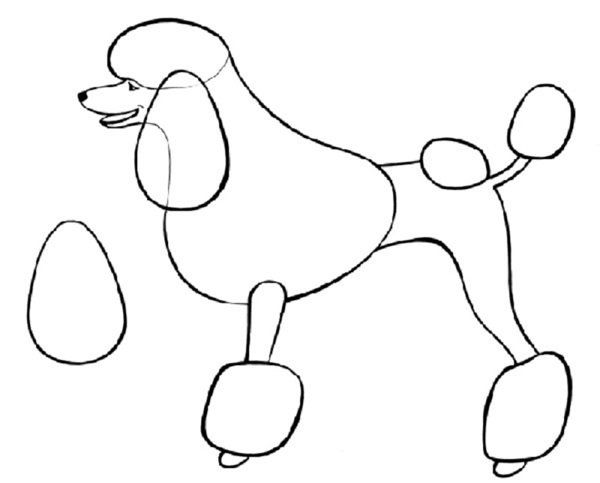
- Transfer the template onto paper, tracing all the contours with a simple pencil.
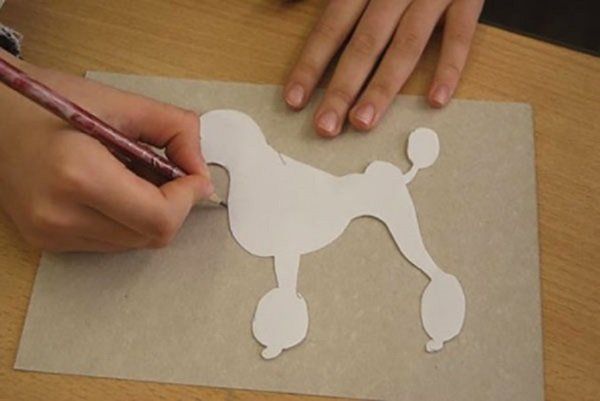
- You need to prepare the cotton pad templates. This can be done in two ways. The first is to cut small spirals from each cotton pad and glue them individually to the top of the body and legs of the template, or to the entire body. The second method is to fold the pad in half, and then in half again (for a total of four). Use a stapler to secure these pieces in place.
- Before you attach all the main elements to the cardboard, you can paint it or draw any elements (a doghouse, a bowl with a bone, grass, etc.)
- Glue the template securely to the cardboard and let it dry.
- Secure the cotton pads with glue, leaving no gaps between them. Use markers, felt-tip pens, crayons, paints, or pencils to draw the poodle's eyes, mouth, and nose. The appliqué is ready.
Made of fabric
The material for the craft can be thick, non-slip fabric: fleece, flannel, felt or cotton.
This appliqué is a bit more challenging because cutting thick felt makes it harder to control the scissors. It might be too much for a child, but it's a suitable option for adults.
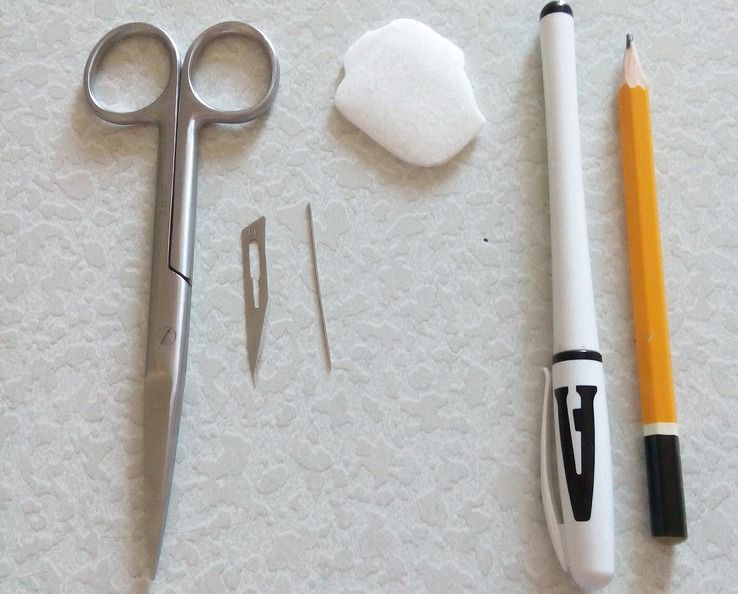
What you will need:
- white and black felt (you will need twice as much black) with a thickness of up to 2 mm;
- glue (you need a special glue - "Crystal" or "Moment", because the usual types soak through the material, and after it dries completely it hardens);
- black threads (a thick thread is better, since a thin one can cut or tear the material);
- three black beads for the nose and eyes (they can be the same, but you can take a larger size for the eyes and a smaller size for the nose);
- sheet of cardboard;
- manicure scissors;
- a paper knife, blade or surgical scalpel;
- simple pencil;
- crayons or white marker;
- Gel pen with a black refill.
- Select a suitable photo of your dog and print two copies. Trace the lighter areas on one photo. Match the size of the felt to the size of the paper before printing. If the image is larger, adjust its dimensions.
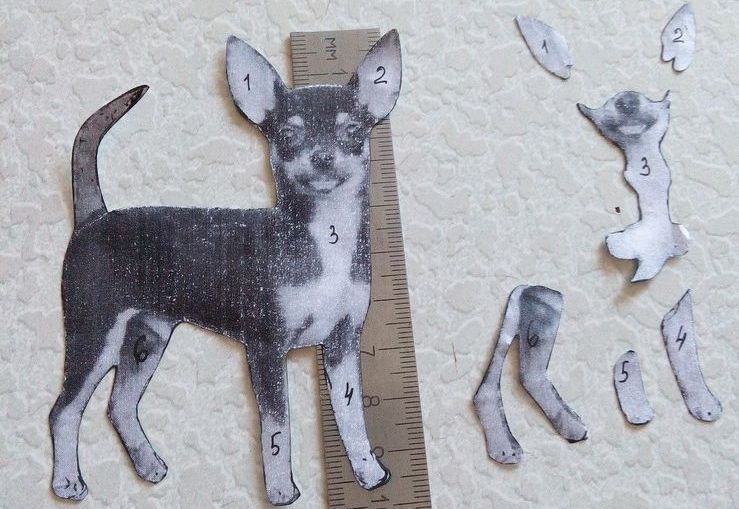
- Place the template on the dark felt and trace it with chalk or a white marker.
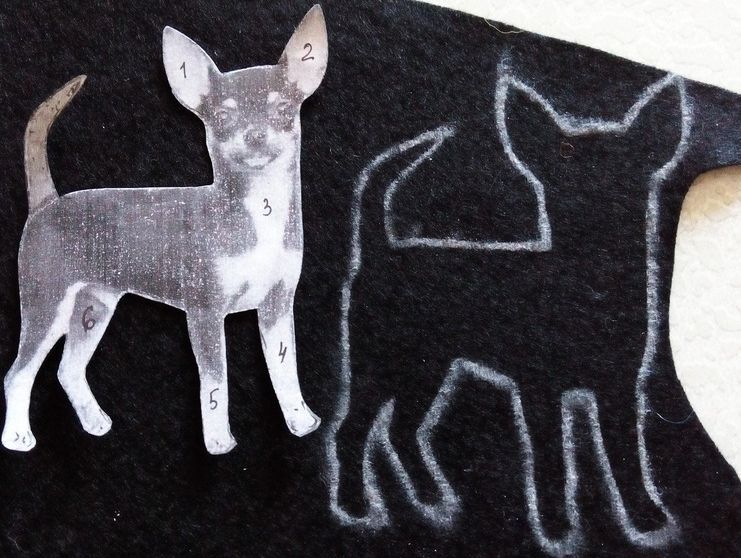
- Place the white dog pieces onto the light-colored felt and trace them with a black pen. It's a good idea to place the paper pieces right-side up so that any black outlines that remain untrimmed won't be visible.
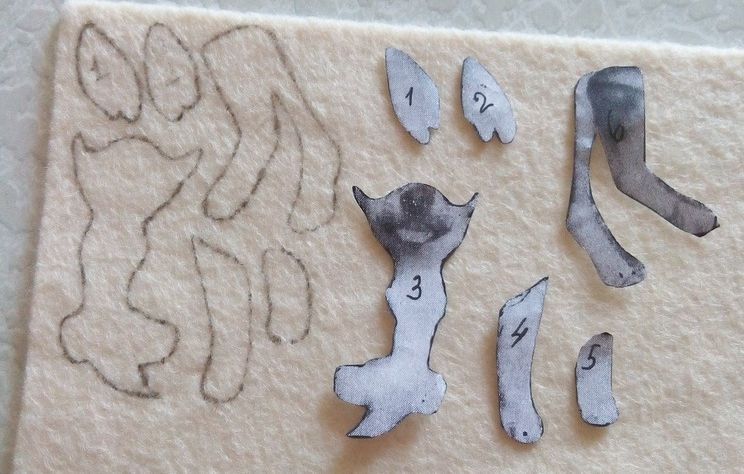
- Once all the white pieces are in place, you can glue them one by one.
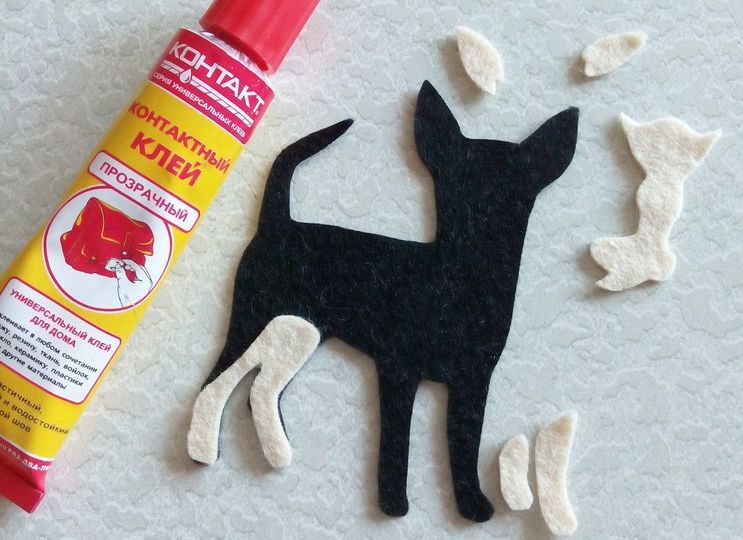
- Apply the glue sparingly to prevent excess from leaking out during gluing. If this happens, don't remove it immediately, as it will smear and leave a messy residue. It can be carefully and completely removed after it's completely dry.
- The next step is to attach the eyes and nose. They are sewn on with a needle and thick black thread. Small marks are made with chalk in the appropriate locations for the eyes, as shown in the picture.
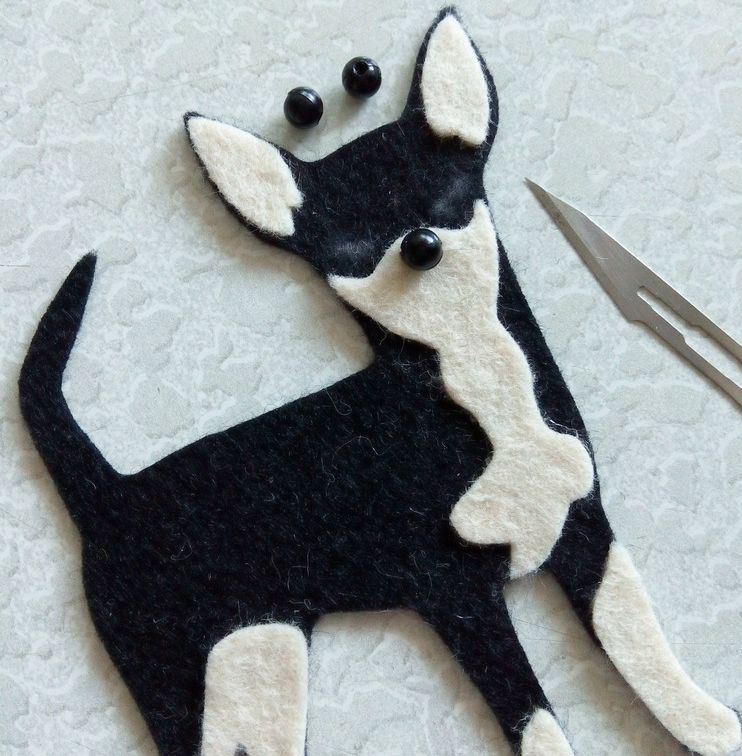
- Small slits are made along these marks with a scalpel, razor blade, or utility knife. The slits are sealed with glue, and beads are immediately inserted into them. Eyes can be simply sewn on, but inserting them into the slits creates bulges resembling eyelids, giving the dog a more natural and original look.
- A design is embroidered on the face under the nose with black thread, and light eyebrows are attached with glue above the eyes.
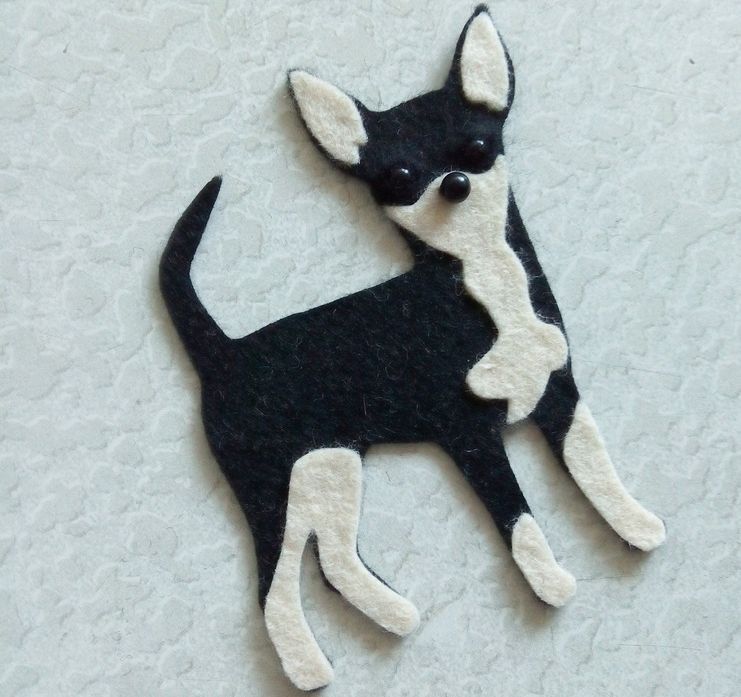
- If the applique needs to be given additional rigidity, it can be glued to cardboard, which is then cut out along the outline of the dog.
The same algorithm can be used when making appliqués from any other type of fabric. In this case, small details should be sewn on by hand or with a sewing machine. Eyes will also be sewn on, rather than inserted into pre-cut holes, as with felt.
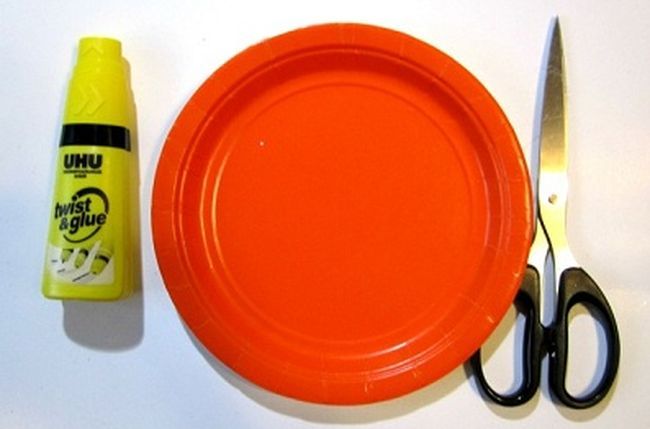
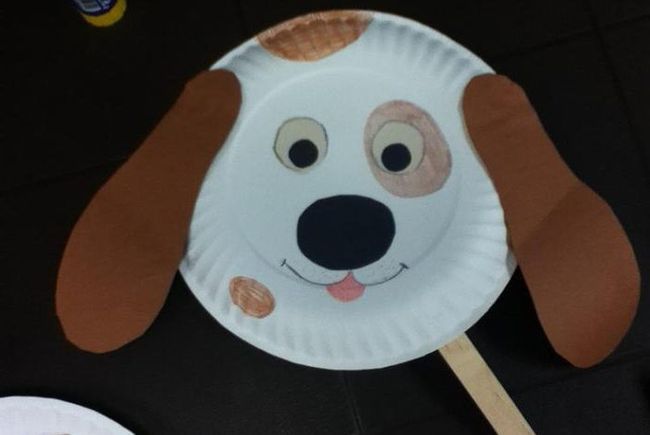
On a disposable plate
This type of appliqué is great for developing a child's imagination and creativity. It's very quick and easy to complete.
What you will need:
- several sheets of colored paper;
- scissors;
- disposable plate (preferably made of thick cardboard);
- glue;
- felt-tip pens;
- optional - eyes for crafts.
- Fold a sheet of colored paper in half and draw and then cut out a shape resembling an elongated pear. This will create two ears.
- Cut out spots for the face from colored paper. Their shape and size can be any size you like.
- Cut two small circles out of black paper for the eyes. You can also make the eyes out of self-adhesive eyeliner. This is especially helpful for younger crafters, as cutting out small details can be difficult for them.
- Glue all elements to the bottom of a disposable plate.
- Draw a pink tongue and mouth.
If you prefer, you can skip the gluing and just draw spots on the dog's face, and even some eyes. The appliqué is ready.
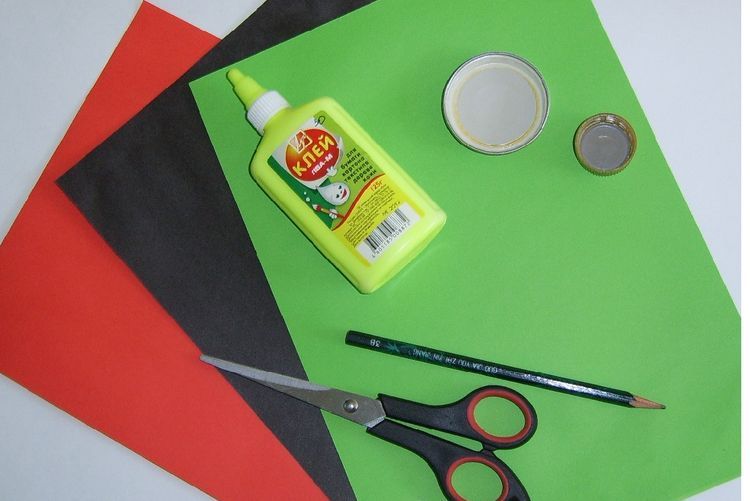
For the little ones
This dog appliqué is perfect for little ones: not only is it easy to make, but it also helps children learn the names and shapes of shapes. You can use colored paper in a single shade, or you can make the pieces multicolored to make the dog look more playful and cheerful.
What you will need:
- colored paper;
- glue
- large scissors;
- thick cardboard;
- Black marker.
- You need to print the template on a printer.
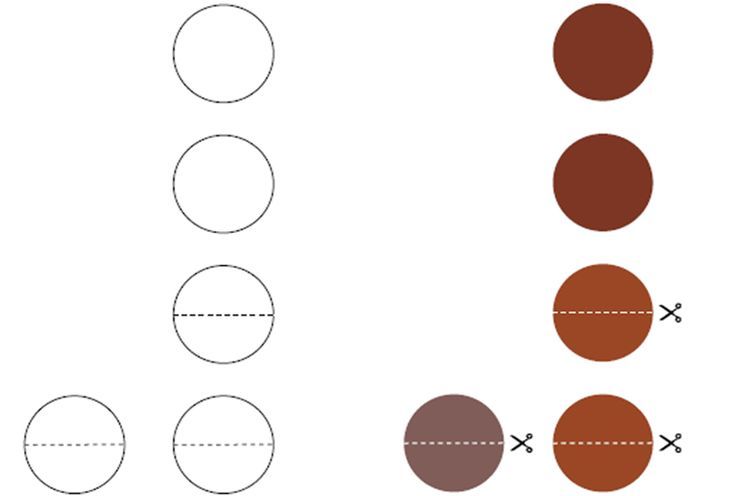
- Cut out the darkest circles – they will become the dog’s head and body.
- Fold the two lighter circles in half, then cut along the center fold line – these will be the paws, ears and tail.
- Separately cut out small ovals for the eyes and a slightly larger one for the nose. Older children can complete all the previous steps independently, but this will be difficult for younger children. Adults can help them or offer pre-cut circles.
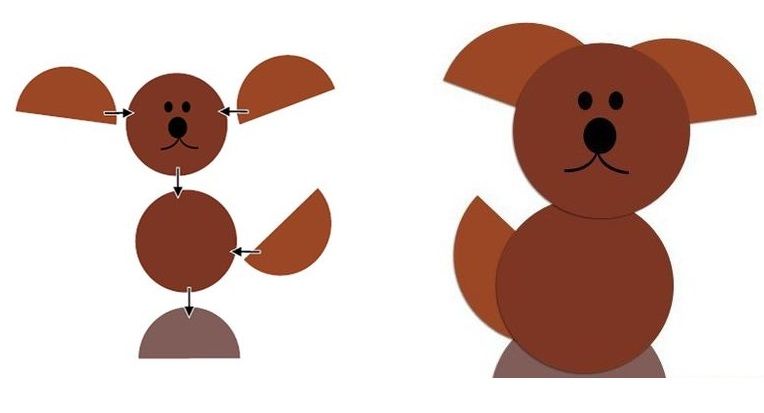
- It is necessary to lay out all the parts on paper to assess how the elements will be positioned relative to each other on the applique.
- First of all, the ears, tail and paws are glued to the base.
- The head and body are attached to them on top.
- Now you need to fix the eyes and nose in place.
- Now you need to draw a mouth on the face. The funny applique is ready.
The same sequence can be used with other geometric shapes: ovals, triangles, squares, hexagons. Don't limit your imagination, and your handmade craft will be unique and one-of-a-kind.
Knitting enthusiasts can make a dog applique using a crochet hook and thread:
Read also:


Add a comment